Building new hatches/ transom door

Joined
Sep 14, 2016
Messages
21
Reaction score
0
Points
1
Age
60
Location
Sitka Alaska
Website
www.prattcustoms.com
Hi guys. New to the forums.

Last Fall I acquired a 26' islander that was severely neglected. The price was right ($5000.00) so I bit!! This was a "as is where is" deal. Both motors needed midsections and lower unit cases due to electrolysis but only had 500 hrs. on them so that was a plus. I found a couple blown motors cheap so I swapped out the power heads and was good to go.

I do quite a bit of fiberglass work on the side mainly for myself and enjoy making "one off" parts for our cars and boats. I thought, since I haven't seen any threads on making parts, I would show how I am going to do mine.

The Grady had several blemishes in the hull so I repaired them and re gel coated from the rubrail down and added a dark blue stripe. I had some silver decals made to replace the old ones.

2ptngpk.jpg


14b6b2q.jpg


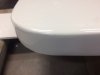
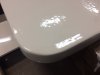
Unfortunately Grady did a poor job building the hatches for these boats. After the gel coat was sprayed in the molds, a colored putty was put around the edges to soften the radius so the fiberglass would lay in easier. This process saves time in production but the end user gets hosed if they get banged. This boat was used by a carpenter in S.E. Alaska building on private islands hauling materials in the boat. Needless to say, ALL the hatches were toast. The anchor rope bow hatch was missing so I am making a replacement from a template.

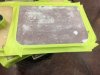
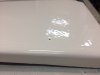
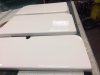
This is what I started with:

2mzk65t.jpg


34ihklt.jpg


kf5szs.jpg


szzqxs.jpg


ea4aip.jpg


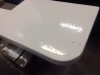
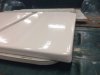
The transom door was filled with scraps of 2x6's as a core. You can see the whole bottom blew out when the wood swelled.

2emcr3b.jpg


4jsw78.jpg


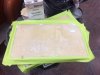
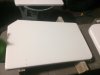
For the missing anchor hatch, the template was made initially from a piece of paper held over the opening and creased while rubbing my finger around the opening. This was transferred to cardboard and final trimming was done to get the proper clearance.

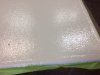
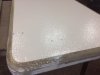
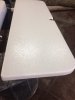
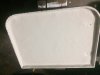
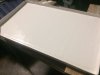
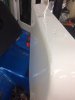
I have several sheets of fiberglass covered urethane foam used on commercial roofs for hail damage resistance. The foam is very dense and is great for making panels and molds. A putty knife peels the fiberglass skin off one side of the foam making it flexible in one direction. Cutting several slits in the foam allows it to bend easily around the radius. A hot glue gun holds it on the form board and silicone makes the radius between the top and sides. Several layers of silicone builds up the radius to what Grady used.

2w2o39d.jpg


kcdmz7.jpg


9890ec.jpg


I'll post more as I get going.
 

trapper

GreatGrady Captain
Joined
Jan 7, 2010
Messages
794
Reaction score
197
Points
43
Alaska, you certainly do fine fibreglass work. I believe you said it was more or less a hobby. No doubt you could make some good bucks if you went into business, but it would probably spoil the fun. Thanks for sharing. Cheers, trapper
 
Joined
Sep 14, 2016
Messages
21
Reaction score
0
Points
1
Age
60
Location
Sitka Alaska
Website
www.prattcustoms.com
That's what keeps it fun. Don't make it a profession. You don't see too many old fiberglass guys and painters.

I trimmed the edges and pulled the parts then drilled and tapped the hinge holes. I ran out and test fit the pieces and they fit perfect.

1z7jb7.jpg


2vrttap.jpg


15z4028.jpg


I decided to build these new rather than spend the time repairing them.

2hds0mt.jpg


bi9vlh.jpg


From right to left is the layers of fabric I am using. Two layers of 1.5 oz chop mat, the 1/4" foam core, Stitch mat, chop mat and 6 oz cloth.

156v14n.jpg


This drivers side panel was shot!! I put chop mat and cloth on each side of some 1/4" foam. Super strong replacement panel.

2lmmovd.jpg


2mdl289.jpg


Last month I made the fenders for my $350.00 trailer.

2dgpdl4.jpg


I will lay up the last two hatches tomorrow and pull Monday.
 
Joined
Sep 14, 2016
Messages
21
Reaction score
0
Points
1
Age
60
Location
Sitka Alaska
Website
www.prattcustoms.com
I decided to re- core the rear deck floor panels while I had my fiberglass supplies out. They were soft and flexed when you walked on them. The main panel weighed around 150#. I struggled just getting it out of the boat and on the table.

I used my 4" angle grinder with a metal cut off wheel and sliced the fiberglass into three pieces.

4puq9g.jpg


Notice how crude the plywood core was installed?

2cz9im8.jpg


With the center section removed, you can see that the the plywood core panels didn't bond well.

1z6rrmb.jpg


2f0autf.jpg


Before fiberglassing begun, the screw holes were plugged with latex tub and tile caulk and taped over.

1217uxt.jpg


257hgdi.jpg


309q1z7.jpg


25t9o9k.jpg


After the balsa core was bedded in and the edges beveled, I pulled strips of woven roving to lay around the perimeter to reinforce it. The factory had this area too thin and some of the screw heads pulled thru. Not anymore!!! No screws or hatch openings should go thru a core.

25ai0cl.jpg


2qwnfph.jpg


2mgpglt.jpg
 

1st grady

GreatGrady Captain
Joined
Jan 31, 2005
Messages
537
Reaction score
3
Points
18
Looks good, i have seen some leave a void around the screw holes then fill with epoxy resin. Be sure to seal the deck screws with some 4000 when installing.
I had to reinforce the deck against the rear seat, screws for the rear panel didn 't hit anyting, poor deck cutout.
How were the stringers?
Do you think this needs to be painted? I did't.
 
Joined
Sep 14, 2016
Messages
21
Reaction score
0
Points
1
Age
60
Location
Sitka Alaska
Website
www.prattcustoms.com
The main stringers are fine.
I make sure any penetrations in the fiberglass skin don't go into the core material. I agree, epoxy with some filler works good as a backer behind screw holes.
I had some extra gelcoat laying around so I brushed it on the new glass mainly to get rid of it.
The hatches will get sprayed on both sides . Waiting on the clear additive before I post pictures of them finished.
 

Fishtales

Well-Known Member
Joined
Jan 31, 2005
Messages
7,584
Reaction score
1,180
Points
113
Hi,
Great job, thanks for sharing and rescuing that baby.

It is a 20+ year old boat that was mistreated, but it sickens me to see the way those hatches were built.
I can't believe shop scraps were used for coring, nor that cheap putty used on the corners. I saw this fairing compound used in the hull to deck bonding process which concerned me too.
Just very poor workmanship in my opinion. I can only hope the newer boats have one piece coring from the CNC routers GW has instead of scraps.

Others complain about chipping around the edge of the hardtop and hatch covers. Some say water gets in on the rough underside edge, freezes and breaks in cold weather. Folks that don't cover their boat well in northern states are most affected. They need to address that process immediately if not already done.
 
Joined
Sep 14, 2016
Messages
21
Reaction score
0
Points
1
Age
60
Location
Sitka Alaska
Website
www.prattcustoms.com
I started to spray out the texture but it was so windy that day it wasn't working out. I reverted to another technique to get a nice texture.

I masked around the edge and rolled on a heavy coat of gel coat. As it starts to set up I lightly run the roller over the top to increase the stipple. Once happy, pull the tape and take care of the rest. Sorry, the pictures loaded in the wrong order. :hmm
 

Attachments

  • IMG_1520.jpg.JPG
    IMG_1520.jpg.JPG
    96.8 KB · Views: 3,572
  • IMG_1521.JPG
    IMG_1521.JPG
    91.6 KB · Views: 3,572
  • IMG_1529.JPG
    IMG_1529.JPG
    89.2 KB · Views: 3,571
  • IMG_1530.JPG
    IMG_1530.JPG
    96.7 KB · Views: 3,572
  • IMG_1533.JPG
    IMG_1533.JPG
    88.4 KB · Views: 3,573
  • IMG_1535.JPG
    IMG_1535.JPG
    41.2 KB · Views: 3,572
Joined
Sep 14, 2016
Messages
21
Reaction score
0
Points
1
Age
60
Location
Sitka Alaska
Website
www.prattcustoms.com
With the arrival of the ORCA clear additive,.. I was able to gel the rest of the hatches. The weather was right at freezing and 40 mph winds for the week so I just rolled on four coats. I went with 30% clear in the mix. Now I have enough thickness to wet sand and polish the edges. I'll get some better pictures once polished.
 

Attachments

  • IMG_1552.JPG
    IMG_1552.JPG
    65.6 KB · Views: 3,557
  • IMG_1553.JPG
    IMG_1553.JPG
    32.6 KB · Views: 3,557
  • IMG_1554.JPG
    IMG_1554.JPG
    69.6 KB · Views: 3,557

downtown

Well-Known Member
Joined
Jan 14, 2006
Messages
165
Reaction score
0
Points
16
Man, I need you to pretty up my boat! Great work!
 
Joined
Sep 14, 2016
Messages
21
Reaction score
0
Points
1
Age
60
Location
Sitka Alaska
Website
www.prattcustoms.com
Well, the weather warmed up a bit and winds died down so I hit the edges with some 80 grit to smooth out and sprayed them.
Were in our new house and my garage has stained concrete floors. My painting days are numbered as we are in a high end neighborhood. Haaaa, One neighbor, a doctor was walking his dog by as I was spraying and a nice fog was gently drifting across the sidewalk. :sorry
I played with the color some more and think I got closer. There is a touch of red in with the black and yellow.

Three coats looks like wet candy but muted my nice non skid.
 

Attachments

  • IMG_1567.JPG
    IMG_1567.JPG
    42.9 KB · Views: 3,540
  • IMG_1565.JPG
    IMG_1565.JPG
    50.2 KB · Views: 3,541
  • IMG_1564.JPG
    IMG_1564.JPG
    52.9 KB · Views: 3,541
  • IMG_1563.JPG
    IMG_1563.JPG
    69.6 KB · Views: 3,541
  • IMG_1561.JPG
    IMG_1561.JPG
    46.8 KB · Views: 3,540
  • IMG_1560.JPG
    IMG_1560.JPG
    59.3 KB · Views: 3,540
  • IMG_1559.JPG
    IMG_1559.JPG
    29.1 KB · Views: 3,540

TheBlackPig

New Member
Joined
Sep 25, 2016
Messages
3
Reaction score
3
Points
2
Shame most of the pictures have disappeared from this thread. What gives? 1618776978833.png
 

Hookup1

GreatGrady Captain
Joined
Oct 16, 2007
Messages
2,611
Reaction score
716
Points
113
Age
69
Location
Cape May, NJ
Model
Islander
I'm interested but many of the photo's are not displaying. I have a 1997 268 Islander. GW construction technology was poor at least for hatches and hardtop. I thought about building molds to re-do them. Anchor locker tore up from windlass misstep. Port side aft storage compartment hatch trashed too.