85 trophy pro resto

WesleyJones

Member
Joined
Aug 29, 2024
Messages
8
Reaction score
0
Points
1
Model
Trophy Pro
Good morning,
My son and I recently bought an 85 trophy pro 25' project boat. It is basically a bare hull. previous owner did some work on the rear end stringers and floor, but I want to open it up and evaluate the complete underside below the floor. It also will need re coring on the gunnels, etc. with this being a walk around style boat, does the cabin surround come off with the cap? Im not sure if it is fastened to the liner somehow that would make it difficult to remove. This model doesnt seem too popular as I look at this forum, but seems to be a nice layout for the type of fishing we do. We have been fishing a 85 22' tournament style grady for the last approximately 7 years that I re built down to the hull, so I know what to expect when we open it up, but any insight or suggestions would be greatly appreciated from someone with experience with this model.

Thanks in advance
 

JeffN

Well-Known Member
Joined
Jan 16, 2007
Messages
600
Reaction score
7
Points
18
Location
Nantucket, Ma.
The Pros were not common but a nice layout. That layout would have been better for my use but I could not find a good one when I purchased my '83 254 in '87. Construction wise I would think your boat is similar to the sailfish/kingfish walk arounds of that era. The cabin was shorter on the Pro's for more cockpit space and the cabin layout was more fishing oriented. Not positive but I think the cabin and deck are all part of the inner liner. Don't recall any seams on my 254 Kingfish except under the rubrail. What power was it set up for I/O or outboard? If outboard, again I think, that you may heve two fuel tanks, perhaps the second tank was an option. The removable hatches in the deck over the tanks would give you access to the most of cockpit deck but on mine there were stringers fore and aft and to port and starboard of my single 125 gallon tank. behind the tank was the engine compartment on my I/O. Best of luck with your rehab. I had my 254 for many years and it was an enjoyable boat. I enjoy seeing these rehab projects on classic Grady's.
 
Last edited:

WesleyJones

Member
Joined
Aug 29, 2024
Messages
8
Reaction score
0
Points
1
Model
Trophy Pro
Jeffn,
Thanks for your reply. I think there may be a seem on top of the storage compartments behind the seats. I will see what happens when we crack her open. The boat had twin I/O from factory, but now has a bracket for twin outboards. I do foresee semi extensive stringer work below deck, and new tank(s), wiring, etc.
Thanks
 

JeffN

Well-Known Member
Joined
Jan 16, 2007
Messages
600
Reaction score
7
Points
18
Location
Nantucket, Ma.
Mine came from the factory with twin Mercruiser 470s 4 cylinders. Repowered in '07 with a single mercruiser 496, that was a great combination. Anyway that area would be different from my boat but there was no corresponding seam accross the walk arounds. No seam around the base of the cabin at the walkaround but yours is two years newer than mine was. I don't recall any seam side to side from the bow to the transom. Be nice if your inner liner was two piece. I had all the original brochures and owners manual etc. (lots of pictures) on both versions of the 25s but after I parted ways with mine, went with a smaller more simple boat due to age, I offered them up here but had no takers so they are long gone. For what it's worth when I recored the deck access over the fuel tank my stringers were in good shape. YMMV
 

WesleyJones

Member
Joined
Aug 29, 2024
Messages
8
Reaction score
0
Points
1
Model
Trophy Pro
Well, we took a power washer and some bleach to the boat today. Cleaned it up and popped the tank hatch off and hosed out the back bilge compartment. As expected, stringers and bulkhead surrounding tank are shot. Previous owner had the rear tank bulkhead replaced, but doesn't help when you tie it into rotten stringers. The tank looks as if it has never been removed. It was supposedly pressure tested, but it will get replaced as it is 38 years old. I will post some pics up on here if I can figure out how to do it. Looks like we have a long way to go, not sure how much interest there will be in this thread, but we will see.
 

WesleyJones

Member
Joined
Aug 29, 2024
Messages
8
Reaction score
0
Points
1
Model
Trophy Pro
few pics from today to see if I attached them correctly
 

Attachments

  • 20240902_174644.jpg
    20240902_174644.jpg
    201.7 KB · Views: 35
  • 20240902_174607.jpg
    20240902_174607.jpg
    419.4 KB · Views: 31
  • 20240902_100921.jpg
    20240902_100921.jpg
    498.7 KB · Views: 31

JeffN

Well-Known Member
Joined
Jan 16, 2007
Messages
600
Reaction score
7
Points
18
Location
Nantucket, Ma.
Well you got started - good! Interesting, so what am I looking at? What is picture 1 of and am I looking towards the bow or stern? Perhaps It's the fuel tank compartment but you said you had removed the hatch. Picture 2 looks like what I would call the alley on the outside of the stringer between the fuel tank striger to the side of the hull. Looks not too bad in there. Or is that the area that you said had already been rebuilt. Is the "back bilge" the old engine compartment? Just trying to figure out what and where I am looking. Got a picture of the deck area where the I/O had been located? Keep up the good work.
 

WesleyJones

Member
Joined
Aug 29, 2024
Messages
8
Reaction score
0
Points
1
Model
Trophy Pro
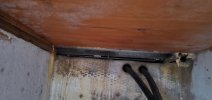
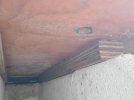
Pic 1 is looking forward from the old engine bay at the joint between the new floor and the bulkhead behind the tank. The floor is the wood color with just a coat of resin on it. The white is the new bulkhead. What I called the back bilge is in fact the old engine bay. The other pick is the "custom" spacer between the floor and the new section of stringer by previous owner. The floor will need to come up, tank out, and figure out how far the rot goes up towards the front. I did a 85 22 ft grady walk thru windshield, and the rot stopped just behind the storage boxes behind the seats. I was able to splice the existing to the new and it worked out well. It seems like the tank access hatches are the biggest problem these old boats had, as there is very little chance of stopping the water from seeping thru the screw holes or the seems. I put a solid floor in the other boat, with only pie plates for access to the hardware. Another thing I noticed is the transom is approximately 3" thick thru the scuppers. I believe it is original. I hope not to find problems there, but I am not optimistic. Either way, I can not wait to tear into her.
 

WesleyJones

Member
Joined
Aug 29, 2024
Messages
8
Reaction score
0
Points
1
Model
Trophy Pro
Just posted some pics. Not sure how I got them all different sizes, but you can see what is going on. 1st is what is supposed to be a limber hole where the inside stringer meets transom. next two are where the new bulkhead was tied into the tank stringers. That is new gelcoat on the floor, LOL.
 

JeffN

Well-Known Member
Joined
Jan 16, 2007
Messages
600
Reaction score
7
Points
18
Location
Nantucket, Ma.
Well you do have yourself a project! Now I know what I was looking at thanks. Some creative work by the PO. I wonder if the PO redid the transom to take the extra weight of the bracket and outboards? Yes the screw holes in the tank deck cover were a weak spot in these old girls. In don't know how thick my transom but I had the transom redone from the inside when I had it repowered due to water intrusion. Interesting not thru the holes for the drives, they were glassed well. The problem was the holes for the cockpit drains which were below the waterline were never glassed the factory. Just a hole saw and screwed the drain flapper in.
 
Last edited:

WesleyJones

Member
Joined
Aug 29, 2024
Messages
8
Reaction score
0
Points
1
Model
Trophy Pro
Yea, the older gradys workmanship left a little to be desired below deck. I think the fiberglass hull is plenty thick, and with some new structure, and/or transom this boat can be a tank.
 

JeffN

Well-Known Member
Joined
Jan 16, 2007
Messages
600
Reaction score
7
Points
18
Location
Nantucket, Ma.
Please keep us posted on the progress. Curious what treasures you find under the deck.