'93 Sailfish Flush Mount Project - 3/2/08 Update

gw204

Well-Known Member
Joined
Jan 31, 2005
Messages
2,479
Reaction score
22
Points
38
Location
St. Leonard, MD
I've removed all of the electronics from the upper and lower electronics boxes on my 252 in preparation for flush mounting. The upper box will contain two VHF radios and the lower will house the stereo and something else if I have the real estate for it (maybe a cell phone holder or the like). Everything will be mounted in Seafoam Starboard cut to fit the existing opening (my original plan was to glass over the opening and gelcoat, but I decided that's too much work).

I was just wondering if any of you guys had pics of flush mounted electronics in an early to mid-90's Saifish so I could 1) get an idea of what the finished product will look like and 2) see if I should change my intended layout at all.

Thanks. :)
 

greyg8r

Well-Known Member
Joined
Jan 31, 2005
Messages
1,129
Reaction score
0
Points
0
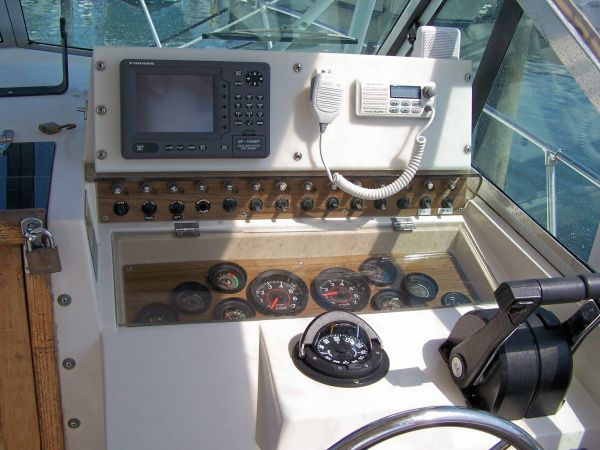
Brian, I replaced the e-box door on my 89 and made a hinged door that the Si-Tex chartplotter is flush-mounted into and the fishfinder is flushmounted next to that. Then, I added a lock to reduce theft. This gives me access to the e-box and the cleaner look of flush mounting.

I have since added a back up fishfinder next to the backup Furuno GPS on top.

electronicsbox.jpg
 

jimmy's marine service

Well-Known Member
Joined
Nov 10, 2005
Messages
934
Reaction score
1
Points
0
Location
cape may nj
Re: PIcs of flush mounted electronics?

gw204 said:
I've removed all of the electronics from the upper and lower electronics boxes on my 252 in preparation for flush mounting. The upper box will contain two VHF radios and the lower will house the stereo and something else if I have the real estate for it (maybe a cell phone holder or the like). Everything will be mounted in Seafoam Starboard cut to fit the existing opening (my original plan was to glass over the opening and gelcoat, but I decided that's too much work).

I was just wondering if any of you guys had pics of flush mounted electronics in an early to mid-90's Saifish so I could 1) get an idea of what the finished product will look like and 2) see if I should change my intended layout at all.

Thanks. :)

there's gonna be pics of a '90 trophy pro-this rig is gonna be getting electronics,a seperated and dedicated battery system,those cheap fuse holders are also gonna be replaced with circuit breakers...keep your eyes open brian,it's comming soon...

those pictures above...how do you see??? the line of sight on that rig is severley hindered...
 

greyg8r

Well-Known Member
Joined
Jan 31, 2005
Messages
1,129
Reaction score
0
Points
0
Never had a problem with line of sight by me at 6'1" or any other passenger...
 

askibum02

Well-Known Member
Joined
Sep 30, 2006
Messages
217
Reaction score
0
Points
0
Location
Lillington, NC
Here's a pic of my electronics as it sits. I going to see about moving the VHF to the upper electronics box with the other one, and flush mount the Radar.


Helm.jpg
 

gw204

Well-Known Member
Joined
Jan 31, 2005
Messages
2,479
Reaction score
22
Points
38
Location
St. Leonard, MD
Thanks for the pics guys. Your setups look really nice.

I had the wife stop and pick up some white posterboard for me today. I'm hoping to have some mock-ups done by the end of the weekend. :)
 

gw204

Well-Known Member
Joined
Jan 31, 2005
Messages
2,479
Reaction score
22
Points
38
Location
St. Leonard, MD
Templates are done. Now I just have figure the positioning of the VHFs and stereo, and cut the openings. I should have some pics by the end of the weekend.
 

gw204

Well-Known Member
Joined
Jan 31, 2005
Messages
2,479
Reaction score
22
Points
38
Location
St. Leonard, MD
Thanks for all the pics guys.

Brian, I like that setup you have. Very nice work! :) Good idea with placing the hatch on top of the box. I may go a different route and place a hatch in the bottom of the box which can be accessed via removing the ceiling panel in the head, but we'll see. That wouldn't give me the storage that you top mounted hatch does though.

So, here is where I am now. Templates are cut and I chopped some holes for the radios this evening to see how things would look.

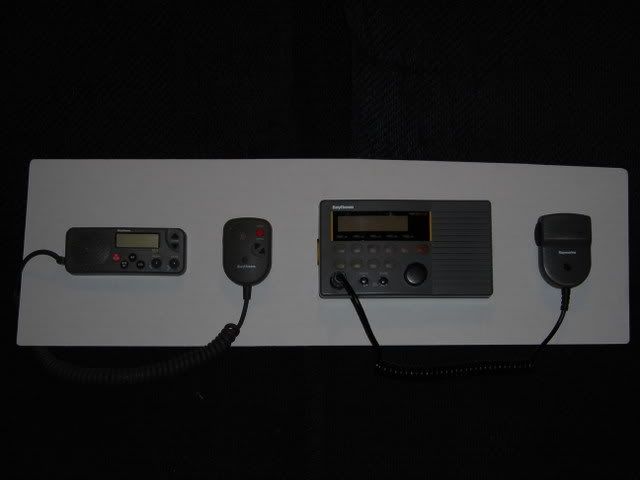
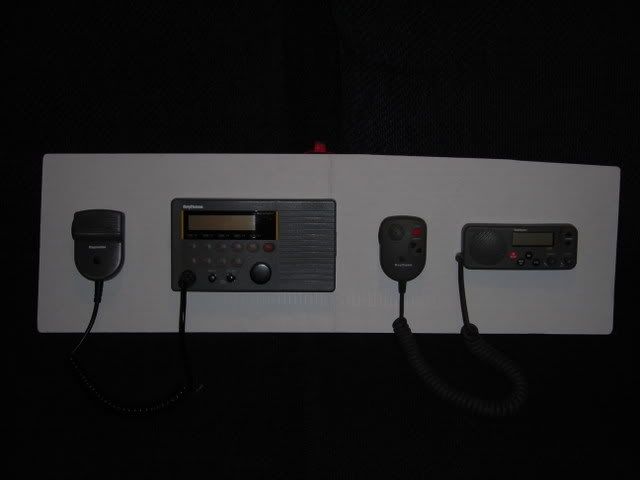
1st attempt....main radio placed on the right since I'm right handed and will be operating it with my right. Mics mounted so the cords runs are kept long to prevent them from hanging down into my line of sight. Notice how the template tapers down a bit on the right.

FlushMountProject002.jpg


2nd attempt...I moved the larger radio to the left side so it would fill the area a bit better. In this case, I simply flipped the first template over and traced the opening. I forgot that this would force me to place the mics on the same sides that the cables exit, so things are quite "dangly" in this case.

FlushMountProject003.jpg


3rd attempt...will be made when I get more cardboard. This one will have the radios shifted right (layed out like attempt 2 with the big one to the left), but the mics will be mounted like attempt 1. I think this will be the ticket and is what I will implement.

Stay tuned.... :)

What do you all think?
 

gw204

Well-Known Member
Joined
Jan 31, 2005
Messages
2,479
Reaction score
22
Points
38
Location
St. Leonard, MD
Yes, I changed the subject of this thread. I'm going to use it to fully document this little project I've got going on now. :)

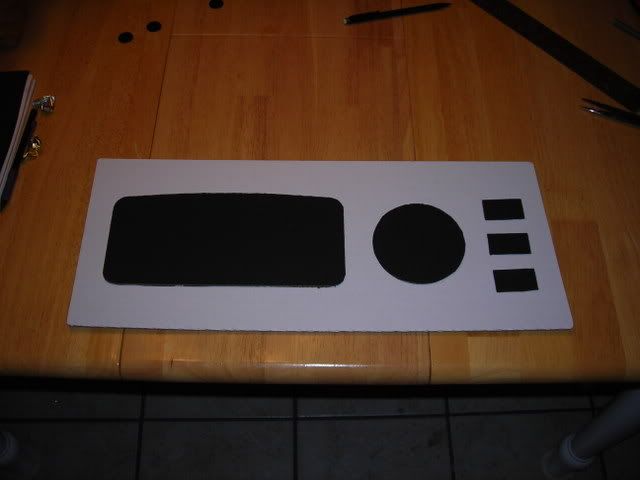
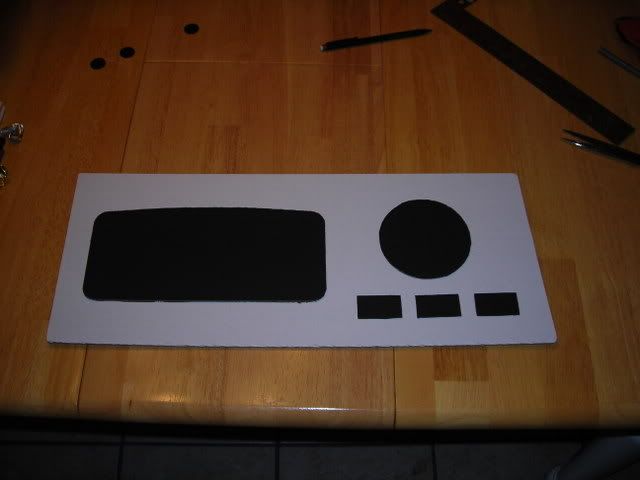
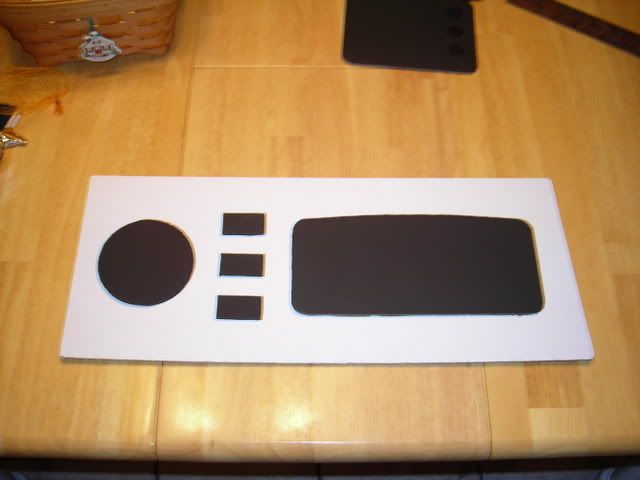
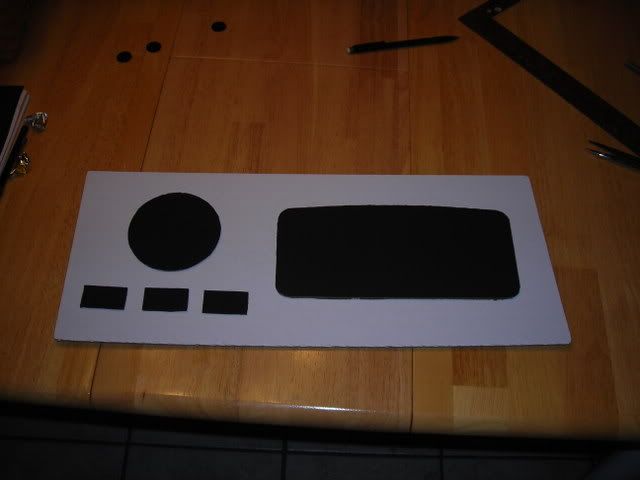
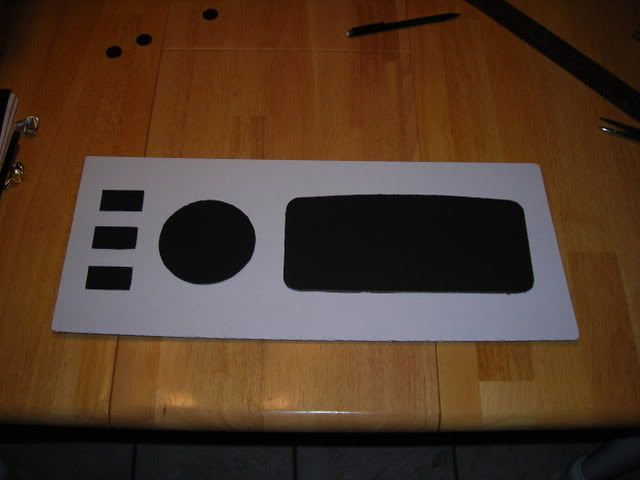
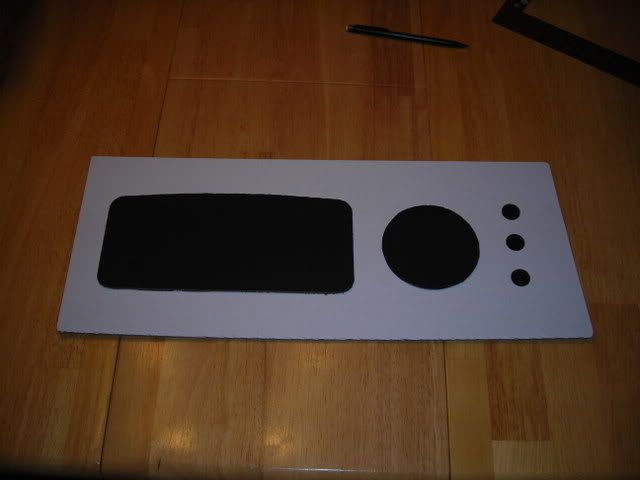
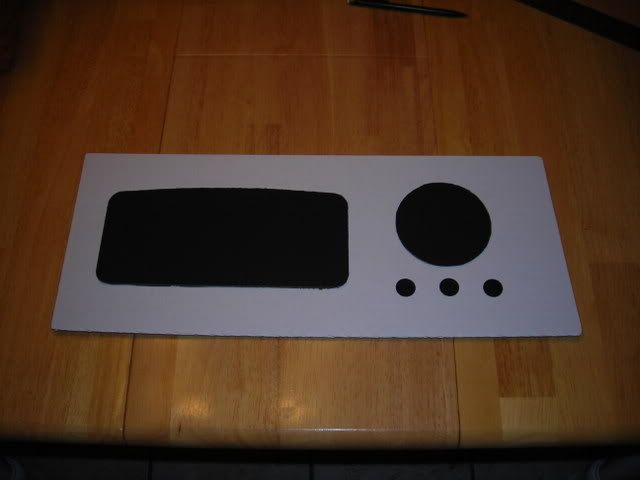
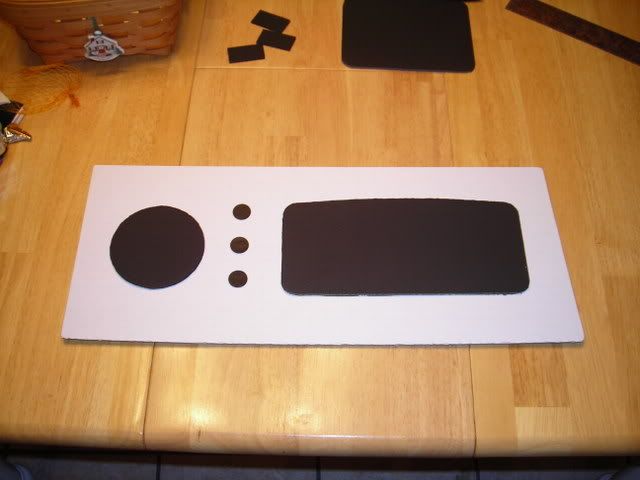
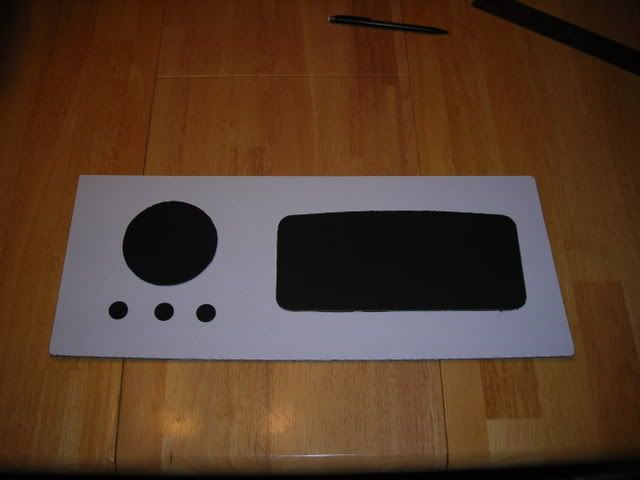
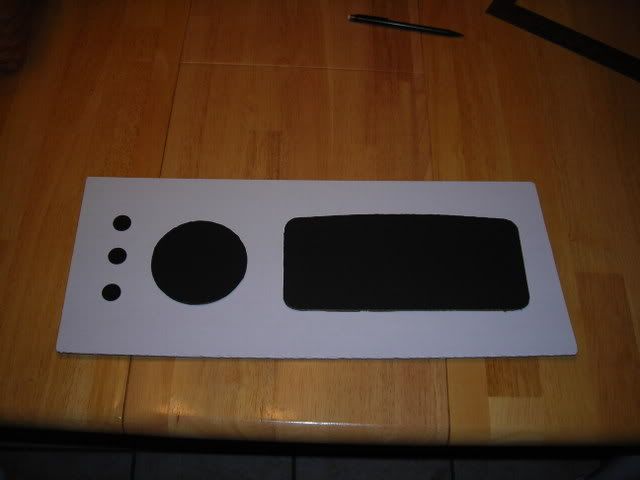
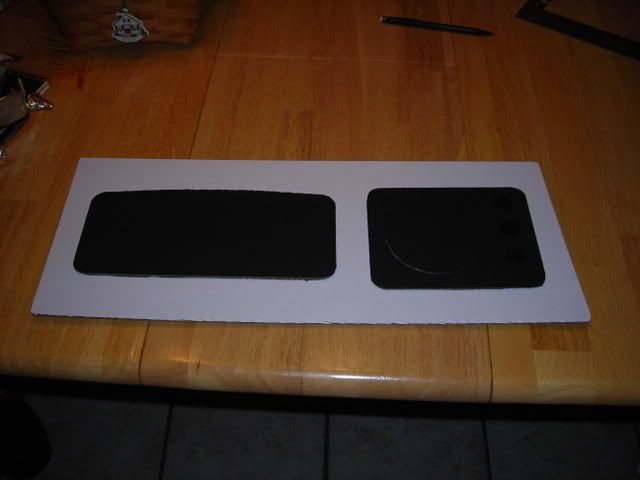
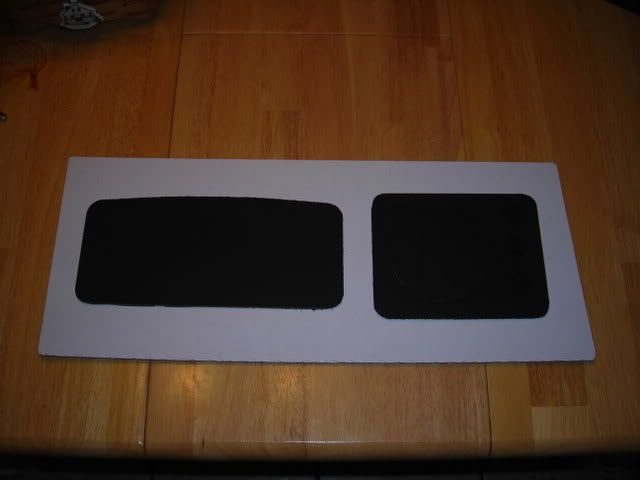
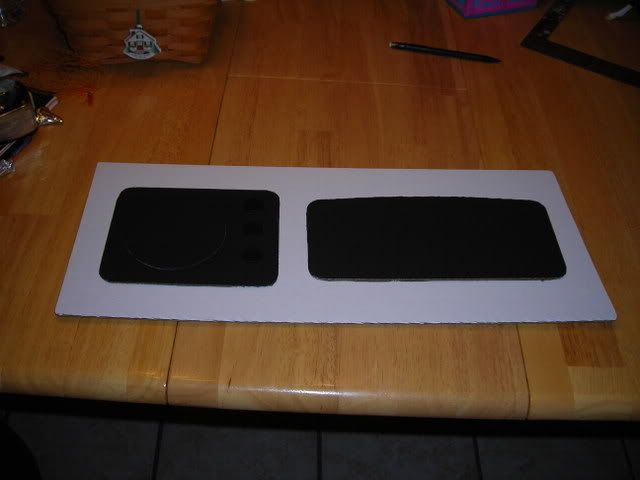
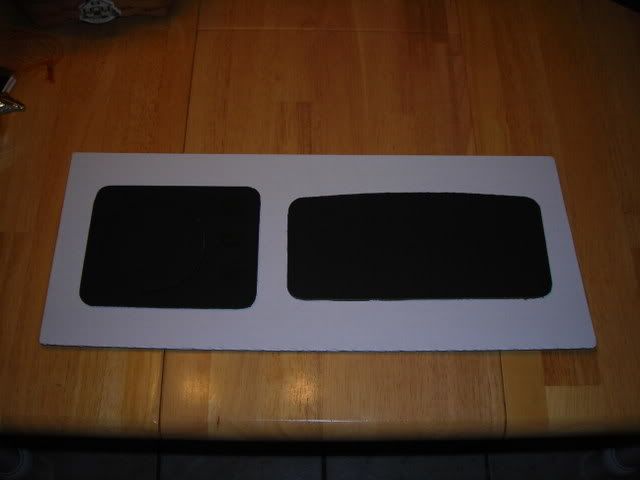
Layout options for the bottom electronics box are below. The various shapes represent the following items:

1. Large black rectangular box = stereo housing
2. Black circle = Floscan 9000 head unit
3. Small black rectangles = OEM Grady rocker switches
4. Small black circles = toggle switches

The switches are for the following functions associated with the Floscan:

1. Totalizer reset
2. Port/stbd. engine fuel burn select
3. GPH/MPG select

My original plan was to mount the Floscan and the OEM Grady rocker switches on a piece of black engraving stock and have the above functions engraved in the panel. The engraving will be done to avoid having to use generic stick or screw on labels which would make it look cheap. I wanted to used the OEM switches to try an maintain a consistent look with the rest of the instrumentation, but I don't think I've got the space on the panel for that. Keep in mind the white panel represents Seafoam Starboard. So, my options are...

Stereo to port, Floscan and OEM switches to stbd, no engravings or switch labels.

FlushMountProject004.jpg


FlushMountProject005.jpg


Floscan and OEM switches to port, stereo to stbd, no engravings or switch labels.

FlushMountProject.jpg


FlushMountProject006.jpg


FlushMountProject007.jpg


Stereo to port, Floscan and toggle switches to stbd, no engravings or switch labels.

FlushMountProject010.jpg


FlushMountProject011.jpg


Floscan and toggle switches to port, stereo to stbd, no engravings or switch labels.

FlushMountProject016.jpg


FlushMountProject009.jpg


FlushMountProject008.jpg


Stereo to port, Floscan and toggle switches to stbd and mounted in a black engraved panel (use your imagination a little here... :D ).

FlushMountProject012.jpg


FlushMountProject015.jpg


Floscan and toggle switches to port and mounted in a black engraved panel, Stereo to stbd.

FlushMountProject013.jpg


FlushMountProject014.jpg


I'm pretty sure I want to keep the stereo to port so I have a clearer line of sight from the cockpit to use the remote. That way I won't have to get up from my seat next to the cooler to change the station or volume. :D

What do you all think, have I overlooked any other options. Right now, my favorite is the stereo to port and Floscan with toggle switches in the engraved panel to stbd. It's this one if you lost track from all the mess above... :D

FlushMountProject015.jpg
 

Seahunter

Well-Known Member
Joined
Jul 5, 2005
Messages
260
Reaction score
0
Points
16
Location
Maryland
gw204 said:
Nope. Why do you say that?
Because you're putting the functions most often used on the left side of the panel. Nothing worst than having to cross your shoulder to operate a control

Functions used most often on the right and you typically cluster the actuators underneath the display or readout.

Radio on right, flow scan on the left with the actuators underneath would get my approval.

If you like I have a nice 3” thick reference book on Ergonomics left over from my Designer days that you could barrow :)
 

gw204

Well-Known Member
Joined
Jan 31, 2005
Messages
2,479
Reaction score
22
Points
38
Location
St. Leonard, MD
Stereo never gets used when I'm behind the helm. That's an "at rest" luxury only. There's already enough distractions out there... :) So, it'll be fine on the left.

I am however constantly monitoring the Floscan and changing functions with my right hand, so that's why I'm putting it on the right. Switches are going next to it simply because I don't have enough room to put them below the display and achieve the desired look.

Previously, the stereo was to stbd and the Floscan to port and that didn't really work for me.

The Starboard is supposed to come in today so hopefully I can make some real progress on this here soon. :)
 

Seahunter

Well-Known Member
Joined
Jul 5, 2005
Messages
260
Reaction score
0
Points
16
Location
Maryland
It sounds like you answered our own question. :D

I want the FF on the starboard side but the binnacle could be a hindrance in that location. hummm........
 

BobP

GreatGrady Captain
Joined
Apr 27, 2005
Messages
4,744
Reaction score
6
Points
38
Location
Long Island, NY
Model
Sailfish
Too many cooks spoil the broth !
----------------------------------------------------------
Other considerations - If you have in mind something to add on in the future, you may want to consider providing space of it now, if you have not already.

And be careful with the starboard, stains are not removable and the surface is readily scratched. I tape the entire face side with the wide blue masking tape. I don't have a router table to work from, I just use a laminate type trimmer as the router - so I take added measure.

One time I used a piece of clean cardboard from a carboard box - on top of the workbench to protect the starboard, the cardboard stained the starboard with brown marks! Such are the benefits of not using white, but instead black starboard!

Have fun !
 

gw204

Well-Known Member
Joined
Jan 31, 2005
Messages
2,479
Reaction score
22
Points
38
Location
St. Leonard, MD
Thanks Bob. I have lots of experience working with this stuff so I know all those little tips and tricks to ensure that when it finally goes on the boat, it looks perfect. I replaced all the teak on my old 204 with it. :)
 

BobP

GreatGrady Captain
Joined
Apr 27, 2005
Messages
4,744
Reaction score
6
Points
38
Location
Long Island, NY
Model
Sailfish
You can teach me!

Last time I hired a guy to make a panel, the new instrument panel for the Yamaha conversion from OMC: black starboard 1/4 inch, three multifunction gauges, one small fuel gauge, I did all the measurements too, brought in a template - cost me $110 just for the panel !!

I guess I really need a router table.
 

gw204

Well-Known Member
Joined
Jan 31, 2005
Messages
2,479
Reaction score
22
Points
38
Location
St. Leonard, MD
Well, after nearly a year's hiatus I am back to work on this project. I took some time on Saturday to trace my templates on to the 3/8" Seafoam Starboard. I actually traced them slightly larger than I need them to be so I can fine tune them for an exact fit. Then I cut out the basic shapes on my tablesaw.

That was as far as I got though. I had to wheel the tablesaw out in the driveway because it makes too much of a mess inside my garage. It was about 40 degrees and the wind was howling so I called it quits being that I'm just getting over a cold and didn't want to get sick again. I'll post some pics later tonight, but they don't show much.