Livewell overflow location

Lt.Mike

Well-Known Member
Joined
Oct 18, 2013
Messages
879
Reaction score
165
Points
43
Age
64
Location
Farmingdale NJ
Model
Overnighter
I converted the starboard fishbox behind the helm into a recirculating livewell with a sprayer bar to fill it and aerator stone. My Grady is an ‘87 Overnighter 20. The conversion into a livewell works well but the small bottom drain designed for an icebox can’t keep up with the incoming water if it’s fully open plus it clogs with fish scales when I throw bass in. (The biggest was 43” and it was fully kicking when the boat rolled into my backyard on the trailer, yes it works that well).
Another note is that with the intake strainer open and running at speed water pushes in and overflows the drain spilling over onto the deck. It’s needs more drain capacity.
I’ve gotten a livewell drain that has a removable strainer and uses a outlet hose with an inner diameter of 1-1/2” more than twice that of the original lower drain. A hole has been drilled to mount it on the side between the box and outer hull. It was fun wire brushing the foam out to make room for the fitting and getting my big hands in through the small ports behind the box.
It’s tough to do but once done it’s done and it’ll work.
I’ve got a decision to make on where to mount the the return through hull.
It could go straight back through the transom or out the side under and a little forward of where the bulge pump exists.
I’m leaning towards going through the side as I don’t like the idea of making another hole through the wood core of the transom. The through hull requires a 2” hole.
Anyone see an issue with this location?

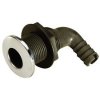
This is the strainer I’m installing in the box.
Triton-Th-1592Afd-1-1-2-Inch-90-Degree-Boat.jpg


This is what will likely be in the hull.
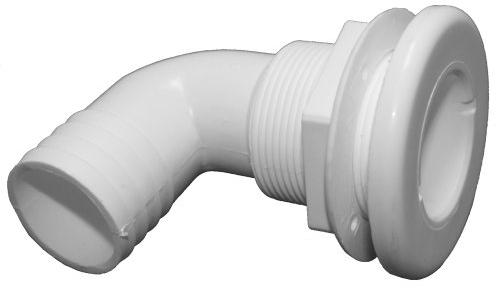
moeth1592b.jpg


Though my boat is under a carport for the winter I have only been working on it on those “Indian summer” days. Can’t get caulk to cure or me to move well when it’s freezing. :wink:
Though it’s snowing again today better weather is on the way and the bass will start moving again.
It’s time to shake winter off and be ready for the season ahead.
Mike
 
Don't use the plastic, get stainless over bronze thru hulls. You only want to do this once. Make sure you have a quality 90 degree marine ball valve right after the thru hull. No hose between the two if you can do it. You want to be able to close it at the hull.
 
Since its gravity drain, I would go out the side as close as possible. Pretty much the same as the original bottom drain did, although it can be higher.( I don't think that drained to the bilge, I could be wrong?)
Don't run it back to where the bilge pump exits. That's a PUMP. You are using gravity.
 
The factory drain exits through a plastic 3/4” thru hull mid ship by the helm and right above the water line. There is a small deck drain under the helm that shares that thru hull with the fishbox and there is no ball valve for that line. The port side has the same setup.
I was intending to mount the through hull on the side below the bilge pumps through hull (which is just under the run rail) slightly higher than the front drain is above the water line. Wasn’t considering a ball valve as with the front drain and rear scuppers being above the waterline not having valves this would be about 2-3” higher. The bilge thru hull will be about 1-1/2 to 2’ above it.
I’m also running the thru hull in that area because of there being ready access for installation and easy inspection. The hose will be braided and connections will be double clamped.
The pickup strainer under the boat is a Graco bronze unit with a bronze ball valve.
The factory scuppers and other thru hulls are nylon plastic so I figured this being higher would be safe being nylon as well. Figured to go with a quality name brand one as well.
Mike
 
39888375014_517536b796_b.jpg


Things can get lost in translation and a pictures worth a thousand words right?
Above is a shot of my Grady tied up on the Delaware River. The work I'm doing is on the starboard side and this is the port but the layout for the deck drain is the same. In the center you can see the front drain and its relation to the waterline. The blue dot in the rear is the approximate location of the bilge pump discharge thruhull. The red represents the livewell strainer and the discharge port locations I'm leaning towards installing. It may be a little higher than as shown.
Antone see anything wrong with this?
Mike.
 
Clarify- You are making an overflow near the of the top of the tank vs having an overflow tube stuck into the bottom drain. Correct?
I hope you positioned it to the aft end of the tank a few inches below the lid so that when the water sloshes backward it will still run out the overflow.

depending on access... I would go straight out or down & out.
My reasoning
Boat builders never run gravity drains aft. They go out or they go down & out. Keep it short and simple.
Your path has it running through the gunnel on a downward angle but you might end up with dips that collect and slow down the discharge.

Possible to put a T in the existing drain line?
even if you have to increase diameter of existing hose and thru hull..
One less hole.

I used this style fitting on my V20 when I replaced all and added a bilge pump. SS cover over quality plastic fitting. They look nice, don't cost a lot.
I wouldn't worry about SS or bronze fittings on that boat. the plastic ones have lasted 30 years
 

Attachments

  • s-l225.jpg
    s-l225.jpg
    6.1 KB · Views: 484
The drain is aft in the box and a couple inches below the lid. There isn’t really a gunnel on an Overnighter. It’s just 4” of space between the inner and outer shell with about 6-1/2’ between fittings. It’s a smooth straight descent from the well to the discharge.
There is no way of getting to the bottom drain of the well which is only 3/4”. It doesn’t keep up and clogs easily. The 1-1/2” I’m installing has a removable strainer so if need those bunker or striper scales will flow right through. I was going to go straight out the side but I would have needed a through hull fitting with about 9” of threads. It would have drained down the side and staining it in the process.
Mike
 
What would be the downside of using a reinforced hose to span that 9"? I'd rather have a hose connecting two pieces (especially plastic) than a long, straight piece of plastic tube that could crack under the stress of the boat vibrating and flexing.

There are stick-on, rubbery, devices meant to keep the exiting water from dripping down the sides. But a commonly used work-around for this issue is a short piece of hose simply jammed into the thru-hull hole (or a little light-duty adhesive sealant to help keep it in place). It only has to stick out about 1" for this to work. This is done quite regularly with cruisers and the AC discharge.

Personally, I'd rather take it out the side as opposed to running the hose along the inside of the hull side towards the aft end.
 
I did pickup two 2” thru hulls but there isn’t room to mount them directly out the side plus getting into that cavity between the livewell and the outer hull to attach hose clamps at that angle is impossible.
 
Ah, understood. I don't see anything "functionally" wrong with your plan. It'd be great to get it out the side, but if it's too awkward to do so, then we go to Plan B!
 
Maybe you already thought of this, but since the hose is running along the inside hull side, where it will be visible... How about using white sanitation hose? This is a link to the GOOD stuff (not all "white" hose is the same). This stuff is smooth on the inside and outside and it is reinforced, as well. I'm very familiar with this stuff from working on/around cruisers and it is VERY good hose.

https://www.northeastsanitation.com/dom ... -inch.html

Quick tip... heat it up with a heat gun (gently) or by dunking it in hot water to make it real easy to slip over the thru-hull barb/nipple. Also, spend a couple dollars more and get the good SS clamps - "AWAB" brand.

It would also be a good idea to glass in a piece of 1/2" plywood as a backer-plate to where the thru-hull is going through your hull for the overboard discharge. A 6" square should do it. You could use foam instead of plywood if you wanted. If you use the wood, be sure to coat the cut edge of the hole a few times with epoxy to seal it. Or... even better... cut the hole in the wood an 1/4" bigger than needed, then come back and fill with thickened epoxy, then redrill the proper sized hole.
 
Dennis, I know this is an older thread, but would you say its ok to use the white reinforced sanitation hose you describe above for the helm drain to thru hull? Its 1" hose on the overnighter, pic attached, Thanks
 

Attachments

  • Screenshot_20200423-141442_Gallery.jpg
    Screenshot_20200423-141442_Gallery.jpg
    1.6 MB · Views: 19
Last edited:
Dennis, I know this is an older thread, but would you say its ok to use the white reinforced sanitation hose you describe above for the helm drain to thru hull? Its 1" hose on the overnighter, pic attached, Thanks
The factory drain on the aft livewell and on the front fishboxes are 3/4” inner diameter reinforced hose. I found in a freshwater livewell setup you need a lot more as the 3/4” drain line won’t keep up.
I used 1-1/2” ID re-enforced hose with double clamps on all connections. The hose is plenty strong as there is no real pressure. Your main worry is a connection coming loose to have you bilge flooded. That’s why you use two clamps on each connection.
I realize now I never posted a follow up to this project. It was a spectacular success btw :) so on the next rainy day I’ll get something in with lots of pics.
 
  • Like
Reactions: SkunkBoat
Here is a quick photo tour of where this project went. First let me say that you will notice a lot of single clamped connections,:rolleyes: Sorry.
This one of those do as I say, not as I do moments. I will always tell someone to do it the right way but the truth is you can't always fit two clamps where you need them. I did not however go cheap on the clamps and paid up for the best marine clamps i could get. There is a big difference in the way they are made.
Also I can't post all the pics in a single response so hang with me there will be lots of pics.

In this photo you can see where I mounted the drains. I put the water level in the well to about 2/3.
Locating the outboard drain directly behind the inspection port worked perfect for ease of install and operation.
You'll see the small drain I started with is in the well in this shot. I just plug it now as the larger drain works flawless.
Most of the time i have the white plastic strainer off to allow scales and whatever the fish spit to drain overboard.

IMG_5598.jpg

IMG_5597.jpg

In this shot is the 3/4" ID freshwater line in from the pump. You can see that its tight for it so a 1-12" hose wasn't going aft past the inspection port.
It all worked out better this way though.

IMG_5592.jpg

Here you can see it keeps up fine with the garden hose running full blast filling the well.
Also the port rides well above the water line. On the question of stains there is never any because I keep my boat waxed and wash it after every trip.

IMG_5602.jpg

Another shot to show the port (and the new trailer ;).
It's above the center of the two tires.

IMG_0496.jpg

This is the inside of the well showing the sprayer bar, airline and blue LED thats tied in with NAV lamps.
I hadn't sealed it entirely with 5200 yet in this pic. That needs to be done because shosh will send water into the bilge.

DSCN8139.jpg

Better look at the sprayer bar. You need to make it so you can remove the end cap for flushing.

IMG_E5630.jpg

I used a Rule 90 degree thru hull valve to send water into the front and rear wells. It can be adjusted to restrict the water but thats unnessessary because you want it fully open. The beauty here is that it is a through hull fitting with gaskets.

DSCN8161.jpg


more to come........
 

Attachments

  • IMG_5596.JPG
    IMG_5596.JPG
    1.6 MB · Views: 2
  • Like
Reactions: SkunkBoat
Ok, we continue the tour...

This is the rule thru hull valve that works perfect with 3/4" hose.

IMG_2991.png


This is why you want to be able to remove the end caps on the sprayer bars.
Whilst picking up another unexpected passenger we drifted to close to the beach and kissed the bottom allowing the strainer to suck up sand .
:mad:
This is the front well after flushing...

IMG_5628.jpg

And the rear....

IMG_5632.jpg

This is made to flush an inboard engine but works very well on the high speed strainer port for flushing the livewell and washdown systems.

IMG_5633.jpg

Showing it in use....

DSCN8155.jpg

This is the diveter valve I got from Wakemakers.com that allows me to send water to the front, the back, or both wells.
It is super simple to use and makes for a clean install.

DSCN8125a_zpsj5rulu1m.jpg

The back of the diverter valve.

DSCN8123.jpg

The high speed strainer is a bronze Graco unit with a Bronze shut off valve.
The rule 800 baitwell pump has a port for a washdown pump.

DSCN8136.jpg

The west marine washdown pump was mounted to "azak board" very much like seaboard and is from home depot.
That is screwed down and seal with 5200 of course.
The stainless bus bar I made cleans up all the negative ground connections, alot...


DSCN8130.jpg

This is what my bus bar replaced! if you can believe it this is what Grady White installed at the factory to connect all the negative grounds in the aft area.
Corrosion got in and crept under the jacketing making it necessary to replace all of the wiring.
The main ground from the battery up to the helm was so bad the meter read a drop of 2 volts!

photo_2bpb_zps7hlny6p4.jpg

This is really just the tip of the iceberg of the work I've done to this boat and I'm certainly not done. If I can make it better I will. ;)
When the world goes back to normal if anyone in driving distance of the Jersey shore wants to climb through my boat to borrow and possibly improve on some of my ideas for their own your more than welcome. :)
Mike.
 
Here is a quick photo tour of where this project went. First let me say that you will notice a lot of single clamped connections,:rolleyes: Sorry.
This one of those do as I say, not as I do moments. I will always tell someone to do it the right way but the truth is you can't always fit two clamps where you need them. I did not however go cheap on the clamps and paid up for the best marine clamps i could get. There is a big difference in the way they are made.
Also I can't post all the pics in a single response so hang with me there will be lots of pics.

In this photo you can see where I mounted the drains. I put the water level in the well to about 2/3.
Locating the outboard drain directly behind the inspection port worked perfect for ease of install and operation.
You'll see the small drain I started with is in the well in this shot. I just plug it now as the larger drain works flawless.
Most of the time i have the white plastic strainer off to allow scales and whatever the fish spit to drain overboard.

View attachment 12558

View attachment 12559

In this shot is the 3/4" ID freshwater line in from the pump. You can see that its tight for it so a 1-12" hose wasn't going aft past the inspection port.
It all worked out better this way though.

View attachment 12560

Here you can see it keeps up fine with the garden hose running full blast filling the well.
Also the port rides well above the water line. On the question of stains there is never any because I keep my boat waxed and wash it after every trip.

View attachment 12561

Another shot to show the port (and the new trailer ;).
It's above the center of the two tires.

View attachment 12562

This is the inside of the well showing the sprayer bar, airline and blue LED thats tied in with NAV lamps.
I hadn't sealed it entirely with 5200 yet in this pic. That needs to be done because shosh will send water into the bilge.

View attachment 12563

Better look at the sprayer bar. You need to make it so you can remove the end cap for flushing.

View attachment 12564

I used a Rule 90 degree thru hull valve to send water into the front and rear wells. It can be adjusted to restrict the water but thats unnessessary because you want it fully open. The beauty here is that it is a through hull fitting with gaskets.

View attachment 12565

Nice job. That should work for you.

more to come........
 
Been using it for big striper (43”) to fluke , etc... everything we put in the well recovers from the fight.
both the front and rear wells hold and keep big bunker up to 14” lively for live lining.
They aren’t that preferred round shape but they’ve worked very well and don’t take up deck space.