1986 Seafarer 227: 5/6/14 Update - Stringer extension prep

gw204

Well-Known Member
Joined
Jan 31, 2005
Messages
2,481
Reaction score
22
Points
38
Location
St. Leonard, MD
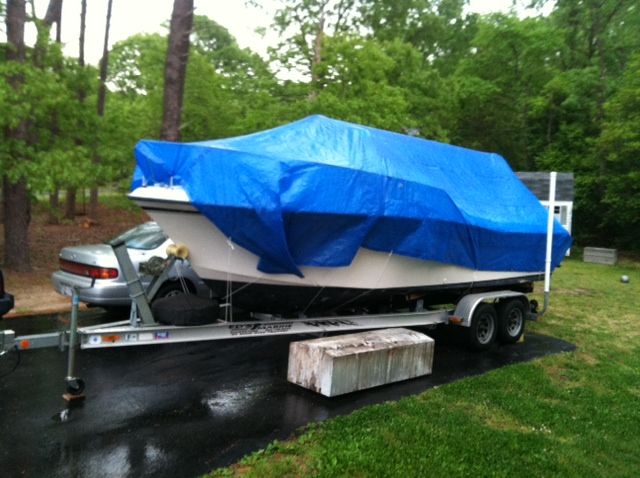
I didn't title this thread 1986 Seafarer 227 Project simply because I told my wife I wouldn't buy another "project"... :lol: Anyway, I started digging into my newly acquired rig yesterday.


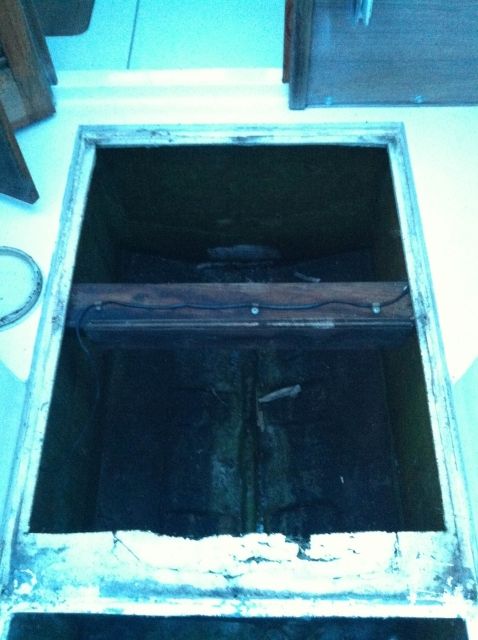
All I really wanted to accomplish on the first day of work was to get the tank out. So, the cover came off first. It wasn't pretty under there... :shock:

photo9.jpg


photo10.jpg


It was easy to see why the cover would flex when any weight was put on it.

photo11.jpg


There wasn't enough clearance for me to back out all the screws on the 2x4s and shims holding the tank in place, so I got what I could and then simply chopped up the rest with my Multimaster. Then I had to trim a little more than an 1/8" from each side of the lip that the hatch sits on to make room to pull the tank up. Thankfully, the shop that had been maintaining the boat emptied the tank when the fuel leak was discovered last fall. So, I was able to put a rope around the fill and the 90 degree elbow coming off the supply port and pull the tank straight up. Over the side it went.

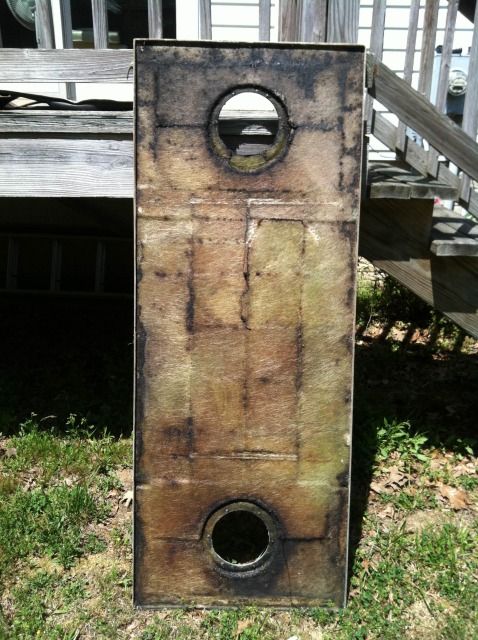
After I spent a few minutes brushing off the top, I had this staring back at me. I think I counted 29 holes...all in the top.

photo12.jpg


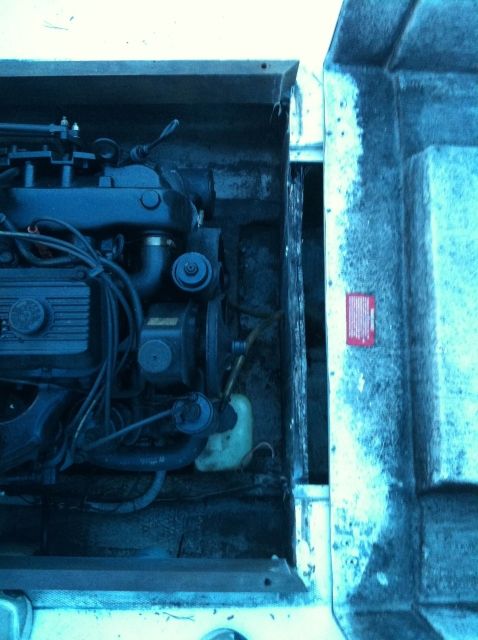
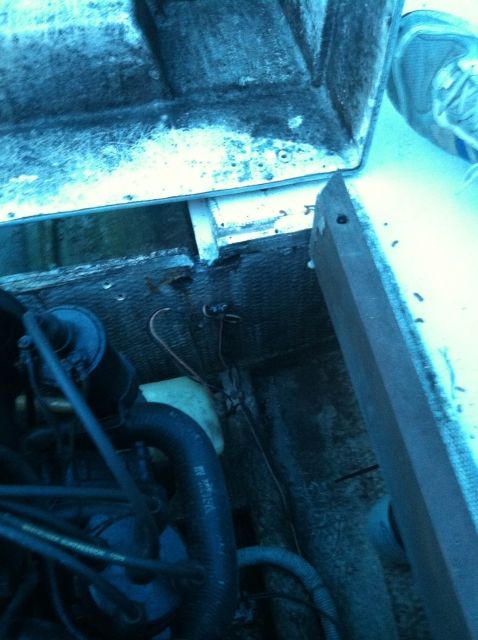
Then I moved on to cleaning the tank compartment and giving a general inspection to the stringers and bulkheads. Since the hatch was unscrewed and the caulking cut prior to my purchase, I was able to sound the top sections of the stringers before I dragged it home and they sounded good, but now I could get to everything.

photo14.jpg


photo15.jpg


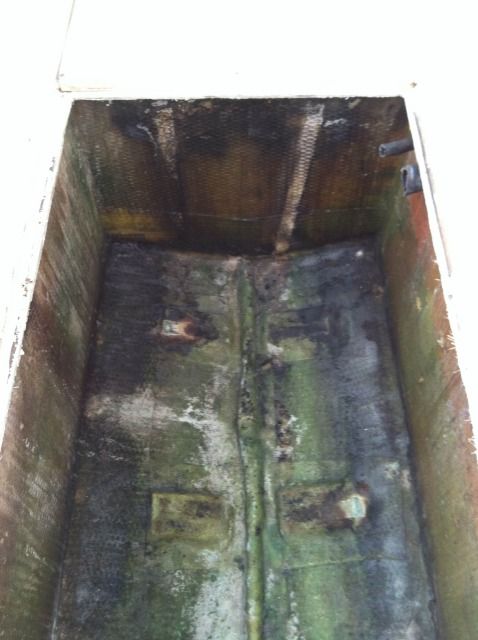
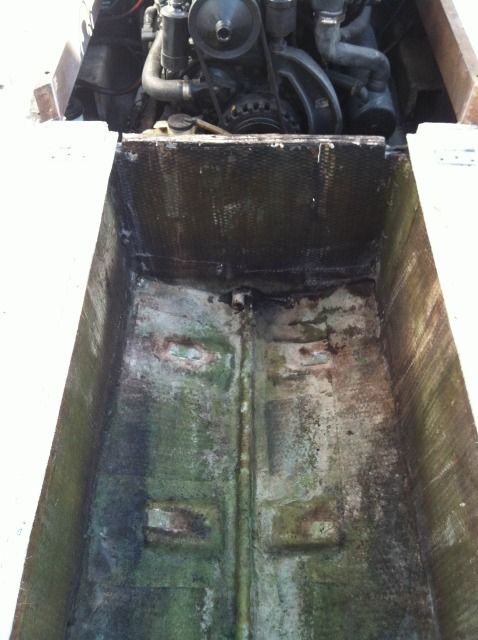
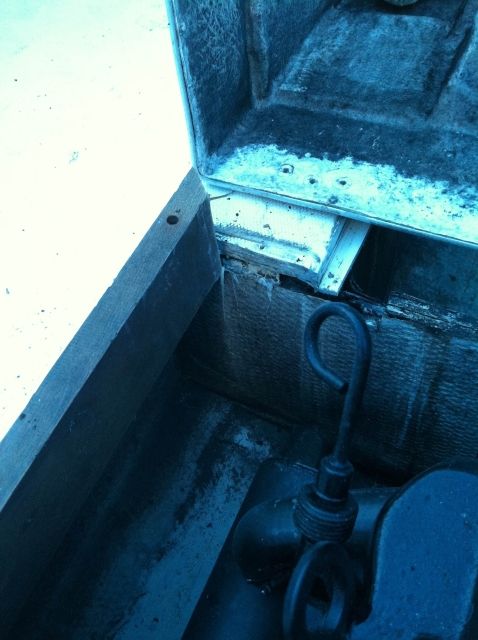
Stringers seem to be in real good shape. Looks like there could be a little delamination in the forward bulkhead and the rear bulkhead is completely rotten. It actually started seeping water after I cleaned the junk out of the compartment. I will probably end up replacing both along with tyring to clean up the glass work down in there. It's the sloppiest I have ever seen. :?


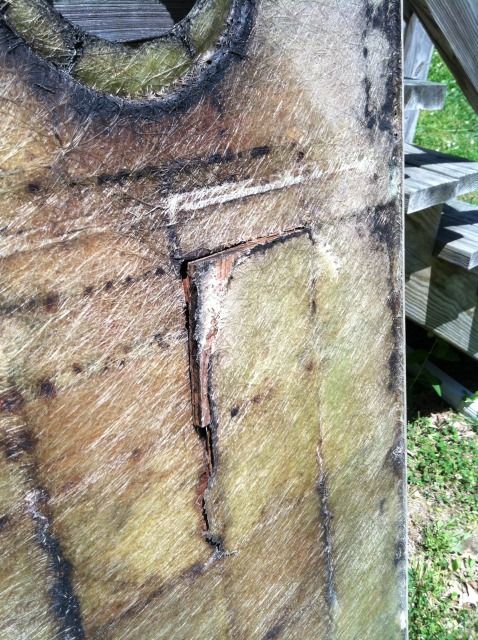
Moving on. I had a little time before I had to start on the honey-do list, so I went after the tank hatch. I cut the bottom skin around the perimeter and then made several cuts through the center trying to match the edges of the plywood squares making up the core. Once that was done, I pulled out the piece that had already broken through the bottom skin a that gave me acces to pry/chisel out the rest. I think it took me all of 15 minutes to gut the entire thing.

photo16.jpg


photo17.jpg


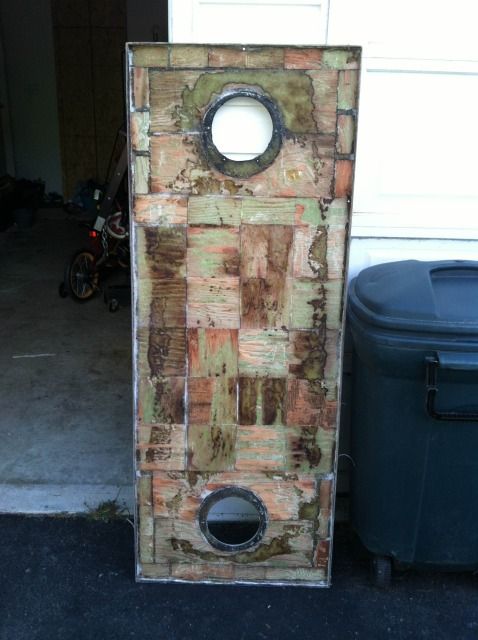
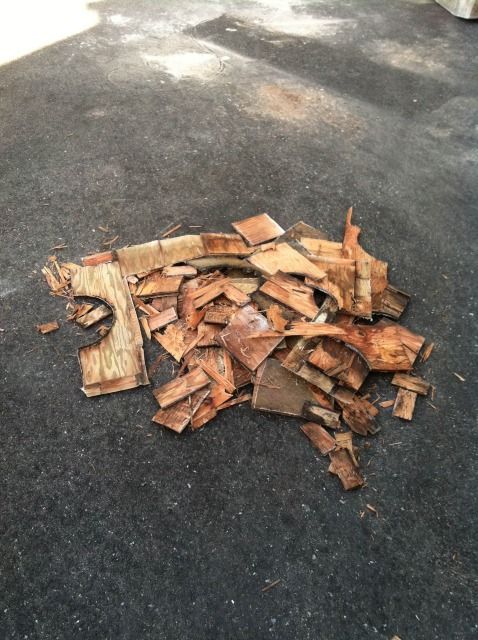
The wood cores were very wet, but didn't seem all that rotten. I think the primary reason for the failure was them simply delaminating from the top skin.

Stay tuned...
 

Megabyte

Well-Known Member
Joined
Mar 3, 2005
Messages
55
Reaction score
0
Points
0
Location
Annapolis, Md
Re: 1986 Seafarer 227 Repairs, Updates and Upgrades

Looking forward to following your progress. :)
 

gw204

Well-Known Member
Joined
Jan 31, 2005
Messages
2,481
Reaction score
22
Points
38
Location
St. Leonard, MD
Re: 1986 Seafarer 227 Repairs, Updates and Upgrades

Remember...it's not a "project". Shhhhhhhh... :lol:

Got her covered up last night to try and keep the weather out until I get the deck closed back up. Stood up a simple frame with some 2x4s and blocks of 1/2" ply, then trew an old blue tarp over it. Total cost was $4.97 and that's only because I had to buy cord to tie it down. :)

photo18.jpg
 

Bill_N

Well-Known Member
Joined
Mar 14, 2008
Messages
252
Reaction score
1
Points
0
Location
Ct River Valley
Re: 1986 Seafarer 227 Repairs, Updates and Upgrades

Doesn't look like you have as far to go on this one. Definately not a project boat :D
 

JeffN

Well-Known Member
Joined
Jan 16, 2007
Messages
586
Reaction score
7
Points
18
Location
Nantucket, Ma.
Re: 1986 Seafarer 227 Repairs, Updates and Upgrades

I did the same thing on my deck hatch last weekend. Took me a bit longer to strip the ply off though. I'll grind the remaining single ply that is stuck to the bottom of the deck off this weekend. LIke yours my ply was very wet but not rotted, I had some pieces in there that probably were not larger than 2" x 3", lots of voids too. It did hold up well for the most part I just had one small soft spot. Glad I tackled it this year. I think most of the water got into my deck through the screw holes that held the panel down, when I redo it I am going to make sure the deck screws do not go through the core. I have ordered all the coring and cloth so I should hopefully have it done in a couple of weeks. Good luck with yours.
 

gw204

Well-Known Member
Joined
Jan 31, 2005
Messages
2,481
Reaction score
22
Points
38
Location
St. Leonard, MD
Re: 1986 Seafarer 227 Repairs, Updates and Upgrades

Got a little more done last night. Still waiting on quotes to come in for the new tank. I think I've sent out about 10 inquiries, and gotten 2 responses.

Anyway, I'm trying to figure out what to do about the bulkhead between the tank and engine compartments. It's completely rotten. I would like to replace it, but access is pretty tight w/out removing the engine (which I am not doing). I may end up just leaving it for now.

photo19.jpg


photo20.jpg


photo21.jpg


I also decided to pull up the forward deck hatch and reconfigure the unused tank compartment as storage. Lots of wasted space in there that I can use for bulky items like fenders or an anchor. I figure I'll build a removable subfloor out of pressure treated wood just to keep stuff up off of the hull bottom. The screw holes in the hatch will get filled in and I will probably just have it set in place. No hinges or latches. The hatch itself seems to be in pretty good shape, so I won't have to recore it just yet. I may add a gutter system around the opening and paint the compartment, but that's down the road a ways. I need this thing up and running soon.

photo22.jpg
 

Megabyte

Well-Known Member
Joined
Mar 3, 2005
Messages
55
Reaction score
0
Points
0
Location
Annapolis, Md
Re: 1986 Seafarer 227 Repairs, Updates and Upgrades

Brian... Is that an inline 6 in the motor box?
 

gw204

Well-Known Member
Joined
Jan 31, 2005
Messages
2,481
Reaction score
22
Points
38
Location
St. Leonard, MD
Re: 1986 Seafarer 227 Repairs, Updates and Upgrades

Nope. She's a 4 cylinder. From what I've read it's a Mercruiser aluminum block, Ford 460 head and 4-barrel (Holley I think) carb. Damn thing is enormous!
 

NOTHING ELSE MATTERS

GreatGrady Captain
Joined
Jun 26, 2006
Messages
1,993
Reaction score
5
Points
38
Age
59
Location
LONG ISLAND NEW YORK
Re: 1986 Seafarer 227 Repairs, Updates and Upgrades

Brian, if the bulkhead is glassed all the way up, can you just remove the plywood with a chain saw and pour Arjay or any other structural foam in there and then maybe a layer or two of 1708? I wouldn't leave it like that.
 

gw204

Well-Known Member
Joined
Jan 31, 2005
Messages
2,481
Reaction score
22
Points
38
Location
St. Leonard, MD
Re: 1986 Seafarer 227 Repairs, Updates and Upgrades

I thought about that as well.

You're right in that I shouldn't leave it like that though. Guess I'm getting a bit lazy these days. :-|
 

NOTHING ELSE MATTERS

GreatGrady Captain
Joined
Jun 26, 2006
Messages
1,993
Reaction score
5
Points
38
Age
59
Location
LONG ISLAND NEW YORK
Re: 1986 Seafarer 227 Repairs, Updates and Upgrades

I have faith in you, for you is only a couple of hours work, do it while waiting for the tank.
Speaking of a tank, have you checked Incaproducts.com? They make/made plastic/poly fuel tanks for Wellcraft.
 

gw204

Well-Known Member
Joined
Jan 31, 2005
Messages
2,481
Reaction score
22
Points
38
Location
St. Leonard, MD
Re: 1986 Seafarer 227 Repairs, Updates and Upgrades

I think I'm going to go ahead and skin the bulkhead from the tank side, pull out the main part of it and see what I have to work with. If there is glass on the forward side of it outside of the stringers, I'll dig out as much bad core as I can and then just try to recore it in sections so I can slide pieces in between the outer most skins and then just reglass the exposed face. Does that make any sense? I know it's not the best way...

I've been trying to find info on the Inca tanks, but have had limited success. Can't find anything about available sizes or distributors. I read a post on THT that says they only sell to builders, so I may be SOL unless I can find a surplus tank. GreatLakesSkipper has some, but none of them really fit my appliction well and I have an email into Marine Connection Liq. as well. At this point, I'm leaning towards an AL tank from Sunrise Marine Tanks in FL or Patriot Marine in NJ.
 

Megabyte

Well-Known Member
Joined
Mar 3, 2005
Messages
55
Reaction score
0
Points
0
Location
Annapolis, Md
Re: 1986 Seafarer 227 Repairs, Updates and Upgrades

gw204 said:
I know it's not the best way...

It might not be the prettiest, but it should be serviceable.
It's not a repair that is exposed, so serviceable is adequate.
 

Grog

GreatGrady Captain
Joined
Sep 27, 2006
Messages
2,008
Reaction score
1
Points
38
Re: 1986 Seafarer 227 Repairs, Updates and Upgrades

If the rear bulkhead is that wet, there's a good chance water probaly go to the stringers too. The stringers along the tank seem to end at that bulkhead, is there another set of stringers next to the motor that go all the way up?
 

gw204

Well-Known Member
Joined
Jan 31, 2005
Messages
2,481
Reaction score
22
Points
38
Location
St. Leonard, MD
Re: 1986 Seafarer 227 Repairs, Updates and Upgrades

I think so. I'll have to look when I get home. I know RIGHT next to the motor on either side are a pair of short stringers. Maybe 2" or 3" tall and about 2" wide. About 6" outboard of those those are taller ones.

I guess the big question is whether or not the folks at Grady glassed each stringer/bulkhead separately so there is a barrier between each, or if they just placed all the cores and then glassed everyhing at once. Probably the latter...
 

gw204

Well-Known Member
Joined
Jan 31, 2005
Messages
2,481
Reaction score
22
Points
38
Location
St. Leonard, MD
Re: 1986 Seafarer 227 Repairs, Updates and Upgrades

Starting to think this bulkhead is going to be the preverbial can of worms. Been looking over mac83's "Replacing 1983 Seafarer floor/gas tank " thread and I see a few things that worry me...

1. There's no indication that the stringers and bulkhead have glass between them that would prevent rot from migrating from one member to another. :(
2. The aft bulkhead appears to run from one side of the boat all the way to the other. It doesn't end at the outer stringers like I had hoped. This means I probably won't be able to get to all of the rot. :(
3. The aft bulkhead appears to be one continuous piece and the stringers are sectioned around it, and not the other way around. I really don't know if that's a good thing or not.

Hoping for the best...expecting the worst...
 

mac83

Well-Known Member
Joined
Jan 24, 2010
Messages
100
Reaction score
1
Points
18
Age
40
Location
Suffolk, VA.
Model
Adventure
Re: 1986 Seafarer 227 Repairs, Updates and Upgrades

Ohhhh us and our projects....just think of it this way. You'll never be able to buy a boat as good as your going to rebuild this one...that's what I keep telling myself :bang it'll all be worth it in the long run. I've learned so much and I really enjoy the time that I get to spend on it. I hope your wasn't as bad as mine.
 

BobP

GreatGrady Captain
Joined
Apr 27, 2005
Messages
4,746
Reaction score
6
Points
38
Location
Long Island, NY
Model
Sailfish
Re: 1986 Seafarer 227 Repairs, Updates and Upgrades

Some more ideas -

You might be able to cut the skin on motor side all along the base and up the sides, like with dremel cutting bit, I used them work good enough and very compact. Then peel off skin & clear off the wood and prep the other skin add mat and bond on new ply with thickened resin. Grind if you can get in there or hand sand base say 4-5 inches on motor side and tab it in, 3 tabs 1708, go one 1708 down from top overlapping the three. If you have to go under side of deck I can't see, use two layers of 1/2 in. ply and stagger joint in each, or long bevel a joint in 3/4 inch for two pieces. And tab it up the sides of main stringers, same 3 layers of 1708.

Grady used a very heavy woven roven one layer, I'd say 24 oz at least.