1988 20ft Overnighter 204-C Fuel Tank specs

Hookup1

GreatGrady Captain
Joined
Oct 16, 2007
Messages
2,794
Reaction score
763
Points
113
Age
69
Location
Cape May, NJ
Model
Islander
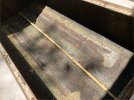
Drill the hole with a stepped bit. Take the shavings off as you go. You would have to take the sending unit out so blow it out, get a vacuum in there on a piece of copper tubing or PVC pipe.

Stepped bits are the best way to drill holes in plastic. Drill bits and hole saws make a mess and sometimes crack the plastic. I drilled holes for my chum buckets and 5-gallon bucket garden planters. Works great.

Use a piece of butchers twine or electricians pulling tape, pick it up with a vacuum thru sending unit hole. Thread fitting on and pull into place. Put a stop on both sides of the fitting and leave it long in case you have to pull it back out.
 
Last edited:

cham

Member
Joined
May 28, 2024
Messages
9
Reaction score
0
Points
1
Age
27
Model
Tournament 192
So we will have a similar setup to the OPs fuel filler hose setup. The difference being our Tournament 190 has fuel fill and fuel vent lines going to the front of the boat not the rear.

I wasn’t able to get a response from the OP but he used a coupler between the 90 degree elbow and rest of the fuel filler hose. I’m curious what kind of material matters. Does it need to be brass, plastic or stainless steel? Is there chance of static electricity building up? I know you ground the fuel filler neck if it’s metal but that makes me wonder about the coupler since it too will likely be metal. Should I find one with barbs or a lip, I found fuel filler specific ones with both design.
 

cham

Member
Joined
May 28, 2024
Messages
9
Reaction score
0
Points
1
Age
27
Model
Tournament 192
What is the purpose of this PVC pipe running the length of the fuel coffin? Why can’t the bow just drain straight into the coffin and then out into the bilge?

The reason I ask is because it’s causing some problems with shimming and spacing undernieth. I could make it work but if it’s not necessary, I’d cut the section that spans the coffin.

My only guess would be it would reduce the time it takes to sink the boat potentially but water can still get up to the bow via the same pvc pipe.
 

Attachments

  • IMG_2504.jpeg
    IMG_2504.jpeg
    913.9 KB · Views: 5

Hookup1

GreatGrady Captain
Joined
Oct 16, 2007
Messages
2,794
Reaction score
763
Points
113
Age
69
Location
Cape May, NJ
Model
Islander
The 1/2" PVC pipe connects the forward bilge to the aft bilge. Its fuel should leak from your tank it could be confined to the fuel compartment and/or drain into aft bilge. On my boat GW plugged it is plugged in aft compartment to prevent a fuel leak from getting into cabin and creating a explosion hazard. I would leave it there.

Another issue is fuel tanks should not not sit on the floor of the compartment. It should be raised up to prevent water from being trapped and creating crevice corrosion. Usually nitrile blocks 3M400'ed to tank.
 

cham

Member
Joined
May 28, 2024
Messages
9
Reaction score
0
Points
1
Age
27
Model
Tournament 192
Yeah the problem is I’m having to double up on 0.5” neoprene rubber strips just to get the tank sitting off the PVC pipe. I can still figure a way, cheers!
 

cham

Member
Joined
May 28, 2024
Messages
9
Reaction score
0
Points
1
Age
27
Model
Tournament 192
So I know I’ve kind of derailed this thread a little bit, but we just decided to double up on the 0.5” neoprene strips using 3M 4000 and it worked.

Now I’m curious what your opinions are on chocking the fore and aft of the tank. To secure the tank down we were planning on using some metal plumbing straps lined with neoprene underneath. We’d screw them into the stringers. But for the fore and aft gaps, I was thinking of screwing thick pieces of PVC into the bulkheads on either side of the tank to take up some of that gap. Then shimming it tightly with glued on neoprene strips.

What do you guys think about screwing a few screws into each bulkhead? We’d seal them up with 4000. In the photo you can see the gap in the front and rear of the tank.

1718986141055.jpeg
 

Hookup1

GreatGrady Captain
Joined
Oct 16, 2007
Messages
2,794
Reaction score
763
Points
113
Age
69
Location
Cape May, NJ
Model
Islander
With plastic tank you don’t have a crevice corrosion problem but you did need to raise it up over the pipe.

On my tanks GW used HPDE blocks. Look at my tank replacement post. They are screwed into bulkhead. You can make them with a table saw. I used a torx head stainless screw in post as well.
 
Last edited:

DennisG01

GreatGrady Captain
Joined
Sep 1, 2013
Messages
6,927
Reaction score
1,243
Points
113
Location
Allentown, PA & Friendship, ME
Model
Offshore
You're dealing with a plastic tank - that's different than what the OP is talking about. Plastic is easy - do whatever you want - you don't even need neoprene strips. Literally, you could just jam a piece of wood into the perimeter gap. Obviously you're going to make it more secure than that... but you get my point. PVC or glass L-channel can be used around the perimeter sides to help keep it secure... but you really only need a few pieces (say 3" long) per side. Keep in mind that plastic tanks can expand much more than aluminum so DO NOT make your securement too tight - if there's a blockage in the vent, they can literally start to look like a balloon!