You are using an out of date browser. It may not display this or other websites correctly.
You should upgrade or use an alternative browser.
You should upgrade or use an alternative browser.
1989 204 Overnighter w/ 04' yamaha
- Thread starter iavaronej
- Start date
sfc2113
GreatGrady Captain
Re: 1989 204 Overnighter w/ 04' yamaha *New Boat*
rebuild the access tank panel, its rotted you will have to take it up to reinforce anyway. it can be done in a weekend.
you have to replace the drain in the floor, thats is attach to the outboard drains as well and water gets into your bilge, not safe. It is probably broken under the decking you have to unscrew the broken piece out. bit$ch of a job but doable.
gas tank, agiain if your going to do the hatch, just do the whole thing, tank cover and all. Sounds like some ones fuel tank shortcut repair. Original tank was 50+gal.
Take some pics and post your progress.
capegrady20
Member
- Joined
- Nov 17, 2011
- Messages
- 5
- Reaction score
- 0
- Points
- 0
Re: 1989 204 Overnighter w/ 04' yamaha *New Boat*
Just wondering how the progress is coming... I just purchased a 1987 Overnighter 20 w/a Yamaha 150. I was lucky to get one in excellent condition. The only repair I need to do now is replace the seat backs in the transom seats. I will post some pics. Good luck!
Just wondering how the progress is coming... I just purchased a 1987 Overnighter 20 w/a Yamaha 150. I was lucky to get one in excellent condition. The only repair I need to do now is replace the seat backs in the transom seats. I will post some pics. Good luck!
Re: 1989 204 Overnighter w/ 04' yamaha *New Boat*
So far I have removed the electrical panel, epoxied/sanded some screw holes, removed the old horn, removed the windshield wiper, and have gotten some rust stains out of the hatches.
I wasn't happy with how the epoxy came out in the colder weather so I'm going to wait till the spring to fill in the rest of the holes, stress cracks, and chips.
Next week I plan on removing most of the teak, do some electrical work, and I will probably remove the panel above the gas tank.
I'll also take some better pictures of the boat.
capegrady20
Member
- Joined
- Nov 17, 2011
- Messages
- 5
- Reaction score
- 0
- Points
- 0
Re: 1989 204 Overnighter w/ 04' yamaha *New Boat*
I can't figure out how to post pics on this site... maybe because I'm a new member, they won't allow me to yet.
I can't figure out how to post pics on this site... maybe because I'm a new member, they won't allow me to yet.
capegrady20
Member
- Joined
- Nov 17, 2011
- Messages
- 5
- Reaction score
- 0
- Points
- 0
Re: 1989 204 Overnighter w/ 04' yamaha *New Boat*
http://cgi.ebay.com/ebaymotors/ws/eBayI ... 1123#v4-41
I don't know if this link still works, but the original ad pics are here.
http://cgi.ebay.com/ebaymotors/ws/eBayI ... 1123#v4-41
I don't know if this link still works, but the original ad pics are here.
Bryan3536
Active Member
Re: 1989 204 Overnighter w/ 04' yamaha *New Boat*
iaveronej,
FYI, We just took the main access / fuel tank hatch to a fiberglass guy in West Babylon that was recommended to us. $500 to re-fab the entire thing, will have it in a week or two. You sound more handy than I am - it would take me three weekends and 20 trips to get the right tools and materials - but in case you decide you want it done, I can get you the information.
Re: 1989 204 Overnighter w/ 04' yamaha *New Boat*
That is a little out of my price range, but thank you for the information. It's good to know that someone on the Island can re-fabricate old panels.
I found out when my tank was replaced a support under the panel was removed. I'm going to try and put something else in to support the panel and hopefully that will solve my problem. I will let you know how it goes.
sfc2113
GreatGrady Captain
Re: 1989 204 Overnighter w/ 04' yamaha *New Boat*
Good deal...... nice overnighter.
capegrady20 said:http://cgi.ebay.com/ebaymotors/ws/eBayISAPI.dll?ViewItem&item=200673615356&ssPageName=ADME:B:BCA:MOTORS:1123#v4-41
I don't know if this link still works, but the original ad pics are here.
Good deal...... nice overnighter.
capegrady20
Member
- Joined
- Nov 17, 2011
- Messages
- 5
- Reaction score
- 0
- Points
- 0
Re: 1989 204 Overnighter w/ 04' yamaha *New Boat*
Thanks! I'm very happy with it. I test drove it before I bought it, but haven't been out in it since tailoring it home from Jersey. Either I have been working, or the weather has been awful! I'm off for Thanksgiving, but my wife is working. If the weather is nice, I'm going for a ride! I did the Penetrol on the simulated wood today - looks great!
Thanks! I'm very happy with it. I test drove it before I bought it, but haven't been out in it since tailoring it home from Jersey. Either I have been working, or the weather has been awful! I'm off for Thanksgiving, but my wife is working. If the weather is nice, I'm going for a ride! I did the Penetrol on the simulated wood today - looks great!
Re: 1989 204 Overnighter w/ 04' yamaha *New Boat*
replace that floor drain immediately and make sure all the others are good too! water will enter the bilge. actually in semi rough seas, water will sometimes come up the drain and get the cockpit wet so that gives you an idea.
i broke one fitting when i was replacing the outboard drains and it is very hard to replace but i was able to do it. make sure not to stress any of those fittings and dont push or pull on the hose, thats how i broke mine. theres a 3 way fitting down there too. the fish box and floor drain into one. they dont inspire alot of confidence either. what scares me is that you cant see the fittings so you just hope for the best after 20 years of service.
get that new electrical panel in.
are you saying it only has a single 25 gallon tank?? completely unacceptable. pull the floor panel and install a new one. stock is either 78 or 88 gallon. behind it (aft) you actually have a big space where you could either install an auxilliary (~10g) fuel tank or washdown system. put a deck plate in there for access. seal up the floors.
best 20 footer you can get. i have a 1990 O'nighter and love it.
gw204
Well-Known Member
Re: 1989 204 Overnighter w/ 04' yamaha *New Boat*
The floor panel isn't all that wide. If properly built, it won't need supports under it.
I did some work on a 204 Overnighter last winter. It included (among other thins) pulling and resealing the access panel, replacing the tank sending unit and taking a few other steps to ensure a long tank life.
The access panel did have some water intrustion and rot, but it seemed fairly solid and my opinion it had a few more years before requiring a recore.
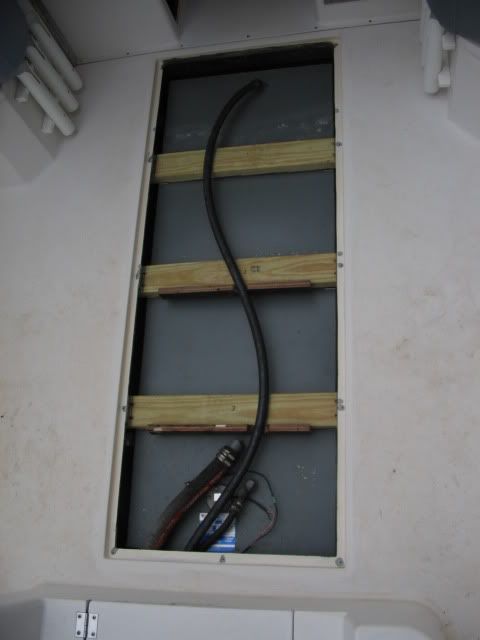
The tank looked like this when the hatch was pulled.
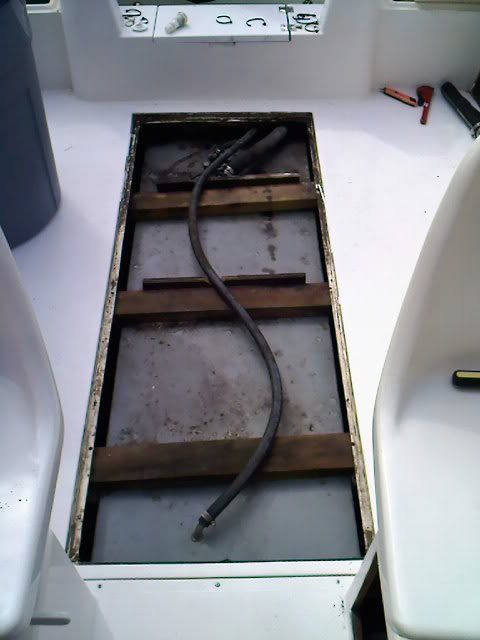
The bottom of each one of those 2x4s had some neoprene/rubber strips stapled to them. On occasion water was getting under these strips due to a bad seal around the hatch and spots of corrosion were starting to form (the tank only has a primer applied, no protective epoxy coating).
I cut down the strips to about 2" x 3-1/2" and bonded them to the tank using 4200. This will ensure not water gets under them.
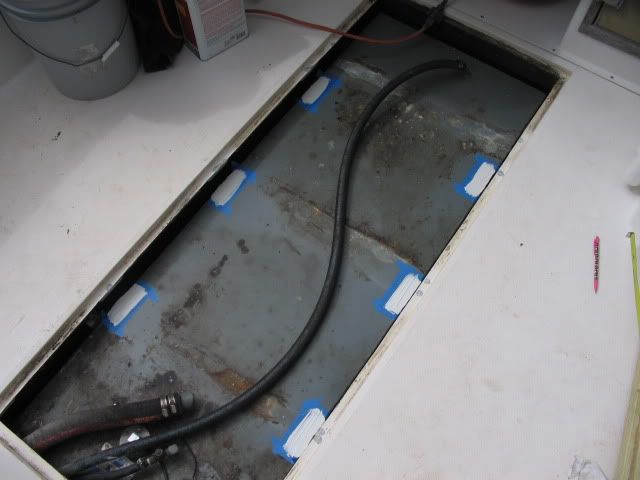
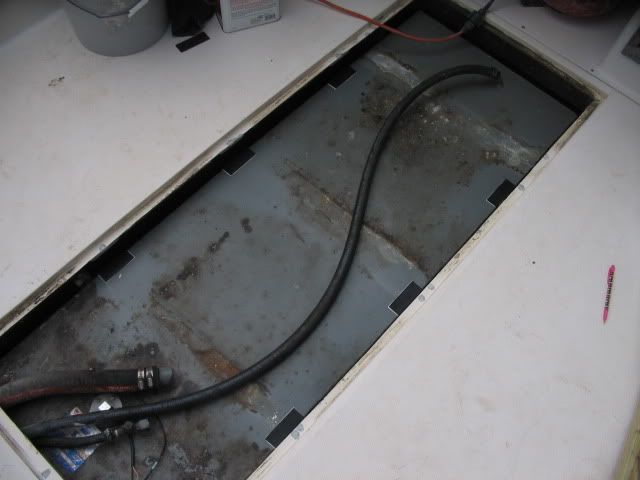
Due to poor installation when the tank was replaced, I had to cut some new 2x4s to span the tank. I'm not exactly sure why these are even there because a series of wooden wedges are what hold the tank itself down. Screwed to the 2x4s was some plywood risers that look to be to designed support the access panel. Not good. Since the tank was not level, I put some more of my resized neoprene/rubber strips on top of the ones on the tank to level out the 2x4s, and then I cut down the risers so the panel would fit in place. This created an nice air gap between the 2x4s and the tank. No chance of water getting trapped there. I also eased the cutouts in the risers were the vent lined passed throug to prevent any sort of chafing on that line.
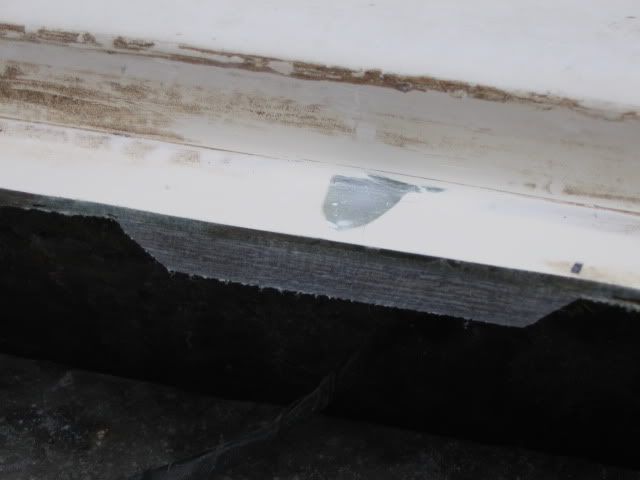
Quite a few of the screw holes for the hatch were stripped out, so I lamined some solid glass blocks and bonded them to the underside of the lip to provide a solid surface for the screws to bite into.
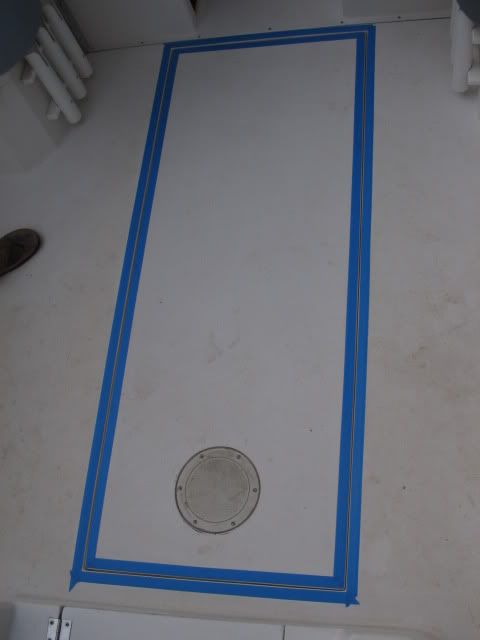
Hatch fastened in place (screws were either sealed with 4200 or 5200...I dont' remember) and taped for caulking.
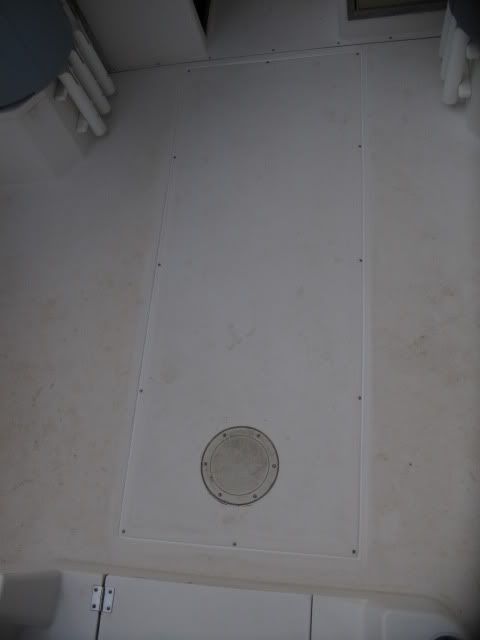
Caulked with 4000UV. Done.
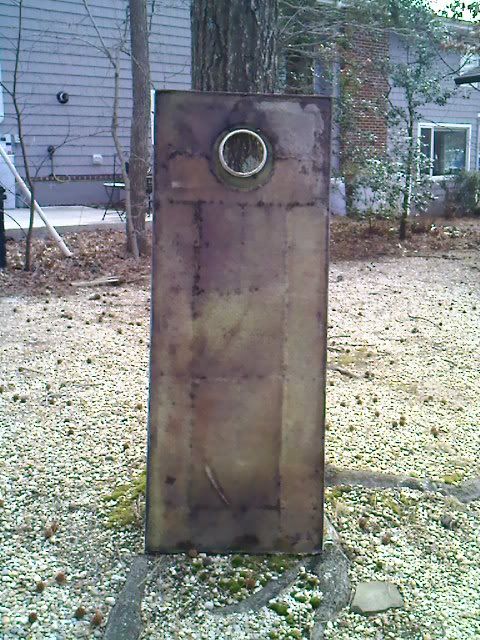
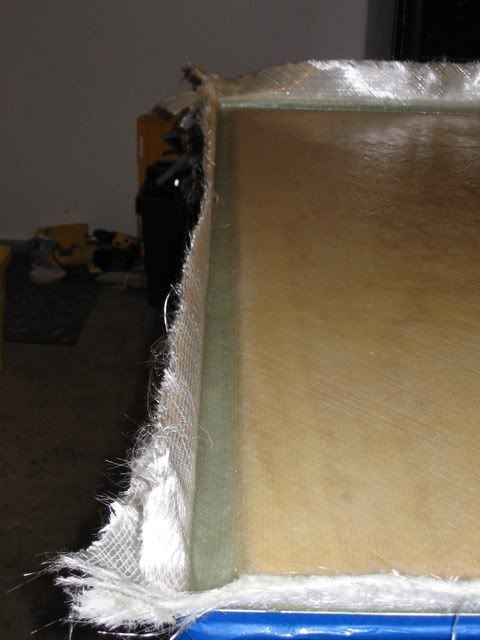
As for the hatch itself, I like to rebuild them this way...
After all the bad core has been removed, cut the new core (I use regular 1/2" ply) so there is about a 1-1/2" gap around the edges and make it a 45 degree cut. This allows the glass to wrap over the edge w/out voids and isolates the core from any possible water intrustion from leaking screw holes. This particular panel has 2 layers of 1708 (I think) over the entire thing, with two additional layers down around the edges for strength.
The hardest part was removing the old core. :cry:
The floor panel isn't all that wide. If properly built, it won't need supports under it.
I did some work on a 204 Overnighter last winter. It included (among other thins) pulling and resealing the access panel, replacing the tank sending unit and taking a few other steps to ensure a long tank life.
The access panel did have some water intrustion and rot, but it seemed fairly solid and my opinion it had a few more years before requiring a recore.

The tank looked like this when the hatch was pulled.

The bottom of each one of those 2x4s had some neoprene/rubber strips stapled to them. On occasion water was getting under these strips due to a bad seal around the hatch and spots of corrosion were starting to form (the tank only has a primer applied, no protective epoxy coating).
I cut down the strips to about 2" x 3-1/2" and bonded them to the tank using 4200. This will ensure not water gets under them.


Due to poor installation when the tank was replaced, I had to cut some new 2x4s to span the tank. I'm not exactly sure why these are even there because a series of wooden wedges are what hold the tank itself down. Screwed to the 2x4s was some plywood risers that look to be to designed support the access panel. Not good. Since the tank was not level, I put some more of my resized neoprene/rubber strips on top of the ones on the tank to level out the 2x4s, and then I cut down the risers so the panel would fit in place. This created an nice air gap between the 2x4s and the tank. No chance of water getting trapped there. I also eased the cutouts in the risers were the vent lined passed throug to prevent any sort of chafing on that line.

Quite a few of the screw holes for the hatch were stripped out, so I lamined some solid glass blocks and bonded them to the underside of the lip to provide a solid surface for the screws to bite into.

Hatch fastened in place (screws were either sealed with 4200 or 5200...I dont' remember) and taped for caulking.

Caulked with 4000UV. Done.

As for the hatch itself, I like to rebuild them this way...
After all the bad core has been removed, cut the new core (I use regular 1/2" ply) so there is about a 1-1/2" gap around the edges and make it a 45 degree cut. This allows the glass to wrap over the edge w/out voids and isolates the core from any possible water intrustion from leaking screw holes. This particular panel has 2 layers of 1708 (I think) over the entire thing, with two additional layers down around the edges for strength.
The hardest part was removing the old core. :cry:


