83 seaferor complete rebuild and upgrades

Tdurr22

Active Member
Joined
Nov 15, 2023
Messages
27
Reaction score
17
Points
3
Age
52
Model
Seafarer
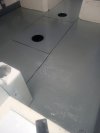
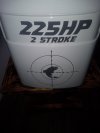
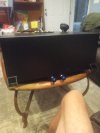
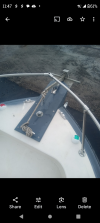
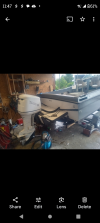
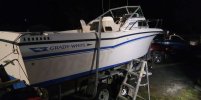
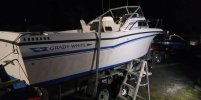
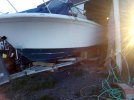
Ok tried this yesterday and something went wrong so I'ma start over. 1983 seaferor inboard removal, transom rebuild and upgrade,swim bracket installed,225 Yamaha 2 stroke installed, hard top installed,all new wiring from ,bow to stern,new light bars forward and rear,led courtesy lights duel colors, gunnel lighting, underwater lighting,helm mood lighting, cockpit lights,new VHF,Sound system with 5k watt amp,speakers thru out but hidden so no ugly cones everywhere, Garmin 4212 oldie but a goodie, rayathon radar,front pulpit,new exterior and interior paint,foam flooring going in soon, trailer has been refurbished also with 4 new hubs& tires,fenders and lights,also added a floor fish box that dbls as a drop in quick connect 23gal reserve fuel cell for the trolling days,all new bilges and pumps added a raw water oump. You name it I've done it rebuilt floor new bottom paint etc hope the pictures post if not I will post them separately in another post
 
Some pictures some before if anyone wants the entire refurb I have all pictures in Google photo file to share
 

Attachments

  • IMG_20240821_200959714.jpg
    IMG_20240821_200959714.jpg
    1.4 MB · Views: 38
  • IMG_20240811_151022240.jpg
    IMG_20240811_151022240.jpg
    858.6 KB · Views: 37
  • 7edaad80-9c3f-4b5f-bf5f-b0159b75c785.jpg
    7edaad80-9c3f-4b5f-bf5f-b0159b75c785.jpg
    2.4 MB · Views: 40
  • Screenshot_20240821-234840.png
    Screenshot_20240821-234840.png
    555.2 KB · Views: 41
  • Screenshot_20240821-234816.png
    Screenshot_20240821-234816.png
    463 KB · Views: 44
  • Screenshot_20240821-234736.png
    Screenshot_20240821-234736.png
    832.7 KB · Views: 45
  • Screenshot_20240821-234753.png
    Screenshot_20240821-234753.png
    673.7 KB · Views: 43
  • received_222172754229106.jpeg
    received_222172754229106.jpeg
    101.8 KB · Views: 43
  • received_222172754229106.jpeg
    received_222172754229106.jpeg
    101.8 KB · Views: 39
  • Like
Reactions: Peter A
Very nice! Do you have any of the floor rebuild pics to share? I'd like to see your process and compare to what I did in hopes of learning something new! I always like seeing other's processes. Nice hull color choice - and I like the extra touch up at the bow!

Side note... your bow lights... they look like the kind meant to be mounted on the SIDE of a boat (a vertical surface). Mounted on a horizontal surface can not only cause you to have night vision problems, but they also are not visible across the required range of vision for other boaters which can also be very dangerous.
 
I'm changing them out not because of safety there fine in that case they just look like frog eyes lol I don't like them
 
I'm changing them out not because of safety there fine in that case they just look like frog eyes lol I don't like them
Frog eyes :)

But, no, if those are side lights - which they look like they are - they are illegal. So this is definitely a safety issue. As I mentioned above, they won't satisfy the required visibility spec. Look back at your notes from when you took a safe boater's class - it's in there ;)
 
Frog eyes :)

But, no, if those are side lights - which they look like they are - they are illegal. So this is definitely a safety issue. As I mentioned above, they won't satisfy the required visibility spec. Look back at your notes from when you took a safe boater's class - it's in there ;)
I have my Captains license the picture doesn't show the reality of the lights I assure there is no issue other than ugly as hell I have new ones on order I can mail them to you if you want them lol
 
I have my Captains license the picture doesn't show the reality of the lights I assure there is no issue other than ugly as hell I have new ones on order I can mail them to you if you want them lol
Part of the benefit of forums like this is discussing and learning new things - which I always enjoy. With that in mind, can you explain how those side lights offer the correct visibility when mounted vertically - including NOT being seen to the opposite side of the bow and also the required 112* aft?

No, I don't want them! :)

I should have been more clear... do you have any other pics of the floor rebuild? I always like to see how others did it (again, looking to learn!).
 
After I look at them more I realized what you were saying about the bow lights even though I felt they were good to go I realize now that yes you are right I don't have the radius I should and they actually blind my night vision under way thanks for bringing to my attention did my first seatrial
 
Part of the benefit of forums like this is discussing and learning new things - which I always enjoy. With that in mind, can you explain how those side lights offer the correct visibility when mounted vertically - including NOT being seen to the opposite side of the bow and also the required 112* aft?

No, I don't want them! :)

I should have been more clear... do you have any other pics of the floor rebuild? I always like to see how others did it (again, looking to learn!).
As far as the floor I only repaired the back fishing area didn't take a lot of pictures of that part wasn't much to it. I just removed the rotten plywood filled the stringers with epoxy filler were needed and refloored it. Once I laid the new plywood down I let it dry out from it being treated and then fiberglassed it all in 2 layers of matte then 2 layers of the finish matting
 
After I look at them more I realized what you were saying about the bow lights even though I felt they were good to go I realize now that yes you are right I don't have the radius I should and they actually blind my night vision under way thanks for bringing to my attention did my first seatrial
10-4 :)
 
As far as the floor I only repaired the back fishing area didn't take a lot of pictures of that part wasn't much to it. I just removed the rotten plywood filled the stringers with epoxy filler were needed and refloored it. Once I laid the new plywood down I let it dry out from it being treated and then fiberglassed it all in 2 layers of matte then 2 layers of the finish matting
Interesting - so your actual fiberglass "floor" is all new glass? I cheated when I did my cockpit - I reused the glass that I cut off. I cut the glass floor into a few sections and then used a single layer of lightweight mat in between the marine ply and the "skins" that I cut off.
 
Interesting - so your actual fiberglass "floor" is all new glass? I cheated when I did my cockpit - I reused the glass that I cut off. I cut the glass floor into a few sections and then used a single layer of lightweight mat in between the marine ply and the "skins" that I cut off.
I was going to do that but since I was putting foam flooring down I figured any discrepancy would be covered anyway if I didn't get a perfect finish lol
 
I was going to do that but since I was putting foam flooring down I figured any discrepancy would be covered anyway if I didn't get a perfect finish lol
I did a similar thing (used Plasdeck - looks/feels more like teak) when I installed a windlass on my Sea Ray's front deck. No need to make the underside look pretty!

Truthfully... even though I was painting my Grady's floor, I re-used the top skin simply to keep costs down :)