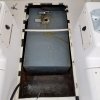
Adventure 208: Removing Gas Filler tube from Gas Tank neck

Joined
Nov 19, 2018
Messages
11
Reaction score
1
Points
3
Age
68
Model
Adventure
OK, I have the fuel tank completely free except for the filler tube attached to the tank neck. I have it freed-up; it turns on the neck nipple, but won’t slide off....won’t budge! Trying not to cut the hose, so I attempted to remove the gas cap filler flange. The filler flange isn’t screwed into the glass, but has a machine screw and nuts backing it up? And there is zero access to the nuts; must have pre-installed before they put the body cap on the hull????!!!! Guess I’ll drill out the oval head machine screws and drive them through?....then cut the filler hose and snake a new one back to the tank. I was trying not to do this, so if anyone has a solution. It’s a 1996 boat, so the rubber fill tube isn’t too supple; probably just replace it? Thanks, CT
 

Halfhitch

GreatGrady Captain
Joined
Nov 11, 2017
Messages
1,412
Reaction score
457
Points
83
Location
Venice, Florida
CT, Having the filler flange bolted instead of screwed on is a plus except when it's time to remove it with no easy access. I am not familiar with the details of your boats layout but is it possible to install a small deck hatch/inspection plate close enough to let you reach, or maybe even see, in there?
 

DennisG01

GreatGrady Captain
Joined
Sep 1, 2013
Messages
7,190
Reaction score
1,341
Points
113
Location
Allentown, PA & Friendship, ME
Model
Offshore
I imagine the problem you're running into in trying to get the hose off the tank's filler nipple is that the hose is just so darn stiff (reinforced) and there isn't enough space to try and get the hose to bend a bit before the hose disappears through a hole. A couple thoughts come to mind...

-- Pour a large enough quantity of hot water on the hose so it becomes more flexible. A heat gun would be great... but the idea of working around the gas tank with a heat gun has some obvious flaws.

-- Depending on the angle of the hose coming off the tank vs the direction you can remove the tank, start to remove the tank while also sliding the hose off.

-- Half's idea of creating an access port to remove the nuts on the fuel fill deck plate is good (are you sure there is nothing you can remove to get access?).

-- If you have room, just cut the hose about 4" behind the fuel tank nipple, then use a barb fitting to connect the two pieces back together.

-- At 23 years old, it's certainly acceptable to go ahead and replace it... but you still need the access to the fuel fill deck plate. Might as well do the vent hose, as well.
 
Joined
Nov 19, 2018
Messages
11
Reaction score
1
Points
3
Age
68
Model
Adventure
Tank is out. Other than the fact the forward wedges driven between the tank and stringers were screwed in before the cap was places on the hull....had to take my multi-tool and slice through the toed-in screws to remove the wedges, then it was a cinch! (Well almost). Everywhere I read talks about the tank resting on a foam snake cushion which apparently soaks-up the brine in the bilge and oxidizes the aluminu at the contact point. This tank is sitting on a pretty hard rubber/plastic extrusion ~1”w x 1/2”thick. The tank looks nearly perfect!....I was assuming the worst, which is why I pulled this tank in the first place, not knowing the history of the boat. I’m beginning to think its previous life was in fresh water..... So, the removal wasn’t necessary after all. I’m going to coal tar epoxy the tank’s exterior and re-install with new hoses. B15402A7-D3B0-4D9C-8073-50D8C5D422C1.jpeg6F894280-3DB7-4D0B-BB63-BF5C84454EBA.jpeg
 

Ky Grady

GreatGrady Captain
Staff member
Joined
Mar 1, 2006
Messages
3,027
Reaction score
1,351
Points
113
Location
Berea, KY/Cross, SC
Model
Seafarer
My tank was resting on similar strips also. Overall my tank was in good shape too being 14 years old and all saltwater life. The sending unit flange took mine out. To far gone to salvage. Ordering new one first week of January.

20181104_163953.jpg20181105_165525.jpg
 

seasick

Well-Known Member
Joined
Aug 19, 2008
Messages
9,531
Reaction score
1,420
Points
113
Location
NYC
I assume you know that that flange leaked based on the stains.
The flange for the sender looks pretty bad and getting a no leak seal might be a challenge. If you have enough meat you should try to sand down the flange after removing any old gasket and see if you can get a decent surface. If not, you can try an extra gasket bedded in sealant. The sealant has to be approved for gasoline application. As to the mounting screws, if the holes are not good enough for the screws, bolts are a possibility but they should be installed with the head in the tanks ( in other words, nuts are installed from the outside. The bolts should be bedded in something like MarineTex which can stand contact with gas. MarineTex is not what you would use on the gasket flange. That has to be flexible to an extent.
Finally, you might want to consider have a pressure test done to make sure there are no pin holes. Personally, after all that work and based on how the flange looks to me, I probably would replace the tacn.
 
  • Like
Reactions: Ky Grady

seasick

Well-Known Member
Joined
Aug 19, 2008
Messages
9,531
Reaction score
1,420
Points
113
Location
NYC
My '93 has a spare fuel fill hose taped to the one being used, from the fill fitting to the tank.
Why?
Perhaps someone ran a new line and left the old but if they ran 2 lines with one as a spare, after ten years you still have two ten year old hoses:)
 

DennisG01

GreatGrady Captain
Joined
Sep 1, 2013
Messages
7,190
Reaction score
1,341
Points
113
Location
Allentown, PA & Friendship, ME
Model
Offshore
Why?
Perhaps someone ran a new line and left the old but if they ran 2 lines with one as a spare, after ten years you still have two ten year old hoses:)
I bet that's the reason - makes the most sense, anyways. "I don't want to have to run a new hose again - that was a real PIA. Let's run two at the same time so if the first one goes bad, we have another ready to go". I suppose if the first one would have a defect that showed up within a few years, it makes sense. But other than that, you're right - even though the spare was never used, it's still X-number of years old.
 

Ky Grady

GreatGrady Captain
Staff member
Joined
Mar 1, 2006
Messages
3,027
Reaction score
1,351
Points
113
Location
Berea, KY/Cross, SC
Model
Seafarer
I assume you know that that flange leaked based on the stains.
The flange for the sender looks pretty bad and getting a no leak seal might be a challenge. If you have enough meat you should try to sand down the flange after removing any old gasket and see if you can get a decent surface. If not, you can try an extra gasket bedded in sealant. The sealant has to be approved for gasoline application. As to the mounting screws, if the holes are not good enough for the screws, bolts are a possibility but they should be installed with the head in the tanks ( in other words, nuts are installed from the outside. The bolts should be bedded in something like MarineTex which can stand contact with gas. MarineTex is not what you would use on the gasket flange. That has to be flexible to an extent.
Finally, you might want to consider have a pressure test done to make sure there are no pin holes. Personally, after all that work and based on how the flange looks to me, I probably would replace the tacn.

I work in the industry so very familiar with what I'm seeing. Flange is to far gone to try and salvage. Had leaks at both the flange and pickup fitting. Peace of mind and safety, new tank is going in.
 

seasick

Well-Known Member
Joined
Aug 19, 2008
Messages
9,531
Reaction score
1,420
Points
113
Location
NYC
Wise move.. Good luck with the project.
 
Joined
Nov 19, 2018
Messages
11
Reaction score
1
Points
3
Age
68
Model
Adventure
Freeport... you forgot the most important part in your post... What did you have to do to remove it?

Hi Dennis - The actual removal (lifting) of the tank wasn’t as difficult as freeing it up! The wood hold-downs / cross bracing between the stringers were toe-screwed with 3” s.s. screws; easy enough to back out and remove the braces. However, the wedges on the side of the tank were also toe-screwed. Two wedges were clearly accessible, then there were two which were installed prior to the cap of the boat being installed and were forward of the access hatch. I was able to take my Fein tool (multi-tool) with a wood/metal blade and plunge-cut the 3” screws to free the forward wedges. Last was the fill tube. Very hard rubber; no way it was slipping off the neck! Cut the hose with a hack saw blade and was able to yank the tank. Tank is now in the shop and I’m researching a coating to apply and keep this 1995 tank in business. Anyone have experience with something other than coal tar epoxy? I understand that’s 1960’s technology.....
 
Joined
Nov 19, 2018
Messages
11
Reaction score
1
Points
3
Age
68
Model
Adventure
Well, the tank is coated with (2) heavy coats of two-part epoxy paint: CM15 from Progressive Epoxy Polymers in NH. They have an incredible website for boaters (and it’s super confusing, but chock full). We’re receiving a ton of snow this weekend on the coast, so probably will await Spring for the re-install. 0583779E-AFC1-4191-8A70-25F5E064D66C.jpeg
 

Halfhitch

GreatGrady Captain
Joined
Nov 11, 2017
Messages
1,412
Reaction score
457
Points
83
Location
Venice, Florida
Freeport Adventure, Looking at your picture, it appears there is a double lamination of the tank at the gauge sender opening. Did the tank outfit install an extra thickness there for more thread support or was that OEM?
 

DennisG01

GreatGrady Captain
Joined
Sep 1, 2013
Messages
7,190
Reaction score
1,341
Points
113
Location
Allentown, PA & Friendship, ME
Model
Offshore
Looks nice, Freeport. Boy, you're not kidding about that website! That first page is like 18 feet long! I bookmarked it :)

Freeport, Maine? We have a few cottages a bit north of you in Cushing, Friendship, and Friendship Long Island. Beautiful areas, up there - and Freeport, as well.