Boat Lift Storage Best Practices

Candylane

Member
Joined
Dec 14, 2020
Messages
9
Reaction score
1
Points
3
Location
Mississippi/Louisiana
Model
Marlin
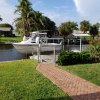
Folks, just purchased a home on a brackish water canal. In the process of buliding an exposed boathouse with a lift to keep my Marlin raised and out of the water after use. Looking for best practices on storing the boat on a lift. It does have a fresh coat of bottom paint. Should you wash the hull with fresh water after every use? Can I just lift and leave it?
 

magicalbill

GreatGrady Captain
Joined
Aug 15, 2005
Messages
1,663
Reaction score
314
Points
83
Location
Indiana
Model
Marlin
I'm obsessive, so take this with a grain...

1.) Make sure you contact Grady for the bunk placement & positioning on a Marlin hull. Whomever is doing your lift may be knowledgeable, but make sure.

2.) Your lift capacity should be at least 15k. (Mine is 16K.) Your Marlin will come in around 12K, mine is 12.5K, loaded with fuel & gear. You want a safety margin regarding weight cap and it's not that much more expensive.

3.) I prefer 20 ft. bunks, which I have for my lift. Others go with 10 or 15 ft. To me, the more hull that is supported, the better. The bunks need to contact the hull as far astern as possible so there is little "overhang." (Grady recommends 3-4 inches from the transom.) Also, make certain when the bunks are being set and the guide poles are positioned, that the bunks are not resting on the trim tabs. (Mine are close.)

4.) RE: Washing/Rinsing:

I spray my whole boat & hull down every time. While I'm leaning under the hull, I spray the lift off as well. Since you have bottom paint, it may not be necessary to spray the hull, but spray any part of the boat that got hit with saltwater underway. Regarding spraying the lift; you have the hose in your hand; it only takes a few minutes and it will extend the life of the lift. (Re-read my opening statement....)

5.) I don't recommend leaving the lift submerged while your on your boat trips. It will just degenerate faster over time and a remote by your helm will lower it for you while your circling around, waiting to drive it on.

6.) I have found it extremely helpful to lower the lift to the point where your Marlin free-floats and at that point, mark one of the stern guide poles with electrical tape. This way, you don't lower the lift any further than you have to when you are ready to drive the boat on.

7.) It is a $ 700.00 option, maybe more nowadays, but the "Hi Speed" electric motors are a big time-saver when raising & lowering the boat. The slow speed models give you time to go have lunch while the boat is raising up or down.

8.) Lastly, I stand by flushing your engines after every trip. (Re-read my opening statement.) Even in brackish water, flushing outboards extends their life.

Lifts are marvelous things. I would never leave a boat slipped in the water full-time.
 

Ky Grady

GreatGrady Captain
Staff member
Joined
Mar 1, 2006
Messages
3,027
Reaction score
1,351
Points
113
Location
Berea, KY/Cross, SC
Model
Seafarer
Bunk placement and boat orientation on said bunks is key. I did this on a VRBO rental house lift a few years back in Cape Coral. Love the idea of a lift, very happy to be able to lift boat out and hose off after use, but since this was a rental, don't know what boat the bunks were set for. Floated a little too far forward and crushed my high-speed pick up when I lifted one time.

20180521_090032.jpg20180529_172635.jpg
 

g0tagrip

GreatGrady Captain
Joined
Mar 14, 2010
Messages
407
Reaction score
31
Points
28
Location
Indialantic
One other point, be sure the lift has large zincs to protect the lift beams. And check them every 6 months, replace them when they are 60% gone. Stray voltage in canals will eat your lift without them.
Oh, and unplug your lift after each usage.
 
  • Like
Reactions: magicalbill

Aquanut2

Well-Known Member
Joined
Feb 23, 2016
Messages
86
Reaction score
10
Points
8
Location
Beaufort NC
Model
Marlin
One other point, be sure the lift has large zincs to protect the lift beams. And check them every 6 months, replace them when they are 60% gone. Stray voltage in canals will eat your lift without them.
Oh, and unplug your lift after each usage.
g0tagrip Where would you place the Zincs? If you have a pic could you share it? Do you think it necessary if I like magicalbill am as obsessive leave lift out of water when underway and rinse it after use?
 
S

schliewe

Guest
Wow, appreciate the great run down! Magicbill doesn't mess around! Keep the tips coming.
 

g0tagrip

GreatGrady Captain
Joined
Mar 14, 2010
Messages
407
Reaction score
31
Points
28
Location
Indialantic
Whomever puts in your boat lift should know to add two zincs, they should hang about two feet underwater., one on each side of the lift. They are the sacrificial zincs to take on any stray electrical current in your canal.
 

Ridge Runner

Well-Known Member
Joined
Apr 30, 2015
Messages
157
Reaction score
30
Points
28
Good advice above. We have a drive-thru lift at the Cape Coral, FL house. We drive in bow first on one end, and when prepping to leave we walk it out and tie up ahead of the lift so there is no chance of lower unit or lift damage...
Since you are building, here is some food for thought:
Build a V-shaped deck that fits your bow. Build docks/decks down both sides. The outside dock gives you the ability to work/wash all the way around your boat. It also serves as an auxiliary dock to tie up to when you have visitors, or buy a second boat. The last wish-list item should be a draw bridge on a small winch that you can lower just behind the outboards for use in flushing/maintenance, etc. Oh, in case nobody else said it, Shore Power and fresh water hose are mandatory. Don't skimp on the lighting at your built-in fish cleaning station either...
 
  • Like
Reactions: magicalbill