Fiberglass cockpit sole soft spot

Chablis

New Member
Joined
Oct 25, 2019
Messages
1
Reaction score
0
Points
1
Age
88
Model
Adventure
I have a soft area on the cockpit floor section that opens to the hull on my GW 20 , I am wondering if I unscrew and pull up if it can be fiberglass repaired or is there a parts cover that I can order. No cracks visible.
 
I have a soft area on the cockpit floor section that opens to the hull on my GW 20 , I am wondering if I unscrew and pull up if it can be fiberglass repaired or is there a parts cover that I can order. No cracks visible.
I'm not completely sure of what you are describing, but a picture would help. However, you may be talking about a floor hatch that is screwed in? Like a floor panel that is covering the gas tank? Yes, that is completely fixable and a pretty easy job for anyone familiar with basic fiberglass work. If this is something you'd do yourself, search around for various threads about this - or post back with more info andI/we can provide more detail. But if it's not something you would do yourself... I'm just trying to save my fingertips! :)
 
I have a soft area on the cockpit floor section that opens to the hull on my GW 20 , I am wondering if I unscrew and pull up if it can be fiberglass repaired or is there a parts cover that I can order. No cracks visible.

Is it a 208 walkaround? I just did mine when I replaced the fuel tank.
It was also soft. I have a thread around here somewhere I can link if you like. I have a picture of what the soft spot looked like when I pulled up the deck hatch
 
I believe you are referencing the removable section, if so you could have anything from a simple delamination of the core from the glass to rotted coring that needs to be replaced. Fairly easy job and there are a few folks on the board that have done it.
 
If you do it right it’ll be rock solid
 

Attachments

  • 829D1D61-AC16-4991-8C39-26A4411BA4C8.jpeg
    829D1D61-AC16-4991-8C39-26A4411BA4C8.jpeg
    1.3 MB · Views: 51
  • A5B8D55B-AF8B-42E2-8FCB-589626A12445.jpeg
    A5B8D55B-AF8B-42E2-8FCB-589626A12445.jpeg
    1.4 MB · Views: 50
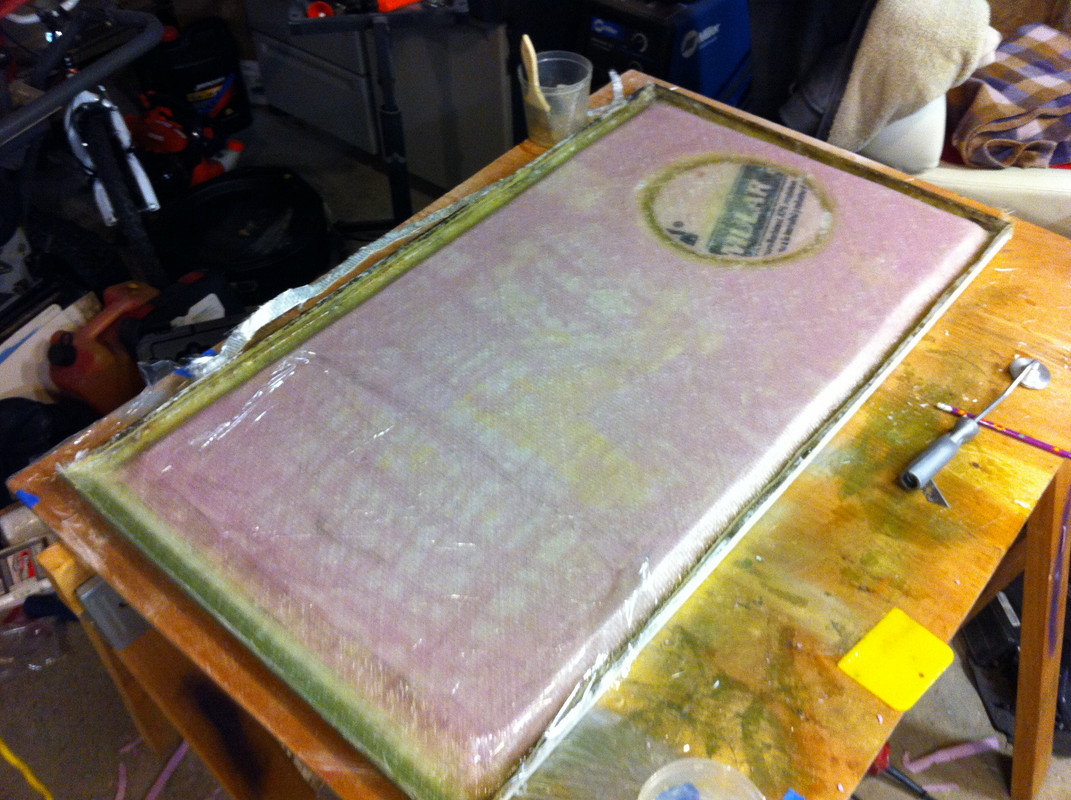
Did this as an experiment... pink foamboard insulation from Home depot:

IMG-4097.jpg
 
This was done by a professional shop. Very happy with the results. Never understood why GW used all those small square pieceshatch.jpgDeckHatchBottom.jpg
 
Never understood why GW used all those small square pieces
The only logical explanation I've ever heard is that it's to avoid air bubbles between the wood and the the fiberglass panel. I can personally verify that this happens and is sometimes hard to control/avoid. Using the small pieces allows you work out any trapped air much easier.
 
The only logical explanation I've ever heard is that it's to avoid air bubbles between the wood and the the fiberglass panel. I can personally verify that this happens and is sometimes hard to control/avoid. Using the small pieces allows you work out any trapped air much easier.

Interesting explanation, but do not agree on that being the reason for all the small pieces. Im sure you can get the air bubbles out if there was only 4 pieces
I just let the pro's handle this part of the job for me so I could do other things that Im better at ;)
 
Interesting explanation, but do not agree on that being the reason for all the small pieces. Im sure you can get the air bubbles out if there was only 4 pieces
I just let the pro's handle this part of the job for me so I could do other things that Im better at ;)
I don't disagree that larger pieces than 8" could work. I'm not a pro, but I will say that I had a heck of time getting the air bubbles out from a 2'x2' hatch I made. I ended up drilling a bunch of 1" holes in the wood, then filled the holes with thickened epoxy before putting a layer of glass on. On the other hand, I was rushing as I had to have everything ready to go the next morning for a 500-mile trip.

I suspect another reason for the 8" squares could be:

-- Easier for manufacturing. A 4'x8' sheet is easily divisible into 8" squares.
-- Different boats would have different sized hatches and floors (the boats with wood-cored floors ALSO were cored with 8" squares). Using 8" squares probably makes it easier to quickly adapt to different sized "areas". As the pieces get larger, you start to get into custom sizing (or more trimming), which takes longer. As you noticed in your hatch, it's not really all that important to have full coverage. The pieces can just be, well, "pieced" in - even somewhat haphazardly is fine. The strength of the hatch comes not from the actual core, but from the separation of the two layers of glass (hence the reason why that foamboard still works).

I'm envisioning that on the Grady plant floor, there are large bins of these 8" squares and the workers just fit them in the best they can - along with little chop saws right near by to quickly fit small pieces.
 
Last edited:
Something worth mentioning.......on all the new repair pics above the wood (or foam board) edges have been tapered and edges were filled with epoxy/cabosil mixture to allow all the screw holes to be drilled in solid glass. All my punky spots on my original tank cover looks to be started from the wood being drilled out and the screw holes allowed water to infiltrate the wood core (See 2nd pic on post #8 from Hookup). Also in between the wood blocks was no resin and only covered with one layer of mat.
This poor construction technique from GW factory seemed to be the norm.
 
Grady used small square pieces so they won't warp down the road.

Rationale is if only one large piece of marine grade plywood there is a risk of that happening.
 
Grady used small square pieces so they won't warp down the road.

Rationale is if only one large piece of marine grade plywood there is a risk of that happening.

I heard that too, as a precaution I let my first layer set up with heavy scrap metal on a flat cement floor.
 

Attachments

  • 05E9D867-EE8C-4383-BED6-63DD6FCD6469.jpeg
    05E9D867-EE8C-4383-BED6-63DD6FCD6469.jpeg
    1.1 MB · Views: 22
Something worth mentioning.......on all the new repair pics above the wood (or foam board) edges have been tapered and edges were filled with epoxy/cabosil mixture to allow all the screw holes to be drilled in solid glass. All my punky spots on my original tank cover looks to be started from the wood being drilled out and the screw holes allowed water to infiltrate the wood core (See 2nd pic on post #8 from Hookup). Also in between the wood blocks was no resin and only covered with one layer of mat.
This poor construction technique from GW factory seemed to be the norm.

Yes, yes and yes. Spot on
 
For the people that paid to have this work done what did it run you? I need to get my small hatch done (behind the tank cover in front of my seat) and the tank cover had a small soft spot that i want taken care of as well.
 
between 4-5 hundred for the deck hatch