Flush mounting electronics on a seafarer

T.C. Seafarer

New Member
Joined
Jul 29, 2012
Messages
2
Reaction score
0
Points
0
This is my first post as I just got my 2001 228g at the beginning of the month.
I am looking to mount a Garmin 740s and a Garmin VHF 100.

I have read several posts about flush mounting electronics over the "glove box" on seafarers. It seems that most cut an over-sized piece of starboard and screw it down. Has anyone tried to get a piece of acrylic/colored plexi cut to match the opening and glued/bonded it to the lip the door gasket rests on. I have found a place that will cut the acrylic to size and cut the mounting holes for the electronics (I don't have the proper tools for this). I know that starboard will not bond well to gelcoat (or anything else) and this may be a way to get a very flush look.

Any thoughts?

Will
 

Strikezone

GreatGrady Captain
Joined
May 9, 2007
Messages
610
Reaction score
2
Points
0
Location
Charleston, SC
Will,

I just went through this same process earlier in the spring. Initially I had planned on fabricating a fiberglass panel that could be gelcoated to match the rest of the help. This would replace the acrylic door and blend in nicely.

After more thought I decided to take a different approach and make a starboard panel that would be attached from the rear while leaving the door in place. This would give the electronics a little more protection and still present a nice finish.

I used a piece of starboard in the Seafoam color which matches great with the Grady color. This is attached at the bottom by screws into the plywood foundation of the helm. The top of the panel is attached with really long machine screws through the hinges on the door. The panel is very secure and is finished with a bead of caulk around the edges.

You can fit two 7xx Garmin units into this space. This gives you a dedicated FF unit and separate chartplotter. Having the whole screen makes viewing so much easier.

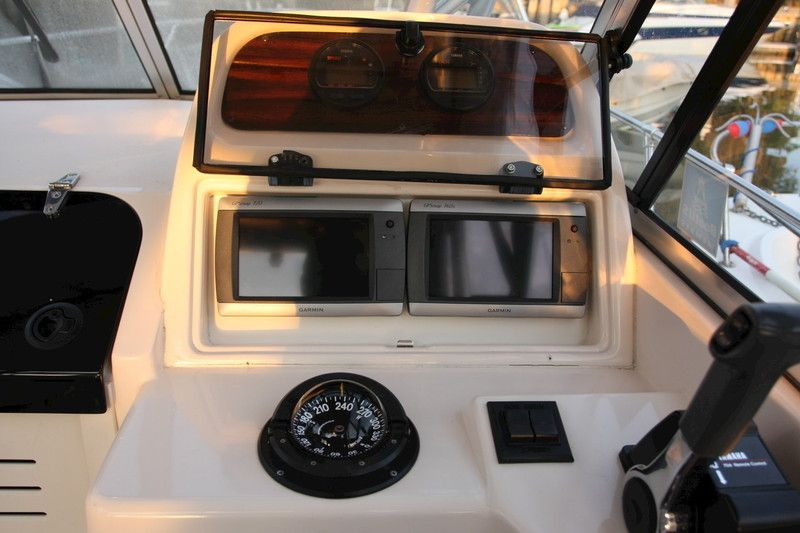
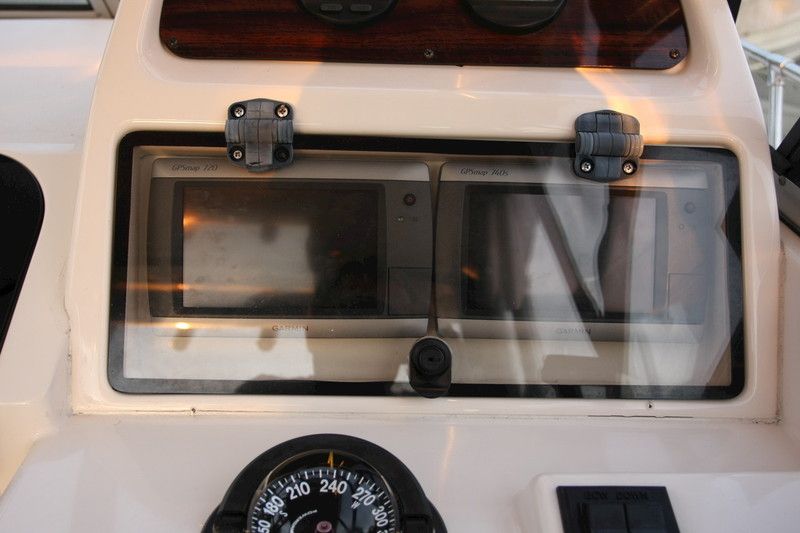
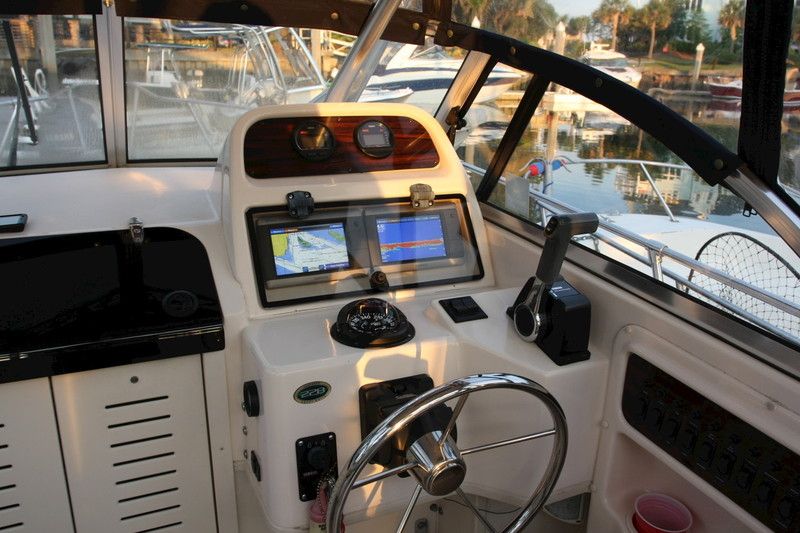
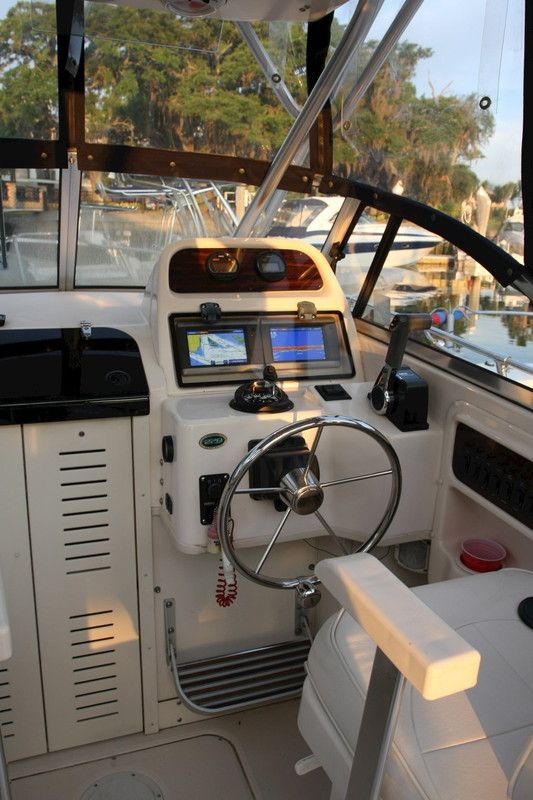
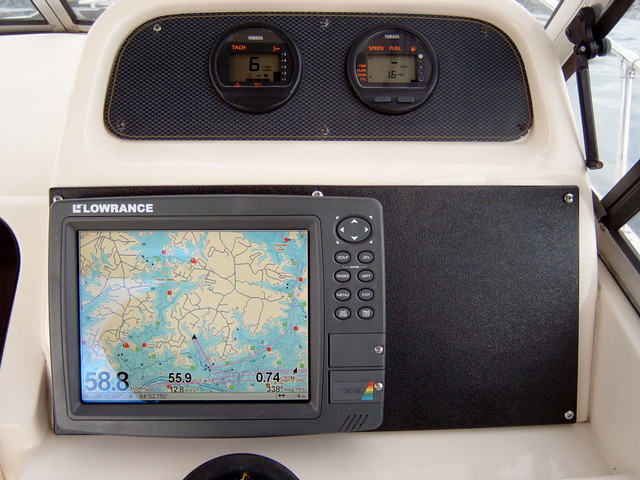
Here's a photo of my finished product. I can take some detailed photos if you'd like of the back side of the panel to show how things are attached.

IMG_0410.jpg
 

T.C. Seafarer

New Member
Joined
Jul 29, 2012
Messages
2
Reaction score
0
Points
0
Strikezone, thank you for the reply.
I like how you have mounted the Starboard from behind. I have to mount my VHF to the right of the chart plotter (no where else to put it) and will not have room to mount the mic under the VHF unless I can keep everything flush with the exterior. I think I am going to try black acrylic and 4200 to do this, hopefully it works.
 

RJTFD

Well-Known Member
Joined
Jan 29, 2006
Messages
117
Reaction score
2
Points
18
Age
57
Location
Manasquan NJ
Strikezone nice job. I mounted mine almost the same except I made a panel that fits inside of box and flush mounted my gps and fishfinder to that . I can still close acrylic door and i'm able to lock it. I first made a template out of 1/8' luan plywood so panel fit perfect around edges inside box I also cut out holes for electronics and placed them on panel so they were excately where I wanted them and I was still able to close door when everything was good I cut to small strips and and mounted them inside box with 5200 and let dry. After that I cut a piece of 1/2" finished plywood cut it to match my template painted it black and than put a bead of silicone and mounted it to strips. After it was dry I was able to secure my fishfinder using mountind screws and my gps I just used a small dab of silicone to hold it in place. If I ever need to get behind electronics I just need to pull off gps. I know it sounds a little complicated but I didnnt want to remove acrylic door or drill any holes in dash.
It came out very good and doesnt look like a handyman special I'm a bit of a perfectionist and might have a little OCD in me!!! Thats why I didnt want to remove acrylic door.
Good luck
Good luck
 

Strikezone

GreatGrady Captain
Joined
May 9, 2007
Messages
610
Reaction score
2
Points
0
Location
Charleston, SC
I pretty much did the same thing. Made a template from thin sheet of plywood, mounted the Garmins, and trimmed to fit from behind. The trick was getting them placed where the lock on the door would latch. These units are packed in about as tight as possible...not much space around the edges.

I liked the fact that the door offered some protection from the weather and/or making the units a little more tough to steal.

The finished product looks like a factory install. Not sure why Grady doesn't update these helms so you don't have to modify things to flush mount your plotters.
 

GulfSea

Well-Known Member
Joined
Oct 23, 2010
Messages
198
Reaction score
1
Points
0
Location
Florida Panhandle
T.C. Seafarer said:
This is my first post as I just got my 2001 228g at the beginning of the month.
I am looking to mount a Garmin 740s and a Garmin VHF 100.

I have read several posts about flush mounting electronics over the "glove box" on seafarers. It seems that most cut an over-sized piece of starboard and screw it down. Has anyone tried to get a piece of acrylic/colored plexi cut to match the opening and glued/bonded it to the lip the door gasket rests on. I have found a place that will cut the acrylic to size and cut the mounting holes for the electronics (I don't have the proper tools for this). I know that starboard will not bond well to gelcoat (or anything else) and this may be a way to get a very flush look.

Any thoughts?

Will

I have an 08' 228 with 2 HDS-8's and considered flush mounting each along with a variety of methods finally electing to mount each with their bracket inside the boxes. One is in the box at the helm and the other on the port side radio box above and have been very satisfied with the set up. I keep the upper unit on sonar most of the time allowing everyone fishing to see what lies below. 99% of the time, I keep the helm unit on plotter'/sonar split while drift fishing.

The benefits of having each mounted this way is they can be locked up and/or removed. Right now my boat is being serviced and both units are here at home with me. This afternoon I'll take one and update waypoints and trails from the last trip out while sitting in my recliner. Not that flush mounts can't be removed but it is more of a challenge.
 

salmonbb

New Member
Joined
Apr 20, 2015
Messages
4
Reaction score
0
Points
1
Strikezone,

Any chance you could re-post the pic of your star-board flush mount set-up behind the cabinet cover? I just bought a new chartplotter, was looking into attempting to fabricate a fiberglass flush-mount area in place of the box cover, when I noticed this thread.

Thanks!

- Salmon
 

salmonbb

New Member
Joined
Apr 20, 2015
Messages
4
Reaction score
0
Points
1
NICE! Thanks for posting! I've got a 7" garmin chartplotter/fishfinder, and would mount that on the left side. On the right, I'd like to put in my stereo receiver and VHF radio, but like another person on here stated, I'm not sure the BTB would fit behind the "glass." I might try to come up with something, though. I don't have a hard top, so that option is out. I like how by mounting from the inside, you have that layer of added security for your electronics. Great work!

:goodjob
 

Joe

Well-Known Member
Joined
Mar 22, 2005
Messages
46
Reaction score
0
Points
0
Strikezone--I REALLY like that idea. How did you attach the backing board to the electronics "hole"? I don't see any obvious screws on the rim of the electronics entrance?

Thanks!
 

Strikezone

GreatGrady Captain
Joined
May 9, 2007
Messages
610
Reaction score
2
Points
0
Location
Charleston, SC
To attach the upper part of the panel I drilled through the plexiglass door hinge and added a long machine screw on each side. For the bottom of the panel I drilled into the plywood base of the helm. This was from inside the cabin. I put three screws on the bottom but think that two would have been sufficient.

After everything is cinched up tight I ran a bead of almond colored caulk around the edges just to tidy things up.
 

Joe

Well-Known Member
Joined
Mar 22, 2005
Messages
46
Reaction score
0
Points
0
Thanks Stroke Zone. I looked at mine this weekend and those top screws must have been pretty long. Did you go through the plastic roof of the electronics area?

Also, did you screw into the near horizontal portion of the bottom?

Just trying to figure this out before I start...

Thanks!
 

Parthery

GreatGrady Captain
Joined
Jan 31, 2005
Messages
2,589
Reaction score
220
Points
63
Location
Atlanta, GA
Strikezone, do you not have trouble with the plexiglass door falling down? My experience has been that one good bump causes it to fall down. Of course, if it's clear and you can see through it then its a non-issue. If its the black plexiglass, it's another story....
 

Strikezone

GreatGrady Captain
Joined
May 9, 2007
Messages
610
Reaction score
2
Points
0
Location
Charleston, SC
I replaced the spring hinges that hold the plexiglas door in the up position. Not been a problem with them falling down.
 

journeyman

GreatGrady Captain
Joined
May 12, 2008
Messages
678
Reaction score
12
Points
18
Location
Gloucester, MA
Model
Marlin
Strikezone, you're right, it does look like a factory install. Nice work!

Strikezone said:
I replaced the spring hinges that hold the plexiglas door in the up position. Not been a problem with them falling down.

I've found over the years that the spring hinges get tired and do need to be replaced periodically. Kinda like my knees! LOL!
 

salmonbb

New Member
Joined
Apr 20, 2015
Messages
4
Reaction score
0
Points
1
Just bought my starboard today and made my measurements. Hoping to have it mounted within the next week or two. Will post pictures once done. Wish me luck!
 

Sba

Active Member
Joined
Sep 20, 2014
Messages
26
Reaction score
1
Points
1
TC Seafarer, did you ever mount your electronics to the lip of the electric box? I am now going through this with my 228 GW , I think Strikezone idea is good and it looks professional, however I would like to have access to the unit with out having the lid up or falling down. It seems to me there is enough edge around the door frame where the gasket to mount one-quarter inch sea foam,hopefully that would be thick enough the size of the plexiglass door and use 4-6 screws with washers on the back side.I don't know any other way to attach this.I would like to use black unless I can get the exact color of the interior. Any help or suggestions form anyone would greatly be appreciated.
 

Parthery

GreatGrady Captain
Joined
Jan 31, 2005
Messages
2,589
Reaction score
220
Points
63
Location
Atlanta, GA
SBA - I had a Seafarer....now have a Tournament. In both cases I removed the door and did a flush mount panel.

The Seafarer panel was done with 1/4" Starboard. I found it to not have enough strength and in the summer, would warp slightly due to the weight of the GPS. Went with 1/2" Starboard on the Tournament and it worked much better.

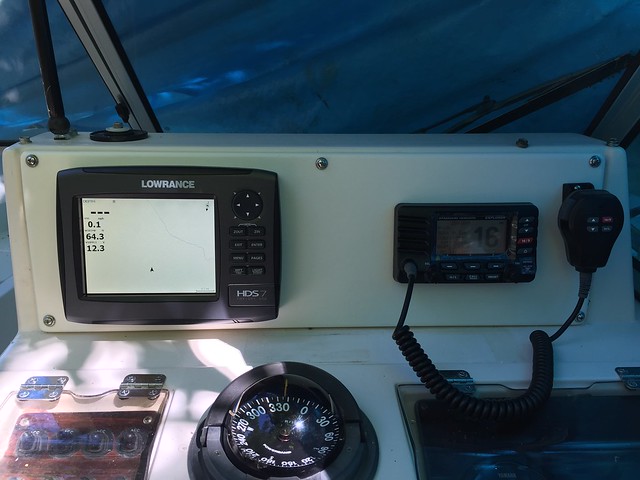
Here are some pics...first one is the Seafarer...second one is the Tournament.

6770621967_e8c11d348d_z.jpg


17136405167_12986b966e_z.jpg
 

Sba

Active Member
Joined
Sep 20, 2014
Messages
26
Reaction score
1
Points
1
Thanks Parthery, I will take you advice and go with one-half inch black starboard, looks like you mounted over the entire area ,It is definitely would be stronger.

do you mine telling me where you got it ,the starboard,and how much , you by chance remember what size you order, Really thank you for your response, nothing like someone who has done that and learned it was not strong enough! Steve
 

Parthery

GreatGrady Captain
Joined
Jan 31, 2005
Messages
2,589
Reaction score
220
Points
63
Location
Atlanta, GA
SBA, the first panel was done by Florida Marine Plastics....caveat emptor with them...Google and read away.

The second panel was done by fellow GG member jbrinch88 who was doing some starboard work for awhile but I believe he has changed marinas and no longer has access to the woodworking tools which are used. It's a shame because he was VERY reasonable, and when he did the panel for the 225 (back in April of this year) it was at my door in less then a week.

If jbrinch is out of the business, two other options are Boat Outfitters (boatoutfitters.com) and Fin-Addict (finaddictmarine.com)

Regardless of who you use, you need to measure the opening that you want to cover. I went 1/2"further around the outside edge of the e-box so that I could drill the screws into the fiberglass. The panel was permanent....I've seen some folks do a panel the exact size as the door and add the latches but I wanted to cover the existing hinge holes. Once you have the measurements, you will essentially download the templates for your electronics and email them to the vendor. They need the templates to cut the holes for you.

Nice thing about the Seafarer e-box is you can access it from the cabin....install the electronics in the panel and then install the panel on the dash. Flip the access down from inside the cabin and wire everything up.