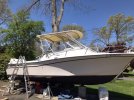
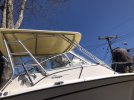
Hardtop paint-265Express

DennisG01

GreatGrady Captain
Joined
Sep 1, 2013
Messages
7,190
Reaction score
1,341
Points
113
Location
Allentown, PA & Friendship, ME
Model
Offshore
Yup - I know what you mean about the weather! Not always the most cooperative.

ANYTHING you do is going to look better, right? But... isn't that AquaMist a Whaler color? Taboo! :) Actually, it's a nice looking color!
 
  • Like
Reactions: SkunkBoat

SkunkBoat

Well-Known Member
Joined
Oct 12, 2017
Messages
4,509
Reaction score
1,614
Points
113
Location
Manasquan Inlet NJ
Website
www.youtube.com
Model
Express 265
So the weather still sucks but i ordered and received the paint. I went with TotalBoat WetEdge from Jamestown Distributors. I have heard that its on par with EZpoxy and Interlux Brightside. They had the best pricing by far, available colors in stock and free fast shipping. Very impressed. I ordered Tuesday morning, got it Thursday afternoon.
It was so cheap I bought in gallons instead of trying to guess the # of quarts. Got a gallon of primer, a gallon of Fighting Lady Yellow and a gallon of White (just plain old WHITE rather than trying to match the seven faded shades of Grady gelcoat).
If I knew how quickly it would ship I could have went with 2 quarts each and if I needed more could get it quick.
I just could not commit to yellow on both top and underside. Going with White on top and yellow underside and, as a side project, yellow tailgate (maybe another post on that)
In theory, I could get two coats on both sides with the yellow gallon if I change my mind and go for it.

I agonized over choice between AquaMist and Fighting Lady yellow.
I used some software to color the top in some photos. In some I said "Thats it! AquaMist" and others it was "Oh ya, yellow."
But in some other pix it just seemed strange to have color on top.
Funny, looking around at boats, canvas tops are almost always a color but hardtops are NEVER a color.
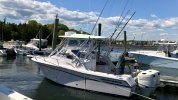
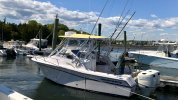
AquaMist 265 top.jpg
yellow265 top.jpg
Aqua top2.jpg
 
  • Like
Reactions: Hookup1

Chessie246G

Well-Known Member
Joined
Oct 31, 2021
Messages
301
Reaction score
104
Points
43
Age
47
Location
Maryland
Model
Explorer
I think the yellow top would have looked sharp... :)

Im planning on painting my hull in the fall. Rub rail down - Navy blue. Alexseal. gal of paint, primer, hardener, brush agent. about $1000 Changing the stripe and decals to white.
 
  • Like
Reactions: SkunkBoat

SkunkBoat

Well-Known Member
Joined
Oct 12, 2017
Messages
4,509
Reaction score
1,614
Points
113
Location
Manasquan Inlet NJ
Website
www.youtube.com
Model
Express 265
Painting the underside of the hardtop and the tailgate Fighting Lady yellow. if I ever painted the hull it would be yellow. I don't think that I'll be the owner that paints the hull though. The next guy needs a project.;)
Yellow pix to follow.


Funny thing... when I roll the white top out of the garage and next to the boat, the boat immediately looks creamier and less faded.
 

Hookup1

GreatGrady Captain
Joined
Oct 16, 2007
Messages
3,035
Reaction score
855
Points
113
Age
70
Location
Cape May, NJ
Model
Islander
My PM question answered!

I'm not sure what to do with my hardtop. The gelcoat is chipping off the sides just like my hatches. Whatever GW sprays/pours into the mold after the gelcoat is sprayed in is real hard and difficult to bond to. Gelcoat is "chalky" and breaking down. First question is should I remove all the topside gelcoat by sanding or soda blasting? I will loose the non-skid but I can add that in when repainted (maybe leave it out).

The underside is simpler. It looks like it was rolled on paint. Where silicone or 5200 caulk was removed it pulled the paint layer off and you can see glass threads. Same issue though - remove it or paint over it?

I'm going to try to talk to two local glass/paint guys next week to see what they say. Unfortunately everyone is super busy.

As far as paint goes I prefer to use a two-part polyurethane like AwlGrip in a standard color or a reproducible custom color. Lots of painting projects ahead.
 

SkunkBoat

Well-Known Member
Joined
Oct 12, 2017
Messages
4,509
Reaction score
1,614
Points
113
Location
Manasquan Inlet NJ
Website
www.youtube.com
Model
Express 265
some notes;

I filled old holes and faired some edge chips with epoxy & filler. I prepped the textured top by basically wet sanding with a coarse scrubby and Acetone. Then wiped down twice with acetone. You can't sand because you smooth the texture. I have a few smooth spots from fairing the holes. Not going to worry about that.

I used Total Boat WetEdge one part poly. Good enough for a hardtop. Looks good. Just put final coat on last night.
I overbought. I bought gallon of each(primer and two colors). I have more than 1/2 gallon left of each and I had wasted extra on each pour. I mixed one pint (16oz)at a time and that was more than enought for one coat on one side. I kept the coats very thin per instructions.
I have 3 white coats on top and two yellow underside (plus primer)


Just a warning...dry time is variable! Primer dried as listed but first coat of paint over primer took 48 hrs to dry, It was still sticky after 21 hrs and that was ideal conditions. Later coats took a full day to dry. Luckily I was in a garage with electric heater. Outside would have been a disaster.
I used thinner 5% on first coat. After the "2 day to dry" panic I skipped the thinner. Thinner DOES keep a wet edge much better.
Then I bought some Pettit Enhancer and used that instead of thinner. Can't say it is any better or not.
 

SkunkBoat

Well-Known Member
Joined
Oct 12, 2017
Messages
4,509
Reaction score
1,614
Points
113
Location
Manasquan Inlet NJ
Website
www.youtube.com
Model
Express 265
The original underside is rolled or "sprayed-on-top" gelcoat. Thin. DON"T USE 5200 on that! I had an old 5200 spot that peeled of too.

The texture on top is useless. Nobody is going to walk up there. Its not necessary. IMO it would clean better if smooth.
( like below the gunnels..why the F did they put texture there?)

Paint did not fill it so I still have texture. BUT, you cannot sand the top to prep or you will be forced to sand the whole thing smooth. IMO a waste of effort. After Soap/water/softscrub bleach cleaning, I used a coarse scrubby and acetone to "wet sand" the texture clean to prep for primer. that took off the chalk.


There is a D- shaped rubber gasket material around the hardtop to frame connection. Found some on amazon https://www.amazon.com/dp/B088TMTVZ8?psc=1&ref=ppx_yo2ov_dt_b_product_details
It sits down on that to fill gaps and prevent squeaks. Then the inside and outside are siliconed.
 
Last edited:

blindmullet

Well-Known Member
Joined
Oct 19, 2015
Messages
449
Reaction score
106
Points
43
Location
Florida
Model
Explorer
Yep---a 2 part uses solvents and it cures as they evaporate. All that single part crap is more dependant on water/air. Their bildge paint can take forever to dry. I was so pissed the first time I tried it. It was about a week because of all the waiting between coats.
 

Hookup1

GreatGrady Captain
Joined
Oct 16, 2007
Messages
3,035
Reaction score
855
Points
113
Age
70
Location
Cape May, NJ
Model
Islander
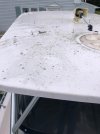
Couple of photos. The first on is the hardtop. Yes it dirty but the little green blotches are like mold growth on a tree. They need to be sanded out. The aft edge (not shown) the gelcoat is failing. Small chips.

Gel fail.jpeg

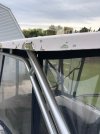
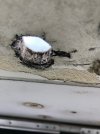
The side of the hardtop is potato chipping. Same on bow pulpit, forward hatch, transom door and 3 of the 4 compartment lids. Looks like black mold underneath. When you sand the edges you can see it underneath the gelcoat. If you sand enough eventually it cleans up.

Gel Chips.jpeg

I need to be sure about my surface prep. As a practical matter though stripping the gelcoat and prep for paint is labor intensive and will be expensive.

Hardtop is loose and ready to be removed. Maybe Sunday. I have a friend with a high lift forklift. Protected from the wind. Welder will install plates for riggers on Monday.

Hardtop coring.jpeg

The hardtop is definitely cored. This isn't the best photo but you can see at top layer of glass about 3/16" thick. Then the coring then a thin glass layer. This doesn't look like a hand layup. Looks a special process used for making hardtops maybe outside Grady. In the areas you can see it is light beige balsa colored. Can't tell if it's wood or synthetic. No deterioration so maybe it is synthetic.

I'm going to take a shot at the prep work myself. See where it goes. I'll definitely use 2-part epoxy filler and paint. Maybe roll out high build primer and get ready for final prime/paint. My brother has a auto body shop in North Jersey. He can do the spraying.
 
Last edited:
  • Like
Reactions: Grey56

SkunkBoat

Well-Known Member
Joined
Oct 12, 2017
Messages
4,509
Reaction score
1,614
Points
113
Location
Manasquan Inlet NJ
Website
www.youtube.com
Model
Express 265
The green stuff (Lichen) will scrubb off with a stiff brush and softscrub bleach. then soap& water. ( I'm hoping the paint makes cleaning a breeze)
After that scrub with acetone. Wipe with acetone.( there are other chems to wipe with that don't evaporate as fast)
I had a couple chips like yours but not so bad. 60 grit sanding wheel on the grinder and take it to clean substrate. Don't be shy. You can reshape it with epoxy filler.

Its made the typical way they make a hatch. A mold, release agent, spray in gelcoat, pour in filler, spray in glass & resin, add core, spray glass & resin, spray gelcoat, pop it out of the mold.
The radius edges are thick filler. Some had voids and bubbles...


I have chipped hatches too. Thats next years project. Thats a different problem because I would have to really try to match color. I'm not planning to paint the whole boat.

I repaired some big chips in my tailgate and painted the whole thing yellow to match the underside of the hardtop. I used high density filler because the piano hinge screws thru that edge.. Fingers crossed it holds up.
 

Attachments

  • hardtop-2.jpeg
    hardtop-2.jpeg
    122.8 KB · Views: 26
  • 265tailgatePrep4.jpeg
    265tailgatePrep4.jpeg
    134.5 KB · Views: 28
  • Like
Reactions: Grey56 and Hookup1

SkunkBoat

Well-Known Member
Joined
Oct 12, 2017
Messages
4,509
Reaction score
1,614
Points
113
Location
Manasquan Inlet NJ
Website
www.youtube.com
Model
Express 265
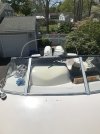
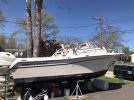
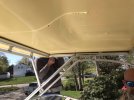
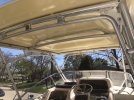
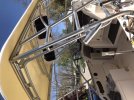
Had a barn raising yesterday. Some pictures

edit: Added a before pic of frame crack...
top cracks-1.jpeg
 

Attachments

  • DAE1E49D-201C-416E-BD81-63890EF173BB.jpeg
    DAE1E49D-201C-416E-BD81-63890EF173BB.jpeg
    1.9 MB · Views: 48
  • 00048EAC-C6DF-4E48-8559-417D7959A0F5.jpeg
    00048EAC-C6DF-4E48-8559-417D7959A0F5.jpeg
    113.4 KB · Views: 48
  • 09568DCE-8AE4-40E8-AE8A-19F75310B846.jpeg
    09568DCE-8AE4-40E8-AE8A-19F75310B846.jpeg
    97.5 KB · Views: 50
  • A59B2E60-F6C8-4E33-B7CB-C14071E9CBBC.jpeg
    A59B2E60-F6C8-4E33-B7CB-C14071E9CBBC.jpeg
    122.2 KB · Views: 50
  • 1CF4B099-7DD0-424B-87E1-D6FAC81B0FF2.jpeg
    1CF4B099-7DD0-424B-87E1-D6FAC81B0FF2.jpeg
    125.8 KB · Views: 49
  • 47AB09B9-893B-4BDE-91EA-9685C79853C0.jpeg
    47AB09B9-893B-4BDE-91EA-9685C79853C0.jpeg
    133 KB · Views: 49
  • 6C984C04-1AE2-4A0C-B9CC-3CFEE0AF0B87.jpeg
    6C984C04-1AE2-4A0C-B9CC-3CFEE0AF0B87.jpeg
    101.5 KB · Views: 50
Last edited:
  • Like
Reactions: PointedRose