How can I dry up a fresh-water-soaked transom?

punter2004

New Member
Joined
Feb 3, 2015
Messages
1
Reaction score
0
Points
0
I own a 1993 Grady outboard that we think is 19 feet long, and has hull number NTLBC653E393. We have a 150 hp Yamaha on her, and it runs like a top in the Thousand Islands area of the St. Lawrence River. However, when installing a new transducer last summer, I found that the two screw holes produced wet wood cores. How can I best dry out the transom so that it can be sealed and last a few more years? Is this possible? We have a back-up boat that we can use this coming summer if it takes the summer to dry it out.
 

Socalinsd

Member
Joined
Sep 16, 2013
Messages
21
Reaction score
0
Points
1
Hard to say how bad the issue is. You can try a few things like standing and bouncing on the anti cavitation plate with the motor trimmed down and look for deflection. If its more than a 1/4" of movement, the structural integrity might be compromised. Also look for obviois signs like stress cracks along the top of the transom. You can also use a plastic mallet or screwdriver handle and tap all over the transom looking for clues. It should be a sharp crack, a dull thud could inicate the presence of water logged areas. These are just a few tips I was given, I had a wet transom as well due to improper sealing of the trim tabs. For peace of mind I had mineinspected by a fiberglass specialist. Very common problem in the older boats but it may still be fine for several years more, I would get it inspected to be on the safe side.

As for DIY repair, you may be able to drill several holes in the problem area, shop vac out some of the water and fill with epoxy or git rot product. Seems like more of a bandaid solution as opposed to a transom rebuild. Anyway try some of the checks above and see what a reputable shop thinks about it. Hope this helps.
 

seasick

Well-Known Member
Joined
Aug 19, 2008
Messages
9,530
Reaction score
1,420
Points
113
Location
NYC
Socalinsd said:
Hard to say how bad the issue is. You can try a few things like standing and bouncing on the anti cavitation plate with the motor trimmed down and look for deflection. If its more than a 1/4" of movement, the structural integrity might be compromised. Also look for obviois signs like stress cracks along the top of the transom. You can also use a plastic mallet or screwdriver handle and tap all over the transom looking for clues. It should be a sharp crack, a dull thud could inicate the presence of water logged areas. These are just a few tips I was given, I had a wet transom as well due to improper sealing of the trim tabs. For peace of mind I had mineinspected by a fiberglass specialist. Very common problem in the older boats but it may still be fine for several years more, I would get it inspected to be on the safe side.

As for DIY repair, you may be able to drill several holes in the problem area, shop vac out some of the water and fill with epoxy or git rot product. Seems like more of a bandaid solution as opposed to a transom rebuild. Anyway try some of the checks above and see what a reputable shop thinks about it. Hope this helps.

If the transom is seriously wet, it will not dry out in any realistic time frame. If you are lucky, the water is only near the transducer screw holes. That is a fairly common occurrence and can be dealt with.
A person knowledgeable in the use of a moisture meter could determine the extent of the water intrusion. You can also try tapping all around the transom with a plastic faced hammer ( leather faced is really the right tool) and listen for evidence of delamination. Delamination is bad and no amount of drying will fix it. If you do not detect delamination, you probably have some life left in the transom.
You might also see how much and for how long you see water or moisture leak out of the screw holes. The more there is, in general, the more extensive the water intrusion.
You might also want to remove and inspect the garboard drain to see if there is water there too. Inspect the inside surface of drain hole. It may need to be sealed with epoxy. If there are no major issues, re-install the drain using screws one size larger than those removed,fill the screw holes and coat the threads will 4200 or 5200. Bed the drain flange also.
Good luck
 

reelserious

Well-Known Member
Joined
Jan 2, 2007
Messages
177
Reaction score
8
Points
18
Location
Beverly, Ma/Tarpon Springs, Fl
I owned a Champion bass boat for many years. Great boats but certain years/models are known for transom problems. I read the Champion boat section of Bass Boat Central website freuently. You can search the site for the topic (numerous threads on how to dry a transom). Here is a link for a video one of the members made documenting the process. http://www.bbcboards.net/champion-boats/561787-drying-out-transom-replacing-jackplate.html

Per the suggestiouns above, a moisture meter or a hammer will help determine the extent.

Good luck.
 

grady_22

Well-Known Member
Joined
Feb 26, 2015
Messages
60
Reaction score
4
Points
8
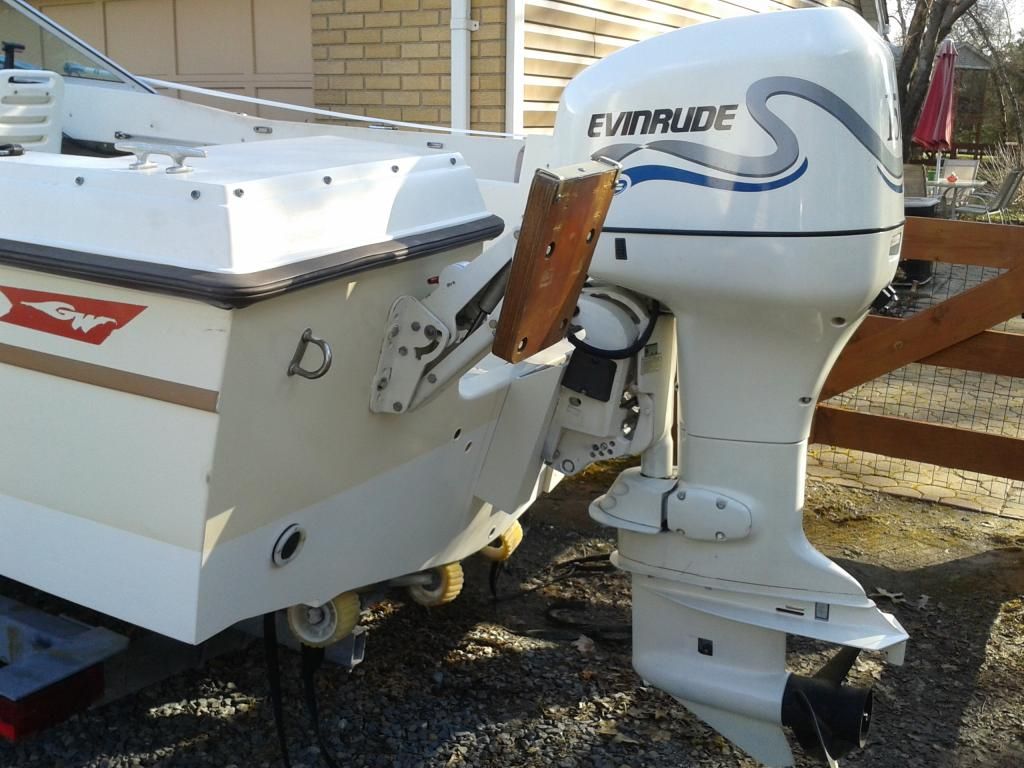
I had a 1982 Grady White Tarpon that had a moderately damp transom, but was still very stout with little evidence of rot. I had wanted to close in the transom cap and remove the dreaded corroded aluminum angle. Fortunately, I was able to fit the boat in my garage. What I ended up doing was pulling the outboard, cutting back the glass over the lip to expose the wood beneath. I pulled all the thru-hulls out of the transom (most were in sorry shape anyways). This allowed a decent bit of wood to be exposed, particularly at the top of the transom. Over the course of early November to March, I had several heat lamps and fans set up around the transom. I know for certain that it did not completely dry it out, but all of the exposed areas were below 15 percent moisture on my moisture meter. After it was dried out, I used a long 1/4 drill bit to drill small galleys in a pattern along the transom from the top. I then soaked a good bit of penetrating epoxy and thinned epoxy down into the transom.

For the thru-hulls I scraped out some wood from around the thru-hull areas and filled with a thickened epoxy mixture. I ground down the old fiberglass cap and used it as a starting point for closing the transom back in, which really helped in keeping the original shape without too much blending and fairing. I then tried re-gelcoating everything from the splashwell back, but the finish did not come out right (still not sure exactly what happened), and the color was impossible to match to the sun-faded 1982 gelcoat. So, the next offseason, I took all the gelcoat back down and refinished it all with System Three polyurethane (http://www.systemthree.com/store/pc/WR- ... at-c29.htm). Color was close, and obviously a lot more glossy than the rest of the boat, but it looked good as I had made a nice tapeline delineating the splashwell area. I included some pics below.


seasick

Well-Known Member
Joined
Aug 19, 2008
Messages
9,530
Reaction score
1,420
Points
113
Location
NYC
I agree that in some cases, water has entered the transom core through leaks under the aluminum cap structure but it does serve a purpose.
The transom is under a lot of stress and the gel-coat can spider crack. When the top of the transom is only glass and gelcoat, those cracks can lead to water intrusion.Granted, the epoxy coating/sealing under the cap will also crack if stressed enough but in that case the aluminum cap acts as a 'flexable' cover that should shed water. The trick on maintenance is to make sure that the bedding and sealing caulk is intact. That is not always easy to do or to inspect without removing the rub rail end caps and/or motor to inspect under the cap.
My feeling is that a moisture test every few years or more often or when you suspect there may be leakage is a non-intrusive way to check for excess moisture. While you are at it, a full transom check is recommended since I see more water intrusion issues through the garboard drain hole and transducer screw holes.
 

Jcontour

Member
Joined
Feb 22, 2015
Messages
10
Reaction score
0
Points
0
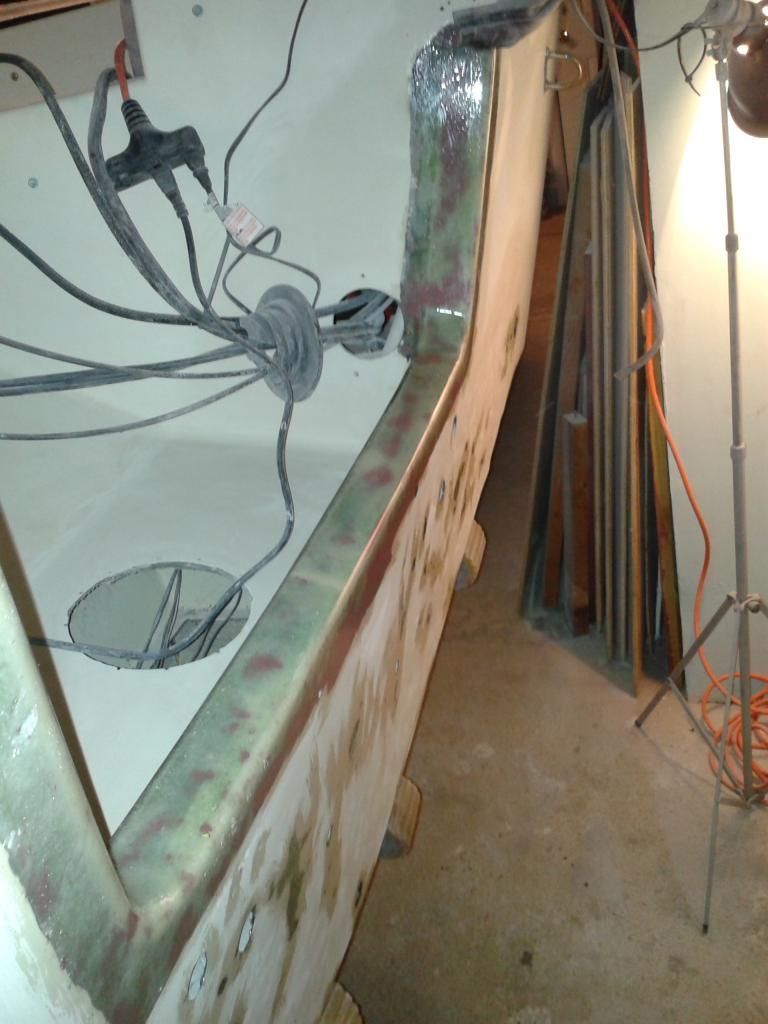
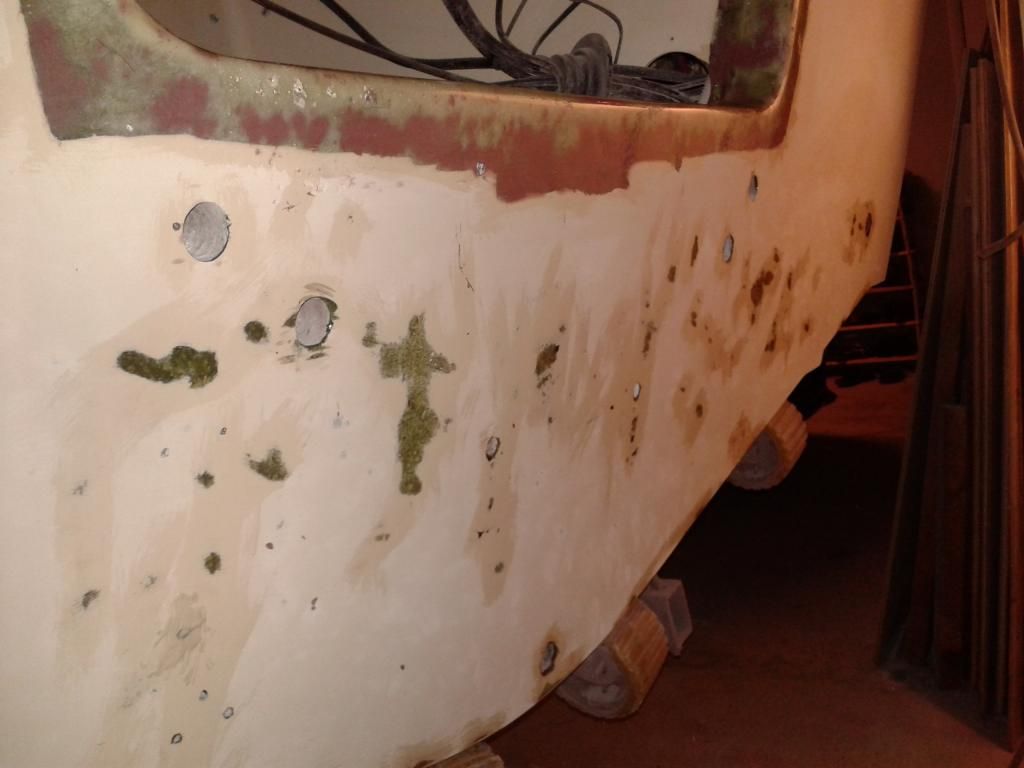
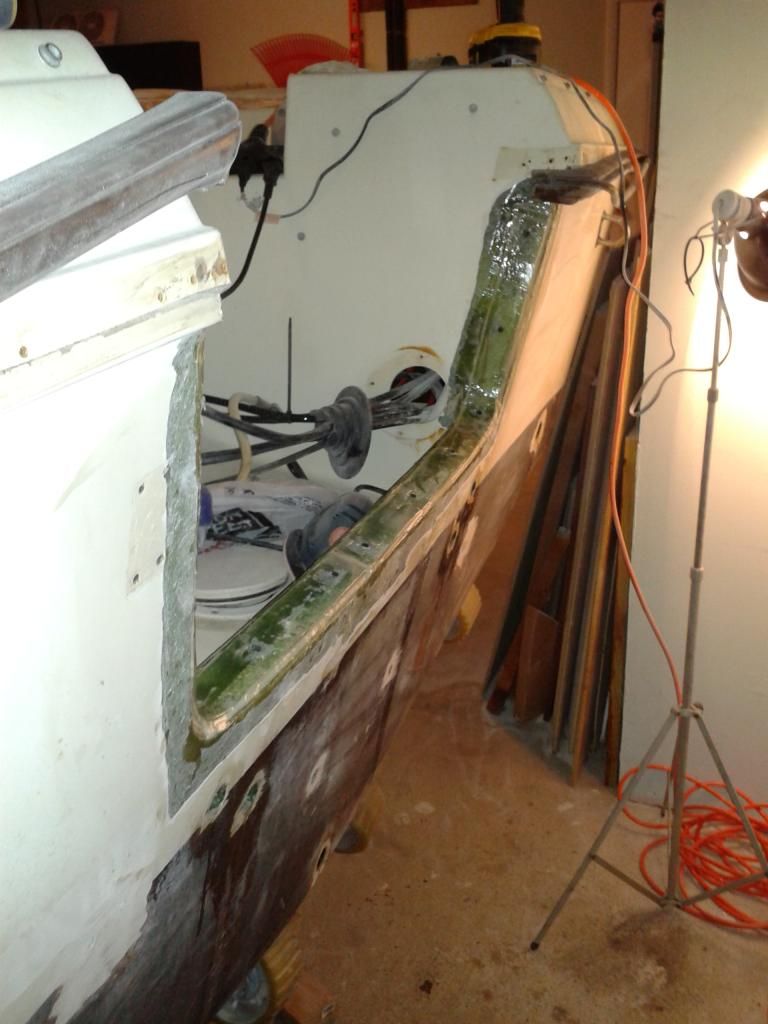
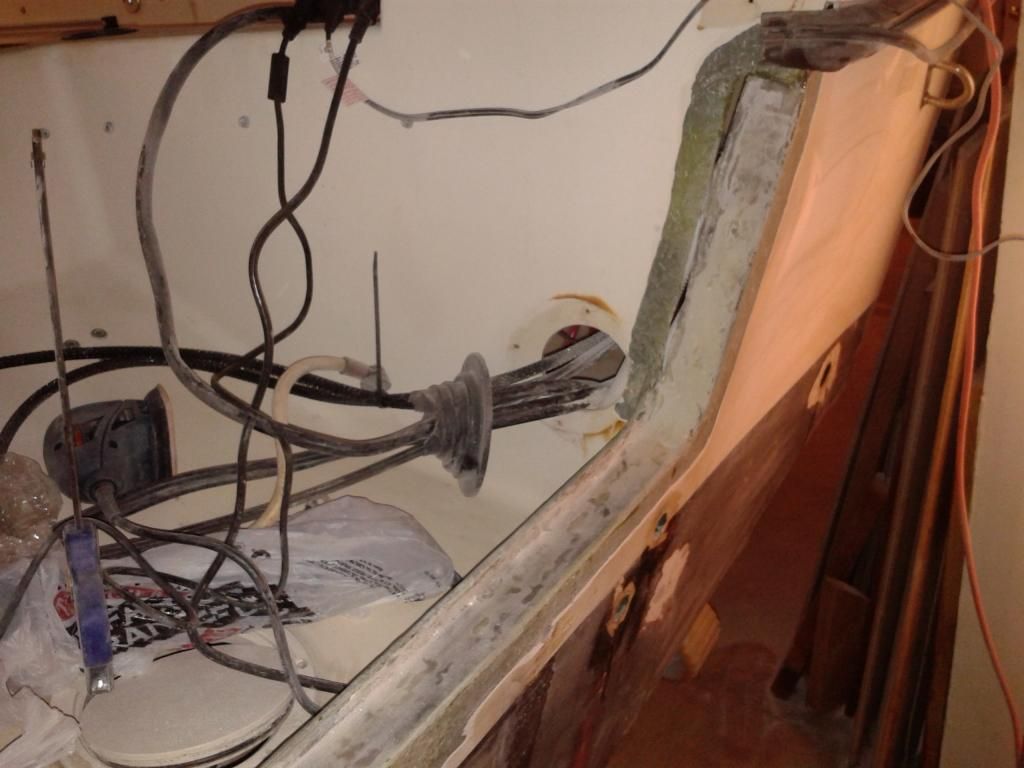
I just finished cleaning up the transom on my 1994 - 209.

I bonded the transom all around the deck cutout with Plexus adhesive, there was absolutely nothing holding the hull to the deck on the vertical walls of the engine cutout area, only the silly aluminum strips. While performing the surgery, the wood core was dry, but the outer glass skin was delaminated, I actually suspect that this was poorly bonded from day 1 as its notoriously hard to bond transom wood in place without bagging it in. I put VE resin in between and re-bonded......Its very strong now.

Upon removing the sonar transducer, the nice owner before me left some open screw holes and poorly bedded fittings in the hull, when removed yesterday, I noticed that it was a bit wet only in that area. I applied a vacuum bag to the area and turned on our massive pumps, and immediately water started dripping out. I'm going to leave the vacuum on it for a few days to pull what ever moisture I can out of it. Once I'm happy that its reasonably dry, I'm going to Vacuum bag infuse resin back through the laminate. There is a hole that the transducer wire comes through that is about 10" above the waterline, I'm going to vacuum from there and feed through the screw holes where the transducer used to be. Hopefully the resin will migrate up the transom and out the hole.

To correct the problem of screws in the hull, Im going to bond the SS mounting bracket for the transducer to the hull with Plexus......no more holes below my waterline!

Pictures Attached
 

Attachments

  • IMG_7112.JPG
    IMG_7112.JPG
    1.7 MB · Views: 3,223
  • IMG_7113.JPG
    IMG_7113.JPG
    1.3 MB · Views: 3,232
  • IMG_7114.JPG
    IMG_7114.JPG
    1.8 MB · Views: 3,226
  • IMG_7089.JPG
    IMG_7089.JPG
    1.5 MB · Views: 3,224

gw204

Well-Known Member
Joined
Jan 31, 2005
Messages
2,479
Reaction score
22
Points
38
Location
St. Leonard, MD
If it's only slightly wet in spots, what Jcontour posted is the way to go.

If it really is soaked, bit the bullet and replace it.