Hydraulic steering problem

NORTONP

Member
Joined
Nov 8, 2020
Messages
19
Reaction score
1
Points
3
Age
75
Location
Boston
Model
Tournament 225
I have a 22' GW with 250 Yamaha 4 stroke. The boat veers to port side, I continually need to steer to starboard to compensate. I have disassembled the helm and everything seems to be moving freely and re-bled the system, doing same thing. Also, I find that when I tilt the motor up and leave it in center position, when I return the next day, the motor has flopped to one side or the other.
5 star marine down in Florida that rebuilds these systems, thought it might be a cracked inner plastic bushing and o-ring, thus leaking from side to side. But Seastar will not sell them that part so can't be rebuilt. They suggested to buy a new one. I also tried adjusting the trim zinc, did not seem to do much?

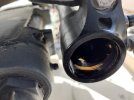
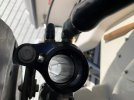
In the meantime, I dis-assembled the Seastar Cylinder. I expected to find an o-ring or gasket mounted on a plastic piece centrally located on the shaft. It is not an o-ring instead it looks like a brass like disc sandwiched between 2 plastic pieces. I suspect that it works by having a close tolerance fit between the disc and the bore of the cylinder. Could this be worn to the point that fluid is leaking from one side to the other? I'm not convinced of that, It looks to be in good shape. I don't want to spend $600 on a new cylinder to find out that it is not the problem.

Has anyone else had this issue? any other ideas?
Paul
 

Willy-C

Well-Known Member
Joined
Nov 5, 2012
Messages
189
Reaction score
66
Points
28
Age
68
Location
Hooksett, NH
Any pics of the cylinder piston head?
I suspect it’s a Teflon/bronze 2-piece piston seal (?).
I run a hyd machine shop north of you and repair all types of hyd cylinders, might be able to help.
 
  • Like
Reactions: SmokyMtnGrady

seasick

Well-Known Member
Joined
Aug 19, 2008
Messages
9,530
Reaction score
1,420
Points
113
Location
NYC
Did you bleed the system following the Seastar instructions? If you bled it by yourself, you didn't follow those instructions:)
The fact that the motor 'falls' over when tilted up means one of two things 1. there is air in the system or 2. you have a leak. It is also possible that the check valves in the pump head are dirty. In that case you can have bleed back but you won't leak oil. The valves may be accessible from behind the dash
So, do you loose oil?

On another topic. The trim tab should be adjusted so that the back end (aft) of the tab is turned a small amount to the right, maybe 15 degrees or less as a starting point . Bad adjustment of the tab may put extra turning force on the steering but it is not your problem.
If you can, lower the motor, set to straight ahead and try to rotate it at the motor by pushing on it. If it is springy, the steering system has air. If it rotates without holding the steering wheel and you don't oil leaking, you have an internal leak.
Sometimes if the oil is changed out, a dirty/stuck check valve may clear up but you have to get as much of the old oil out as possible and you will need at least two bottles of new fluid to refill and bleed
 
Last edited:

SmokyMtnGrady

Well-Known Member
Joined
Jul 11, 2009
Messages
2,020
Reaction score
504
Points
113
Once you solve this issue I highly advise you get those plastic pieces you insert on the steering ram. They reduce or eliminate the stress of a 500 pound power head has on seals . the pieces for on the outboard edge of each side and stop motor flop completely. It will increase the life of the seals and when towing keeps the motor in one stable position . Good luck .
 

Hookup1

GreatGrady Captain
Joined
Oct 16, 2007
Messages
3,035
Reaction score
855
Points
113
Age
70
Location
Cape May, NJ
Model
Islander
Let's start with the most important question - are you leaking any fluid? Does the helm station fluid level fall? If so how much and how fast?

If the valves in the helm unit are "leaking" (they control pumping fluid left or right) you won't loose fluid but they won't seal and let fluid pass.

The motor shifting to one side or the other when trimmed up is common. Again - assuming you are not leaking fluid. There are stops you can slip on. I bought My-Wedge supports and a 5" steering support (most are 4"). https://www.amazon.com/Gatorbak-Gator-Lock/dp/B07XFGS2PT

Unlikely it is a cylinder. If the piston or cylinder is damaged you will have to replace it. Not repairable. If leaking yes replace the seals but use OEM not aftermarket.

If you are continually having to turn starboard to keep the boat going straight I'll bet its the helm pump. Don't fool around with it - just replace it. Maybe Willy-C can go over your pump and cylinder.
 
Last edited:
  • Like
Reactions: wspitler

NORTONP

Member
Joined
Nov 8, 2020
Messages
19
Reaction score
1
Points
3
Age
75
Location
Boston
Model
Tournament 225
Did you bleed the system following the Seastar instructions? If you bled it by yourself, you didn't follow those instructions:)
The fact that the motor 'falls' over when tilted up means one of two things 1. there is air in the system or 2. you have a leak. It is also possible that the check valves in the pump head are dirty. In that case you can have bleed back but you won't leak oil. The valves may be accessible from behind the dash
So, do you loose oil?

On another topic. The trim tab should be adjusted so that the back end (aft) of the tab is turned a small amount to the right, maybe 15 degrees or less as a starting point . Bad adjustment of the tab may put extra turning force on the steering but it is not your problem.
If you can, lower the motor, set to straight ahead and try to rotate it at the motor by pushing on it. If it is springy, the steering system has air. If it rotates without holding the steering wheel and you don't oil leaking, you have an internal leak.
Sometimes if the oil is changed out, a dirty/stuck check valve may clear up but you have to get as much of the old oil out as possible and you will need at least two bottles of new fluid to refill and bleed
 

NORTONP

Member
Joined
Nov 8, 2020
Messages
19
Reaction score
1
Points
3
Age
75
Location
Boston
Model
Tournament 225
Thanks for all of the advice. There is no leaking of fluid externally and no loss of fluid. I had previously removed the helm thinking the issue was caused by the valves in the helm. I removed and cleaned the valve body and bore the best that I could, although initially it seemed to move back and forth freely. I then bled the system using the method using interconnecting both bled screws that is described in several you tube video's. After bleeding, the motor seems to be pretty tight when you push on it. I will check on the Seastar bleeding instructions.

When dis-assembled the cylinder I did notice an orange like residue in the fluid remaining in the cylinder, almost looked like very, very fine metal particles? I wounder how tight that fit needs to be in order not to allow passage of fluid from one side to the other.

I May take another look at the helm.
 

seasick

Well-Known Member
Joined
Aug 19, 2008
Messages
9,530
Reaction score
1,420
Points
113
Location
NYC
The bleeding using the tubing connecting the two bleed fittings can be hit and miss. It may work better with two people, one at the helm and one astern. The reason is that someone has to pay close attention to the fluid level at the helm. If it drops too much in the reservoir it will suck air into the system. Same issue at the cylinder. If you don't insure that the steering piston doesn't move , air can get sucked back in as you tighten the bleed valve. The best method is to follow the instructions and use a short piece of tubing stuck in a clear jar that has an inch or so of fluid. As you bleed there should be no bubbles visible in that bleed tubing. Using a clean jar also generally allows the reuse of the fluid for refilling and additional bleeding assuming it is not obviously contaminated.
 

NORTONP

Member
Joined
Nov 8, 2020
Messages
19
Reaction score
1
Points
3
Age
75
Location
Boston
Model
Tournament 225
I ordered a helm seal kit and 2 qts of fluid so I can clean out the helm valves again and then I will refill and bleed system per Seastar method.
 

Hookup1

GreatGrady Captain
Joined
Oct 16, 2007
Messages
3,035
Reaction score
855
Points
113
Age
70
Location
Cape May, NJ
Model
Islander
I bled mine successfully in January with the YouTube short-hose two bleed screw method. One person job. I would recommend taking the bleed screws off, cleaning and replacing the o-rings before attempting. Put new caps on fittings too. Wiggling the motor gives you some idea if there is any air left in the system.
 

seasick

Well-Known Member
Joined
Aug 19, 2008
Messages
9,530
Reaction score
1,420
Points
113
Location
NYC
I bled mine successfully in January with the YouTube short-hose two bleed screw method. One person job. I would recommend taking the bleed screws off, cleaning and replacing the o-rings before attempting. Put new caps on fittings too. Wiggling the motor gives you some idea if there is any air left in the system.
Interesting. I am going to have to try that method again. Did you just use tubing or did you get the correct quick connectors? Did you pre fill the tubing with fluid before bleeding?
 

Hookup1

GreatGrady Captain
Joined
Oct 16, 2007
Messages
3,035
Reaction score
855
Points
113
Age
70
Location
Cape May, NJ
Model
Islander
Just the tubing - no quick connects. I did not prefilll tubing. I setup my helm station like an IV - hanging the bottle connected to the fill with the usual fill hose. You do need to position the motor initially and try to purge the cylinder. The whole process is so much better and saves expensive fluid. Everything recirculated back to the helm pump and air is replaced by fluid. I didn't follow the video exactly but figured out what they were trying to accomplish.

IMPORTANT - change the o-rings in the bleeders. They are likely old and will allow air back into the system. Unscrew the bleed cap completely - they are inside.
 
  • Like
Reactions: SkunkBoat

Uncle Joe

Well-Known Member
Joined
Aug 15, 2017
Messages
420
Reaction score
152
Points
43
Location
Jamaica Bay, NY
Model
Offshore
I recently did the connected bleed valve method by myself.....it worked great. It does not suck air in through the helm because you have the bottle inverted and connected to the fill port on the helm and a small hole in the bottom of the bottle. As air escapes the system through the bottle it is replaced by fluid. It tightened my system up considerably.

Spend the 20$ and get the tube with the quick-connects.
 

seasick

Well-Known Member
Joined
Aug 19, 2008
Messages
9,530
Reaction score
1,420
Points
113
Location
NYC
Just the tubing - no quick connects. I did not prefilll tubing. I setup my helm station like an IV - hanging the bottle connected to the fill with the usual fill hose. You do need to position the motor initially and try to purge the cylinder. The whole process is so much better and saves expensive fluid. Everything recirculated back to the helm pump and air is replaced by fluid. I didn't follow the video exactly but figured out what they were trying to accomplish.

IMPORTANT - change the o-rings in the bleeders. They are likely old and will allow air back into the system. Unscrew the bleed cap completely - they are inside.
thanks for the info. I will let you know how it goes when I get to the task:)
 

Fishtales

Well-Known Member
Joined
Jan 31, 2005
Messages
8,029
Reaction score
1,286
Points
113
The quick connects are useful for the motor connections for sure. Not sold on using them for the helm connection per the youtube vid. I like the Seastar method with a hole in the bottle approach better, with the hose and screw connector but you do lose the bottle and any residual fluid in the end. I don't know if it is the raised helm in my boat (wheel is a good 2' or so higher than cylinders), but I have bled the system twice in 14 years (blown hose and new power steering unit) and never had to touch the bleeders on the motors. All the air came up through the helm. I did have to work the wheel back and forth (initially unpowered many times and then powered but very little air by then) between the stops and the air worked itself all through the fill at the wheel. Maybe having the hole in the bottle with zero back pressure in the bottle due to the hole in the bottom helped. Regardless, much less spill and mess but as stated you do have to deal with a bottle with a hole in the end. I ended up using more than a bottle and only cut a hole in one, so I was good in the end.
 

NORTONP

Member
Joined
Nov 8, 2020
Messages
19
Reaction score
1
Points
3
Age
75
Location
Boston
Model
Tournament 225
I may have figured out my steering problem. As I mentioned before, the Seastar cylinder has a brass like seal sandwiched between 2 plastic bushings centrally located on the shaftbushing c.jpg
I also noticed some brass like residue in the remaining fluid inside the cylinder.
residue c.jpg
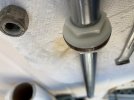
Additionally I noticed some corrosion pitting on the inside surface of the cylinder bore.
corrosion c.jpg
So, I am thinking this is the cause of fluid leaking from one side to the other. also ther roughness of the pitting may have caused the brass seal to wear out adding the the leakage problem. looks like I might be replacing the cylinder, any thoughts on this?
Paul
 

NORTONP

Member
Joined
Nov 8, 2020
Messages
19
Reaction score
1
Points
3
Age
75
Location
Boston
Model
Tournament 225
in addition, I took a good look at the brass seal, it is definitely scored from the pitting.
scored seal c.jpg
Sorry its upside down?
 

SkunkBoat

Well-Known Member
Joined
Oct 12, 2017
Messages
4,508
Reaction score
1,614
Points
113
Location
Manasquan Inlet NJ
Website
www.youtube.com
Model
Express 265
I used the "jumper past the cylinder" method. There were two of us but its the "one man " method described by others. used an old qt bottle with the bottom cut off & hose into helm fitting. Bought a gallon of mil5606 on amazon. Flushed it good and threw away the old fluid. Then just keep turning the wheel and pouring into the open qt bottle til bubbles gone. Re-did this after AP install. There is no better way to do it unless you have a fancy pump. After all that I still have some fluid in the gallon can
 

Willy-C

Well-Known Member
Joined
Nov 5, 2012
Messages
189
Reaction score
66
Points
28
Age
68
Location
Hooksett, NH
So, like I said in post #2, it’s a 2-piece Teflon/bronze piston seal. If you cut it off be careful to not scar the sides of the plastic on the piston head. Best to use a small flathead screwdriver turned on an angle to puncture the seal, pull it off and the expander oring (or square ring) under it. Give me the bore, width of groove and inside dia of the groove.
if I don’t have it in stock, I can get it fairly quick. I have many sizes.
The rust pitts in the barrel if they not too deep hopefully could be honed or dressed up with a small Dremel sander, then polished. The pitting was from water in the steering oil and was left in one spot for a while.