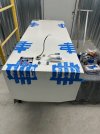
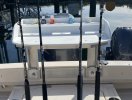
Im replacing my 265 Express Fuel Tanks!!!!! Pic heavy

Sea Shift

Well-Known Member
Joined
Feb 2, 2012
Messages
190
Reaction score
21
Points
18
Model
Express 265
So...........After developing a nice lil hole in the top of my front tank I finally got all the fuel out to start the process of removing the old tanks. Let me tell you, disposing of anything more than 5 gallons of bad fuel in California is impossible!! I had to get rid of 120 so i burned a bunch after continually emptying my fuel water seperator, (Thanks for the tip on that) but in the process i think i gummed up my injectors. Port motor is now having issues. Anyway that is a later problem.

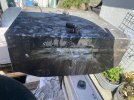
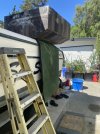
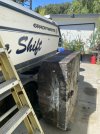
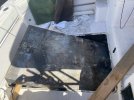
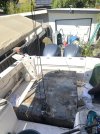
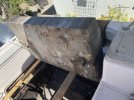
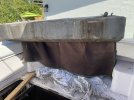
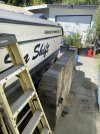
Today I puled the old tanks. It went fairly smooth. The rear tank had six poly hold down blocks that were screwed to the walls. Once those were removed, along with the 2 x 4 cap on the back bulkhead, I was able to pully the tank up by attaching a 4:1 to the top rail on the roof. Once above deck i propped it with 2 x 4 's then scooted it to the edege of the boat, flipped it on edge and eased it down to the ground. One man job, probably shoulda been two but hey I made it work.
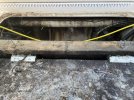
14258862-0F3B-4F8A-8F16-4054C0CA1E14_1_105_c.jpeg

1A67EC19-0739-4ABF-85DC-F27FEE37B294_1_105_c.jpeg

DD26FF53-3E83-4BAA-9C8B-ACFD8C0D8D6B_1_105_c.jpeg

69833D21-5BFA-4B20-BA8E-3642751309DD_4_5005_c.jpeg
CCE61CE2-D9A7-41BB-B139-981E536E15CF_4_5005_c.jpeg

ADBFB199-5D74-4595-820B-693F80AF13E4_4_5005_c.jpeg
511A5760-37B3-428A-A560-8071695786B2_4_5005_c.jpeg
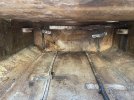
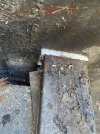
I then had to access the front tank. Lemme just say this is much more of a chore. There are four poly blocks holding that tank in place and a bulkhead made of two 2 x 4's. I was able to remove the screws in the bulkhead and remove that.
B9827025-FD13-4EB4-9A08-4B3D26005B90_1_102_o.jpeg

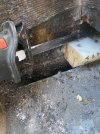
Next the poly blocks. Let me just say, the back two are impossible to get a screw driver to. There's only 4 inches between the tank and the bottom of the compartment of the fish kill box. Soooooo.......I just used a sawzall and cut the screws on the back side of the block. My plan is to move the blocks back about four inches to be able to re-assemble. Shouldn't be an issue.


Next.....................
 

Sea Shift

Well-Known Member
Joined
Feb 2, 2012
Messages
190
Reaction score
21
Points
18
Model
Express 265
Chop Chop.....

2867BE7F-7D3D-4349-8CCC-A2A62F6EA956_1_102_o.jpeg

So the front two are where I cut more corners. To access them I removed the drawers in the cabin wall. Once there you can see two circular access hatches in the floor in there. The problem is the one on the port side is UNDER the fresh water tank! So no access there with out somehow removing that. The one on the Starboard side seems accessible however I am a large guy and I dont think I could gumby in there anyway. So I cheated and didnt remove those, I just yanked on the tank from the rear and it slid out from under the blocks. Success!! I pivoted it with my pully system and braced it on the rear side with a 2 x 4.

C83DECE4-D17F-4274-B567-B5E0427F0BF4_1_102_o.jpeg

Once Slid to the transom I placed the pully on the front of the tank and hoisted it up and blocked.

027EF07D-27AF-4491-8DDB-B09A2A1C9FEC_1_102_o.jpeg

Again, tip lift and out she goes!!

2D926B82-F751-4D70-9A23-66EF93F30D53_1_102_o.jpeg

539D5046-4CF2-43B0-B8FD-ACA422527A45_1_102_o.jpeg

18B9F902-18EF-40D6-8033-8CDB203B2094_1_102_o.jpeg

You can now see the blocks up front. It also looks like there is one across the front edge. My hope is once the new tank comes I will be able to "Tuck" it back under the same as the old one came out. We will see.........

A1EF1864-129A-4FDF-ABA6-0C31F8AD5285_1_102_o.jpeg

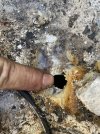
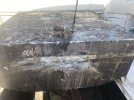
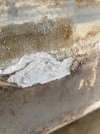
Here was the reason for replacement. big hole on top. and multiple big pits on the sides where it was touching the bulkhead etc.... At least the fuel compartment looks ok. Dirty but very solid.

AC6F3F58-51C5-4682-8B50-F59937DA1FEC_1_102_o.jpeg

7CF9B0C6-B24B-4930-A401-F83103DFE17D_1_102_o.jpeg

02A2DAFC-85B2-4950-9E70-9D13684323A6_1_102_o.jpeg
 

Saltyone

Well-Known Member
Joined
Jul 13, 2018
Messages
292
Reaction score
85
Points
28
Location
St Helens, OR
Model
Express 265
That is my winter project on my 265 as well. Thanks for the info!
 

SkunkBoat

Well-Known Member
Joined
Oct 12, 2017
Messages
4,508
Reaction score
1,614
Points
113
Location
Manasquan Inlet NJ
Website
www.youtube.com
Model
Express 265
Great post with pix. Thanks.

FYI, the Fresh water tank had to be cut out of mine. Take a good look at it. You might want to do that project while you’re at it.
 

Sea Shift

Well-Known Member
Joined
Feb 2, 2012
Messages
190
Reaction score
21
Points
18
Model
Express 265
Great post with pix. Thanks.

FYI, the Fresh water tank had to be cut out of mine. Take a good look at it. You might want to do that project while you’re at it.
I have literally never used mine. I think im just going to leave it alone. But thanks for the heads up. The one of more concern to me is the waste tank on the other side. The screws to the straps holding it down have literally rotted away. Definitely need to get that secured otherwise it might get real smelly! Yuck!
 

Hookup1

GreatGrady Captain
Joined
Oct 16, 2007
Messages
3,035
Reaction score
855
Points
113
Age
70
Location
Cape May, NJ
Model
Islander
That is a pretty ugly hole! I never saw a tank that bad. Be sure to pad the tank from the bilge. You don't want water trapped in contact with the tank.

I did mine last summer. Look at this for tips.
 

Sea Shift

Well-Known Member
Joined
Feb 2, 2012
Messages
190
Reaction score
21
Points
18
Model
Express 265
That is a pretty ugly hole! I never saw a tank that bad. Be sure to pad the tank from the bilge. You don't want water trapped in contact with the tank.

I did mine last summer. Look at this for tips.
Thanks Hookup1, I read your post prior to pulling my tanks. Tons of help and confidence gained from your experiences. I will be adding the neoprene to the bottoms for sure!! The tops of the tank were very wet and had a mold/Jelly on the tops. Obviously poor maintenance on my part and thats what caused the corrosion. They did have many little pits too. On the plus side, the hole was on the top! so I only had a real problem when I topped off.
 

Hookup1

GreatGrady Captain
Joined
Oct 16, 2007
Messages
3,035
Reaction score
855
Points
113
Age
70
Location
Cape May, NJ
Model
Islander
Thanks Hookup1, I read your post prior to pulling my tanks. Tons of help and confidence gained from your experiences. I will be adding the neoprene to the bottoms for sure!! The tops of the tank were very wet and had a mold/Jelly on the tops. Obviously poor maintenance on my part and thats what caused the corrosion. They did have many little pits too. On the plus side, the hole was on the top! so I only had a real problem when I topped off.
I found that when the deck hatches get waterlogged they ooze plywood glue. This sticks to the top of the tanks and creates a great environment for corrosion.
 
  • Like
Reactions: Sea Shift

Sea Shift

Well-Known Member
Joined
Feb 2, 2012
Messages
190
Reaction score
21
Points
18
Model
Express 265
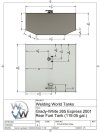
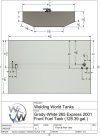
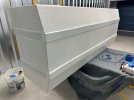
The tanks are being made! Drawings were the exact same as what i pulled out so I'm glad to know they are originals. One more step done!
120.jpg

130.jpg
 

Diad

Well-Known Member
Joined
Nov 9, 2022
Messages
180
Reaction score
52
Points
28
Model
Express 265
For what it’s worth…..the company that did my tanks made them a little bit smaller so that they could go back in easier to account for imperfections in the hull. The front tank is like 120 now and the back tank is like 115. With efficiency of the motors these days I wouldnt miss 15 gallons of fuel. I never received drawings though so I can’t send them to you.
 
  • Like
Reactions: Sardinia306Canyon

Sea Shift

Well-Known Member
Joined
Feb 2, 2012
Messages
190
Reaction score
21
Points
18
Model
Express 265
For what it’s worth…..the company that did my tanks made them a little bit smaller so that they could go back in easier to account for imperfections in the hull. The front tank is like 120 now and the back tank is like 115. With efficiency of the motors these days I wouldnt miss 15 gallons of fuel. I never received drawings though so I can’t send them to you.
Thank you for the tip. It doesnt appear that the thanks were that tight in the hull. Did you find that it was snug in your boat?

I was hoping they were almost the same since I wasnt able to reach the front hold downs in the bow of the front tank. That way it will be snug. Hopefuly not too snug@!
 

Hookup1

GreatGrady Captain
Joined
Oct 16, 2007
Messages
3,035
Reaction score
855
Points
113
Age
70
Location
Cape May, NJ
Model
Islander
Thank you for the tip. It doesnt appear that the thanks were that tight in the hull. Did you find that it was snug in your boat?

I was hoping they were almost the same since I wasnt able to reach the front hold downs in the bow of the front tank. That way it will be snug. Hopefuly not too snug@!
Be careful with the tank dimensions. Not sure you are going to be able to slide the new tank back in. You should have nitrile strips attached to the tank and pad out where the blocks are. My tanks came out easy but I had to cut to fit the HDPE blocks back in. Also use a Torx head screw on the block - much easier.

Crevice corrosion is caused by water trapped between something in contact with the tank. Remove all the rubber strips in your fuel compartment. Use 3M4000 to attach strips to your new tank.

28 Tank.jpeg 28 Tank 2.jpeg Tank Screws.jpeg
 
  • Like
Reactions: Sardinia306Canyon

Sea Shift

Well-Known Member
Joined
Feb 2, 2012
Messages
190
Reaction score
21
Points
18
Model
Express 265
Be careful with the tank dimensions. Not sure you are going to be able to slide the new tank back in. You should have nitrile strips attached to the tank and pad out where the blocks are. My tanks came out easy but I had to cut to fit the HDPE blocks back in. Also use a Torx head screw on the block - much easier.

Crevice corrosion is caused by water trapped between something in contact with the tank. Remove all the rubber strips in your fuel compartment. Use 3M4000 to attach strips to your new tank.

View attachment 35273 View attachment 35274 View attachment 35275
That was my plan after reading your post on this. Hope it works!
 

Fishtales

Well-Known Member
Joined
Jan 31, 2005
Messages
8,031
Reaction score
1,286
Points
113
Very informative. Thanks for sharing!
 

Ekea

Well-Known Member
Joined
Aug 11, 2020
Messages
634
Reaction score
214
Points
43
Age
39
Location
Mid Atlantic
Model
Chase
Crevice corrosion is caused by water trapped between something in contact with the tank. Remove all the rubber strips in your fuel compartment. Use 3M4000 to attach strips to your new tank.
why not 5200? you will never take the strips off. regardless of what you use, dont skimp on it

also, i wouldnt recommend full length strips as water would have a tougher time draining past them if the boat is relatively level. i would do small strips.

5_Tank with Strips.JPG
 
  • Like
Reactions: Sardinia306Canyon

Hookup1

GreatGrady Captain
Joined
Oct 16, 2007
Messages
3,035
Reaction score
855
Points
113
Age
70
Location
Cape May, NJ
Model
Islander
why not 5200? you will never take the strips off. regardless of what you use, dont skimp on it

also, i wouldnt recommend full length strips as water would have a tougher time draining past them if the boat is relatively level. i would do small strips.
3M 5200/4200/4000 are all fine because of their adhesive properties. You can do short strips too just make sure you have them over the tank supports. Don't forget to do the ends and the blocking where the tank makes contact.
 
  • Like
Reactions: Ekea

Sardinia306Canyon

GreatGrady Captain
Joined
Oct 11, 2023
Messages
523
Reaction score
101
Points
43
Age
60
Location
Island of Sardinia
Model
Canyon 306
Thanks for this great tread!
One reason that i like my 306 Canyon and GW in general is that they think about fuel tank replacement when designing their boats.
I skipped even to view a Pursuit 3350 OS after i stumbled over a tread showing how to do it on a rather new 3350OS and that was cutting the whole cockpit floor to gain access and after replacing them fiberglassing and gelcoating the cut out floor back in.
The idea of having fuel tanks in a 100% watertight compartment is theoretically a good one, but does simply not work in reality.
Maybe i was just lucky or Henley did a great job with the saddle tanks on my 99 Venture 34 as they where in a great shape and did not leaked till i sold her.
But on all other boats i had and many customers ones i had to change the tanks.

Chris