New Dash, 2000 Seafarer

SherpaT

Member
Joined
Oct 11, 2005
Messages
13
Reaction score
0
Points
0
Location
Marblehead, MA
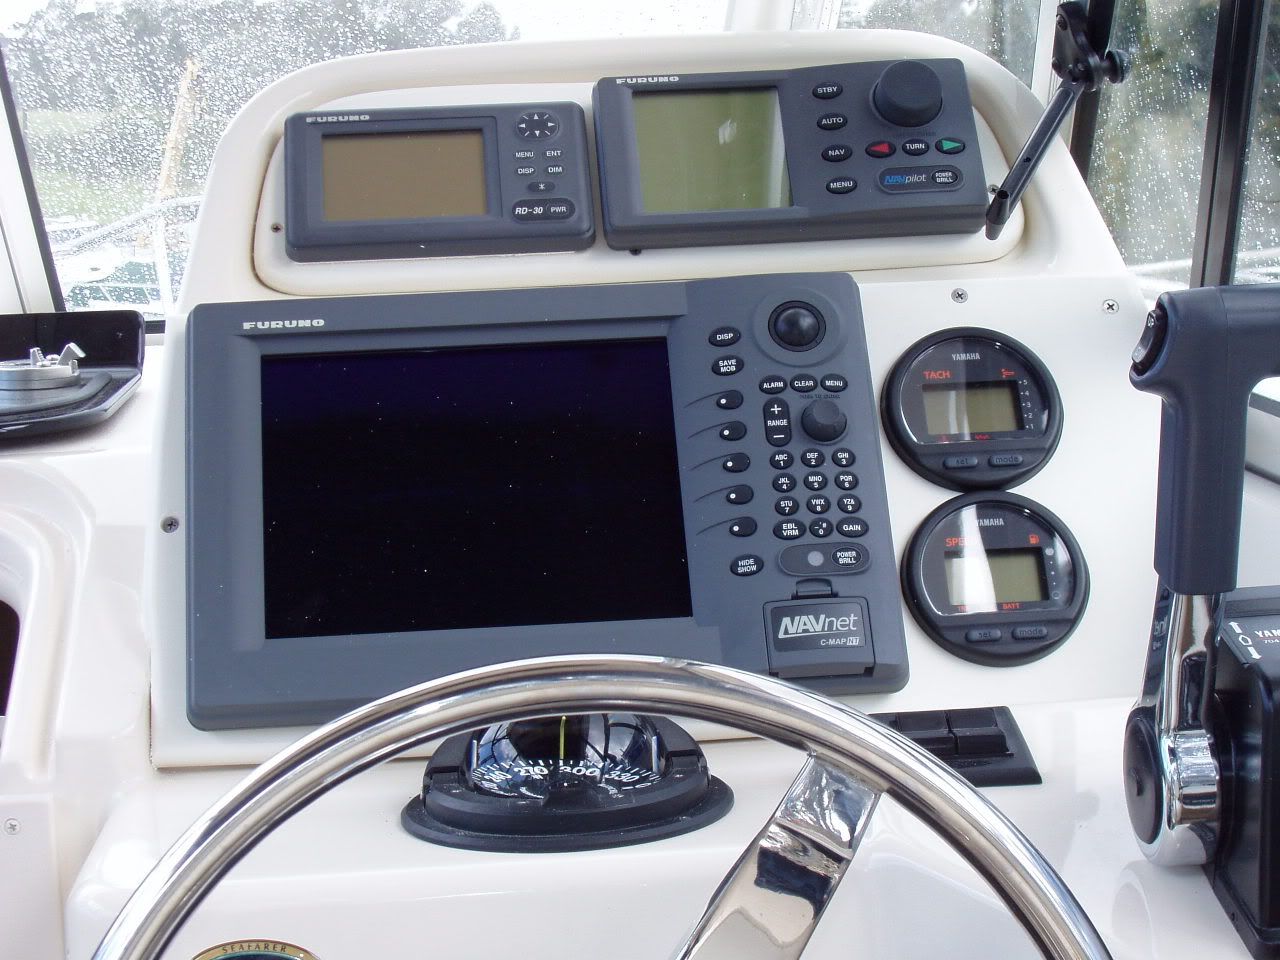
I'm thinking about converting the existing helm Electronics box to a flush mounted dash setup. I have two options.
1) Get rid of the hatch cover, and mount the dash flush. May require some minor surgery.
2) Mount the dash in a "recessed" position, and keep the hatch for additional protection. I have a combo gps/sounder (about 8" square, a small stereo and vhf. May go to a 10" Raytheon system when I add radar.

There may be other options. Any thoughts? Anybody tackle this before?

Thanks,

Tim


[/img]
 

Parthery

GreatGrady Captain
Joined
Jan 31, 2005
Messages
2,589
Reaction score
220
Points
63
Location
Atlanta, GA
Option #1 is an easy one, relatively speaking. I did my '01 this way, and was able to fit a 10.4" Lowrance combo unit in the panel with room to spare.

I also helped JiminGa do the same project on his Seafarer....he did separate GPS and FF units in a flush panel.

You might want to do a search and find the two threads (both mine and his)....both include pictures.

Its not a particularly expensive upgrade (I spent less than $75 including the panel - cut to fit, and some stainless screws, washers, etc...) but it makes your electronics much easier to see and use.
 

SherpaT

Member
Joined
Oct 11, 2005
Messages
13
Reaction score
0
Points
0
Location
Marblehead, MA
Thanks. Perfect. I'll look up those threads. Hoping to post pics of my new hardtop, but need to figure out where to host my images.
 

Brad1

Well-Known Member
Joined
Feb 24, 2005
Messages
615
Reaction score
0
Points
0
Location
Monroeville, PA
I went option#1 as well. Made the panel out of 1/2" thick black marine starboard. Black makes a nice color contrast. My electronics all came with a template for flushmounting. I used a router to bevel the edges of the panel. No need for even drilling new holes in the boat. Used the existing brackets that the screws for the hinges were threaded into.
 

Parthery

GreatGrady Captain
Joined
Jan 31, 2005
Messages
2,589
Reaction score
220
Points
63
Location
Atlanta, GA
Here is the link to JiminGA's upgrade on his 228.
http://www.greatgrady.com/forum/viewtop ... highlight=

Here is a pic of the Lowrance 111 flush mounted in my '01 226:
S3500001-copy.jpg
 

SherpaT

Member
Joined
Oct 11, 2005
Messages
13
Reaction score
0
Points
0
Location
Marblehead, MA
That's exactly what I was thinking of. Looks great. Thanks,
I'll be pulling the boat in a few weeks, so I'll post the progress on that and other projects.

Tim
 

Parthery

GreatGrady Captain
Joined
Jan 31, 2005
Messages
2,589
Reaction score
220
Points
63
Location
Atlanta, GA
Unless you are handy with a router and a jig saw, you might want to consider laying out what you want to do and where, make your measurements, and then pay someone to make the panel.

Both Jim and I both used Fin Addict Marine (www.finaddictmarine.com) and they would get my thumbs up again. Send them the measurements and the templates for the electronics, and they will cut the holes, do the roundovers, and send you a completed panel. Attach your electronics to the panel, remove the plexiglass door, and mount the panel. Total cost for the panel, cut to spec, including UPS shipping, was less than $50

Fin Addict also has the matching GW off white color, if you decide to go that route instead of black.

One recommendation I would make is to use 1/2" panel. I used 1/4" and if you overtightened it, it woud start to bend. The 1/2" is sturdier.
 

Brad1

Well-Known Member
Joined
Feb 24, 2005
Messages
615
Reaction score
0
Points
0
Location
Monroeville, PA
Parthery said:
Unless you are handy with a router and a jig saw . . .

Just to add to the above statement using my personal experience.

Unless the peice of starboard you purchase is the exact dimensions you need for you panel (which I'm sure it isn't), you will need to cut the panel down to the size you want. For those cuts, in order to make the outside edges perfectly straight, you will need to use a table saw. After you cut it down with the table saw, use the router to give the outside edges a finished look. For the sizing cuts and routing, sharp blades and bits at high speed yield the smooth edges (that applies to anytime your working with starboard).

For the cut outs for your electronics, you'll need the jig saw. These cut outs are hidden by the face of the electronics, so if there's a slight inperfection (as long as it's not too big of an imperfection) it will never been visible.

Parthery said:
Total cost for the panel, cut to spec, including UPS shipping, was less than $50

Unless you have the tools I mentioned above, or foresee your self working with starboard in the future, that $50 is certainly worth the price. That's a very good deal IMO. Me, I already had the table saw, router, and jig saw that's why I did mine myself.

Parthery said:
One recommendation I would make is to use 1/2" panel. I used 1/4" and if you overtightened it, it woud start to bend. The 1/2" is sturdier.

I totally agree. The 1/4" stuff is just too flimsy for this application.
 

Gary M

Well-Known Member
Joined
Jun 2, 2006
Messages
475
Reaction score
10
Points
18
Location
Ft. Lauderdale
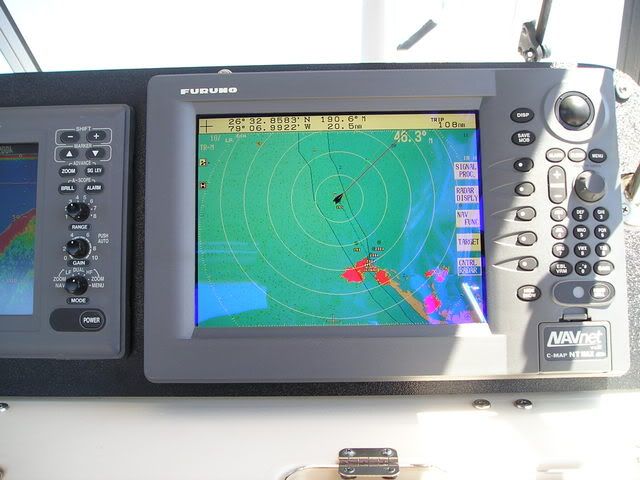
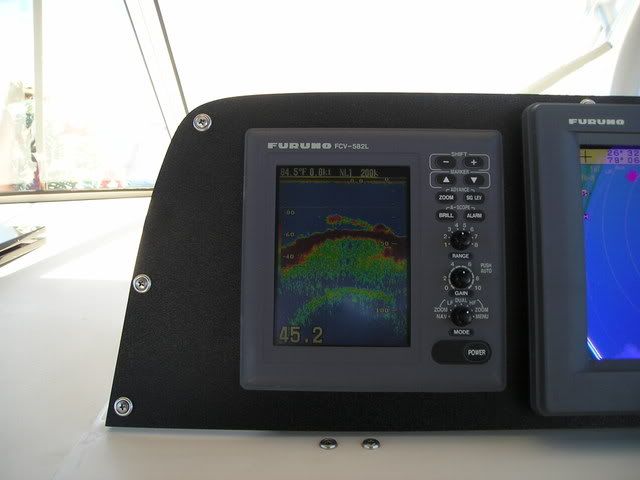
We dumped the door and made a plate to cover the entire helm box face. That gave us the opportunity to then cut away part of the areas on either side of the old door to get the electronics to fit. I heard bad things about using Starboard so we had a Marine shop make up a faceplate from a nice, textured, black plastic.

Bahamas024.jpg


Bahamas027.jpg


I chose to not caulk in behind the panel. I did this to make it look sharp and also to make it easier to pull the panel down to do anything behind the electronics. I'm a big stickler about keeping salt spray/water or even fresh water anywhere near my electronics.