New Overnighter, new transom

JDS535

Member
Joined
Dec 31, 2024
Messages
14
Reaction score
0
Points
1
Age
59
Model
Overnighter
Hello all, I am new to the forum and new to Grady White boats. It has been a few years since I sold my Mako and I and super excited about the 1984 GW Overnighter 20 I just bought.
I knew immediately that this boat needed a new transom. There was no motor on the boat and half of that cheap aluminum trim piece was gone exposing the gap between the back of the transom and the top. Stress cracks, brass drain plugs pulled through the skin due to wood swelling etc.
Anyway, I replaced the transom on my Mako successfully and used the boat for 3 years before selling it.
I removed the back skin leaving 4" to tab to, and replaced the layers of plywood using West System Epoxy. All in all, it was a time consuming and expensive process.
My plan for the GW is to remove the back skin leaving 4" to tab on either side of the seam and pour the transom with Arjay compound.
My question is : has anybody done this? Does anybody know if the transom and stringers are tied in wood to wood, or is the transom glassed in then the stringer butts to it.
My concern is taking that back skin off, then finding out that the end of the stringers is bad too. The entire inside of the boat shows no indication of rot. Everything is super clean and hard. The stringers pass the tap test all the way down to the transom. No brown water or stains anywhere.
What do you guys think?
 
Here are youtube vids I made when I used Carboncore(aka Arjay) to pour a transom.
My V20 was complicated by the shape of the transom. It was not flat across. I opted to remove the INNER skin.
Gradys are flat. outer skin is the way to go.


On my V20, the stringers surprised me as the core flowed out the holes at the bottom of the stringers.
So in that case, they assembled the transom and stringers and then glassed.
I suggest you tape or lightly glass over the holes and redrill later

Arjay is polyester. You need to use polyester resin where there is contact with arjay. Once its together, you can use epoxy to cover.


V20 transom part 1

V20 transom part 2

go straight to chainsaw..... :p
 
Thanks, Skunkboat.
I watched the Vids. Good stuff. I saw the blowouts on your boat while pouring. I am hoping GW has the transom and the stringers seperated by a layer of glass so I dont have to worry about them. I like the electric chainsaw idea. I cant imagine going at that with my Stihl gas chainsaw without tearing all the glass up. I'm gonna look for a cheap used electric saw just for this job. How is she holding together after time?
I ran it for a few years and sold it to move up to my Grady 265. That stuff is solid.
The only issue was where I tried to get away with not glassing over the outside of cuts in the motorwell. I glassed the inside and just faired the outside. Really need a layer of glass to prevent eventually spider crack. A layer of glass means much more fairing required.


Harbor Freight super cheap chain saw.....
 
Last edited:
I have seen a couple guys do it that way, I always wondered if the structural putty would hold.
 
So, I guess I will just open it up from the outside and see what I see.
 
So, I guess I will just open it up from the outside and see what I see.
its a Catch22. You have to open it up to really know if you actually needed to open it up.
With the outer skin off, you'll have a good look at the stringer attach points.
 
LOL, update on my plans. So I calculated the Arjay material needed ant it will cost $2000 to use that material. Much more than I was expecting. Seacast would cost about $1100 but with all of the strand fiberglass in it I worry about voids when pouring it.
I am now considering using plywood and relaminating it with fiberglass. My first plan was to remove the rear skin and leave a 4" border but that would make it hard to get the plywood tight, and fill any voids around the edges as I go.
What do you guys think about cutting the skin all of the way out to the edge and just lapping 3 layers of glass over the whole skin and around the edges?
That would make it easy to get the plywood tight and filled well.??

Thanks, Jeff
 
You can't wrap around edges. Period

If you cut to the corners you might as well throw the boat in the dumpster.
 
Last edited:
I'm guessing that shipping is what is killing you. I was able to find a distributor in NY that I could pickup from. Was worth a couple hrs driving.

I'm looking at CarbonCore website. CarbonBond TPC is $250 per 5 gal bucket. I needed 3 buckets for my V20. Can't imagine a 20 ft grady needs more...maybe 4 buckets?

https://www.carbon-core.com/product/carbonbond/
 
Last edited:
I looked at 2 websites and it said I needed 4 buckets. $250 each is not too bad. It sounds like this is the better way to go.
When I did my Mako I took off the back skin at around 4" inside the corner all around the bottom but I had full access to the top so I just dropped the pcs of plywood in from the top. I will not have that option on this one so I cant use plywood or coosa board unless I cut up. I don't want to do that.

Thanks
 
LOL, update on my plans. So I calculated the Arjay material needed ant it will cost $2000 to use that material. Much more than I was expecting. Seacast would cost about $1100 but with all of the strand fiberglass in it I worry about voids when pouring it.
I am now considering using plywood and relaminating it with fiberglass. My first plan was to remove the rear skin and leave a 4" border but that would make it hard to get the plywood tight, and fill any voids around the edges as I go.
What do you guys think about cutting the skin all of the way out to the edge and just lapping 3 layers of glass over the whole skin and around the edges?
That would make it easy to get the plywood tight and filled well.??

Thanks, Jeff
I did my 91 Overnighter last spring with Seacast and you are correct about it being very thick. I did it exactly like you are describing, removing the outer skin to aid in getting all of the old and rotten wood out. 1 mistake I made was this. I had the entire top of the notch open to pour but I only cut small access openings out toward the sides and it did not want to flow very well. I ended up using a broom stick to ram it out to the corners. That transom is like a rock and was very pleased with how it turned out.
 
I did my 91 Overnighter last spring with Seacast and you are correct about it being very thick. I did it exactly like you are describing, removing the outer skin to aid in getting all of the old and rotten wood out. 1 mistake I made was this. I had the entire top of the notch open to pour but I only cut small access openings out toward the sides and it did not want to flow very well. I ended up using a broom stick to ram it out to the corners. That transom is like a rock and was very pleased with how it turned out.
Hey Crang, Thats great information. That was my concern with seacast. I am looking at Carbon core now because they are supposed to have a cold weather formula and that does not have the fibers in it so it pours easy. I had the same idea to just drill like a 1" hole in the bulkhead on each side and use a funnel to pour the compound into the sides of the transom.
Thanks for the info.
 
I did my transom on my 82 Overnighter about 3 years ago. Cut the outer skin, removed the rotten plywood, and replaced with 2 layers of new Okuma 11 plywood, then glassed a new outer skin with epoxy and 7 layers of 1708.

If I had to do it over again, I would take off the rubrail, cut the cap and remove the stern battery box area. Then remove the old material from the inside. This method is just as time intensive, and requires some additional work to reattach the inside components. The value is the additional strength that you will get when finished because you did not remove the outer layer of glass. It's also much easier to remove the rotten ply from the inside and place the new ply.

I capped the transom with 1708, no more aluminum angle to let water penetrate.

I'll be glad to share some pics from my project if you would like.
 
  • Like
Reactions: SkunkBoat and Crang
I did my transom on my 82 Overnighter about 3 years ago. Cut the outer skin, removed the rotten plywood, and replaced with 2 layers of new Okuma 11 plywood, then glassed a new outer skin with epoxy and 7 layers of 1708.

If I had to do it over again, I would take off the rubrail, cut the cap and remove the stern battery box area. Then remove the old material from the inside. This method is just as time intensive, and requires some additional work to reattach the inside components. The value is the additional strength that you will get when finished because you did not remove the outer layer of glass. It's also much easier to remove the rotten ply from the inside and place the new ply.

I capped the transom with 1708, no more aluminum angle to let water penetrate.

I'll be glad to share some pics from my project if you would like.
I also capped my transom to eliminate the aluminum angle. I think it looks better capped.
 
I had my Seacast shipped to where I work rather than my house and saved about $75.
 
I did my transom on my 82 Overnighter about 3 years ago. Cut the outer skin, removed the rotten plywood, and replaced with 2 layers of new Okuma 11 plywood, then glassed a new outer skin with epoxy and 7 layers of 1708.

If I had to do it over again, I would take off the rubrail, cut the cap and remove the stern battery box area. Then remove the old material from the inside. This method is just as time intensive, and requires some additional work to reattach the inside components. The value is the additional strength that you will get when finished because you did not remove the outer layer of glass. It's also much easier to remove the rotten ply from the inside and place the new ply.

I capped the transom with 1708, no more aluminum angle to let water penetrate.

I'll be glad to share some pics from my project if you would like.
So, the way I understand this with the liquid transom material is that the new material ( Seacast, Carboncore or Arjay ) is the strength of the transom. The skin is just a covering really. But that said, the liquid material bonds to the skin completely anyway so the seam that you cut really doesn't mean as much. I saw 1 video where they didn't even glass the seam, they just faired over it. I wouldn't do that, and the manufacturer recommends not doing that either.
Looking into my bilge area everything looks brand new, and tapping the stringers with a hammer everything sounds solid and bounces back like it should. I really do not want to get into tearing the bulkhead apart and glassing areas on the topside. If I keep the fiberglass work to the transom it sounds like soooo much less work. And I won't worry too much if the back is not perfect. The skin on mine is about 1/4" thick so I plan to reuse it. I saw somewhere that they used a power planer to make stepped levels to glass the seam back in. That sounds like a super idea so I will try that. I also plan to roll 1708 over the top like you did. I may do the entire area where the motor sits to keep it flat. I think that will do me. I am using a Johnson 130 2 stroke, if that doesn't work out I wouldn't go any bigger than a 150 2 stroke so the weight and or horsepower is not a big concern. This is a nice clean boat and I am 59 years old so I plan for this to be my last boat. I would love to see some pics of what you did.
Thanks.
 
It bonds very well to the skin. I spilled some in the bilge area and had to grind it away. I couldn't remove it any other way. With that said, you should glass the skin back in correctly just to be safe. I have photos of the process if anyone is interested but keep in mind I am no expert.
 
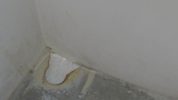
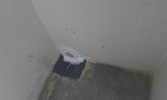
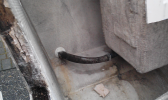
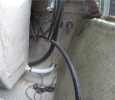
So, I had another thought on this project and wanted some feedback on it. I saw a video where the owner moved the deck scuppers from the transom to the sides of the boat. It seems like a good idea to get them out of the transom while I am replacing it. One of the threads on this forum talked about how the scuppers are under water if 2 guys stand at the back of the boat fishing at the same time. I was wondering if moving them would help with them to take in less water ( or more ) . Anybody do this?
- Thanks
My V20 already had the scuppers out the sides but I did move the deck drain from "in the deck" to "on the bulkhead". This was because there was always a little wtaer that would not go down the drain due to the lip of the fitting.
If you move the scuppers, you have to get it right. look at the height above the waterline and where your deck drains are. They also have to be astern of the deck drain.
Think about how the hose will bend.

You are not going to have any wood anymore, so not sure what benefit you get moving from transom.

Screenshot 2025-01-30 at 9.33.55 AM.png
Screenshot 2025-01-30 at 9.34.39 AM.png

Screenshot 2025-01-30 at 9.32.19 AM.png
Screenshot 2025-01-30 at 9.35.13 AM.png
 
Last edited: