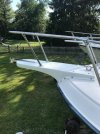
Rebuild 1988 Grady White Offshore Pulpit

MrD

Active Member
Joined
Nov 25, 2020
Messages
28
Reaction score
5
Points
3
Age
47
Location
Brick, NJ
Model
Offshore
Hi All, thanks for any comments that would be useful. I am new to boating and new to this Grady White. One of my winter projects is I removed the Pulpit. It was delaminated and banged up some. I since removed the underside skin to reveal the wood. I also started grinding/sanding the topside to figure out what to do there. The wood is moist but not saturated/soaked.

My questions I am unsure of, even after doing much research is:
1) Can I lay down a layer of 1708 cloth on the topside to fix all the holes and delamination (then eventually fairing and gel coat)?
2) For the wood core, can I dry it out and drown it in some epoxy or resin or do I need to remove the old wood?
3) I was thinking of going with polyester resin (for price), do I have to sand back all of the old gelcoat before I lay down the 1708 or CSM on the old skin?

Been researching and learning so much from BoatWorks and other forums. I understand the prep involved and got my hands fairly dirty already. Just need some more advice to get me over the next hurdle.

See pics of before and current work done.
20201220_154747 (1).jpg
20201220_154709.jpg
1611274020185.png


1611274110701.png
 

SoLucky

GreatGrady Captain
Joined
Dec 8, 2020
Messages
50
Reaction score
25
Points
18
Age
59
Model
Seafarer
Gutsy project for a newbie!

The wood looks quite good and I don't see a need to replace it. For the few areas with some obvious water intrusion and dry rot (the very dark areas) I would drill out the bad material and then fill with an epoxy paste (I like West System epoxy with their Micro Fiber filler added to thicken into a paste). Once that cures you can then re-drill any holes needed for hardware mounting (which caused the water intrusion in the first place). In fact, I would do the same (drill, fill with epoxy, etc.) for all the hardware holes even if not yet rotted -- by creating an epoxy barrier between wood and mounting hardware you will keep water from re-entering the wood.

For the top skin you could go your route and re-glass. But to get good adhesion you will have to grind off the gelcoat and get into the underlying fiberglass. I wouldn't do it. I would sand down most of the gelcoat, but not go into the glass. Then I would fill, fair, sand, epoxy coat (as a water barrier), gently sand some more being careful not to go through the epoxy, prime as per instructions from you paint supplier, and then paint with 2 or 3 coats of a high quality marine finish (awlgrip, interlux, petit, etc.). Epoxy is not UV stable, so you have to paint over it if you want it to last.

You probably notice I keep mentioning epoxy. I recommend against polyester resin -- it is cheap for a reason. It does not bond as well as epoxy, gets brittle over time, cracks, and then you have to redo everything again. Epoxy creates a water barrier -- polyester does not... it is water permeable. Use a high quality epoxy -- such as West System -- and your pulpit will last a lifetime. Good quality epoxy retains its resiliency and flexibility much, much longer than polyester so it is unlikely to crack unless you hit a piling! Given all the hours you are putting into this project, is an extra $100-$150 in materials really a deal breaker?

Good luck. Can't wait to see the results.
 
  • Like
Reactions: PointedRose

MrD

Active Member
Joined
Nov 25, 2020
Messages
28
Reaction score
5
Points
3
Age
47
Location
Brick, NJ
Model
Offshore
Gutsy project for a newbie!

The wood looks quite good and I don't see a need to replace it. For the few areas with some obvious water intrusion and dry rot (the very dark areas) I would drill out the bad material and then fill with an epoxy paste (I like West System epoxy with their Micro Fiber filler added to thicken into a paste). Once that cures you can then re-drill any holes needed for hardware mounting (which caused the water intrusion in the first place). In fact, I would do the same (drill, fill with epoxy, etc.) for all the hardware holes even if not yet rotted -- by creating an epoxy barrier between wood and mounting hardware you will keep water from re-entering the wood.

For the top skin you could go your route and re-glass. But to get good adhesion you will have to grind off the gelcoat and get into the underlying fiberglass. I wouldn't do it. I would sand down most of the gelcoat, but not go into the glass. Then I would fill, fair, sand, epoxy coat (as a water barrier), gently sand some more being careful not to go through the epoxy, prime as per instructions from you paint supplier, and then paint with 2 or 3 coats of a high quality marine finish (awlgrip, interlux, petit, etc.). Epoxy is not UV stable, so you have to paint over it if you want it to last.

You probably notice I keep mentioning epoxy. I recommend against polyester resin -- it is cheap for a reason. It does not bond as well as epoxy, gets brittle over time, cracks, and then you have to redo everything again. Epoxy creates a water barrier -- polyester does not... it is water permeable. Use a high quality epoxy -- such as West System -- and your pulpit will last a lifetime. Good quality epoxy retains its resiliency and flexibility much, much longer than polyester so it is unlikely to crack unless you hit a piling! Given all the hours you are putting into this project, is an extra $100-$150 in materials really a deal breaker?

Good luck. Can't wait to see the results.
Wow, exactly the advice I needed. Thanks Solucky. So no need to layer some cloth on the topside then. If I am understanding you, just use some sort of fairing (like car bondo but the marine equivalent) to clean up the spider cracks, gouges, etc. Should I use gelcoat as final layer or is this a personal preference. Again thanks for all your help.
 

Fishtales

Well-Known Member
Joined
Jan 31, 2005
Messages
8,075
Reaction score
1,300
Points
113
I agree. Nice to see that the coring is properly done. I wondered if there would be parquet in there. I would layer a couple of layers of glass and gelcoat over. I wouldn't use fairing compound (bondo) as that is an area prone to bangs (anchor, chain and general movement if you have the windlass).
 

jk

Member
Joined
Aug 8, 2009
Messages
17
Reaction score
3
Points
3
Location
Buzzard's Bay
MrD
Wondering if you have any updates on your progress?
I just started the same project on my '88 Offshore
thanks
 

MrD

Active Member
Joined
Nov 25, 2020
Messages
28
Reaction score
5
Points
3
Age
47
Location
Brick, NJ
Model
Offshore
MrD
Wondering if you have any updates on your progress?
I just started the same project on my '88 Offshore
thanks

As I am staring now at the pulpit just thinking when I will be finally done with it. I will post some pics soon, I promise. I ended taking out the old wood, had some moisture still in it and did not want to do this for another 30 years. I bought 3 gallons of epoxy, ebond out of Florida, $120 shipped to NJ. I used some polyester resin in the beginning stages to structurally seal and hold things together. I went a little ape shit with the disc grinder. I then switched to Epoxy. I have two 3/4" plywood pieces laminated and glued together. I also glassed in the cutout on the top and made it all one level. See updated pics coming soon. Anyway I can help please let me know.16183647357944682417935405322118.jpg16183646708636925462358085844497.jpg20210315_113348.jpg20210312_181710.jpg
 
  • Like
Reactions: PointedRose

PointedRose

Well-Known Member
Joined
Feb 11, 2021
Messages
690
Reaction score
214
Points
43
Location
San Francisco
Model
Overnighter
As I am staring now at the pulpit just thinking when I will be finally done with it. I will post some pics soon, I promise. I ended taking out the old wood, had some moisture still in it and did not want to do this for another 30 years. I bought 3 gallons of epoxy, ebond out of Florida, $120 shipped to NJ. I used some polyester resin in the beginning stages to structurally seal and hold things together. I went a little ape shit with the disc grinder. I then switched to Epoxy. I have two 3/4" plywood pieces laminated and glued together. I also glassed in the cutout on the top and made it all one level. See updated pics coming soon. Anyway I can help please let me know.View attachment 20021View attachment 20020View attachment 20016View attachment 20018
Looks like quite a bit of progress, nice work so far.
 

fellinger

Well-Known Member
Joined
Apr 9, 2015
Messages
229
Reaction score
7
Points
18
Nice work. I replaced the one on my 1995 272 Sailfish with a starboard one made by Offshore Eddy in Cape May, NJ. Was done very well and not crazy expensive. It has tubular aluminum supports sandwiched between the layers and has held up well. Pulpit.jpg
 
  • Like
Reactions: PointedRose

jk

Member
Joined
Aug 8, 2009
Messages
17
Reaction score
3
Points
3
Location
Buzzard's Bay
Good stuff. My problem started a couple of seasons ago with a crack along the top edge which I patched, but eventually led to a large amount of delamination. Following what MrD did, my plan is to remove the bottom skin, seal the wood which is in good shape, epoxy the bottom skin back on, and then deal with sides. Definatly need to re-fiberglass the sides and tie it together. My biggest question is how to tackle the flanged pieces on the sides/bottom. I don't think they're structural, mostly aesthetic. Not sure how to form them. Also, one other big change is to add two cleats to the bow on either side of the pulpit. Boat is usually moored, and I want to get the load off of the pulpit, plus I think they would rub up against the side flanges too much. Let me know if you have any suggestions.
thanks


Pulpit1.jpgPulpit2.jpg
 

PointedRose

Well-Known Member
Joined
Feb 11, 2021
Messages
690
Reaction score
214
Points
43
Location
San Francisco
Model
Overnighter
Good stuff. My problem started a couple of seasons ago with a crack along the top edge which I patched, but eventually led to a large amount of delamination. Following what MrD did, my plan is to remove the bottom skin, seal the wood which is in good shape, epoxy the bottom skin back on, and then deal with sides. Definatly need to re-fiberglass the sides and tie it together. My biggest question is how to tackle the flanged pieces on the sides/bottom. I don't think they're structural, mostly aesthetic. Not sure how to form them. Also, one other big change is to add two cleats to the bow on either side of the pulpit. Boat is usually moored, and I want to get the load off of the pulpit, plus I think they would rub up against the side flanges too much. Let me know if you have any suggestions.
thanks


View attachment 20025View attachment 20026
You could make a mold with some clay or something and use like wax paper or double sided tape with the mold to reform a piece shaped to how you want it
 

jk

Member
Joined
Aug 8, 2009
Messages
17
Reaction score
3
Points
3
Location
Buzzard's Bay
You could make a mold with some clay or something and use like wax paper or double sided tape with the mold to reform a piece shaped to how you want it
Thanks for the wax paper suggestion, worked perfect. Here's the finished product. Certainly not perfect, but I'm happy on how it came out. Learned a lot (and cursed a lot) about fiberglassing and painting, but it's back on and the boat's in the water, so all good.
finished pulpit.jpg
 

MrD

Active Member
Joined
Nov 25, 2020
Messages
28
Reaction score
5
Points
3
Age
47
Location
Brick, NJ
Model
Offshore
Wow...came out great. I'm still not done with mine as I had to put in gas tanks, bow hook, and all the thru hulls so got side tracked. Glad to hear also the boat is in the water.