Trim Indicator on Yamaha Gauge

A&J Outdoors

Well-Known Member
Joined
Jul 14, 2022
Messages
193
Reaction score
36
Points
28
Age
60
Location
San Antonio, TX./Au Gres MI.
Website
www.outdoorslivecrew.com
Model
Sailfish
03 282 with original engines and gauges. When I purchased it the gauges were unreadable. I sent them to a place to get refurbished. They did a great job and they look and work perfectly except, the starboard tach has the trim indicator shows the motor trimmed up all the way and does not change when I trim the motor up or down. I imagine it is something in the wiring but was hoping someone he would have an idea about which wire.gauges on.jpg

 

Beyond A Wake

Well-Known Member
Joined
Jan 23, 2022
Messages
238
Reaction score
43
Points
28
Age
73
Model
Freedom 335
normally the issue is at the motor end. The small lever that is spring loaded and moves when motor is tilted gets sticky or just stops working. Check that first, it is easily accessible when motors are tilted up and you can see it on the side of the point where motor swings just inside frame.
 
  • Like
Reactions: A&J Outdoors

A&J Outdoors

Well-Known Member
Joined
Jul 14, 2022
Messages
193
Reaction score
36
Points
28
Age
60
Location
San Antonio, TX./Au Gres MI.
Website
www.outdoorslivecrew.com
Model
Sailfish
normally the issue is at the motor end. The small lever that is spring loaded and moves when motor is tilted gets sticky or just stops working. Check that first, it is easily accessible when motors are tilted up and you can see it on the side of the point where motor swings just inside frame.
Thank you, I like starting with the easy stuff! I'll check that today.
 

wspitler

GreatGrady Captain
Joined
May 16, 2011
Messages
1,372
Reaction score
320
Points
83
Location
Inglis, FL
Model
Express 330
Lube it with silicone spray and actuate it numerous times with your finger. Be careful to lock the motor up while your hands are under the motor. It is a typical failure point. It should be lubed at least every 100 hours. If one has failed the other will be not far behind.
 
  • Like
Reactions: A&J Outdoors

DennisG01

GreatGrady Captain
Joined
Sep 1, 2013
Messages
7,246
Reaction score
1,359
Points
113
Location
Allentown, PA & Friendship, ME
Model
Offshore
In this case the lever arm (at the motor) wouldn't be stuck "down"... but it could be broken off which essentially puts it in the "up" position all the time. Either way - you'll know more once you look. Follow the wires - you can disconnect and ohm the pins while manually moving the lever to see if it's functioning properly.

Or... don't worry about it. A trim gauge actually isn't very important. For one, you can physically see the engine. Two, conditions can vary so much that it's hard to rely on a specific setting. Three, a particular "bar" is only a rough estimate - meaning bar 3 on the port engine could be 31% and bar 3 on the stbd engine could be 38% (just using rough numbers there). Engines don't always tilt at EXACTLY the same rate.

The best "trim" gauge is what you sit on :) You can even tell if one is a bit higher than other based on the boat's attitude.

In the end... it's a "pretty" gauge - but not overly useful. Mine hasn't worked in 6 or 7 years and I haven't missed it once.

My advice... if you can fix it by messing around with it yourself, great. If it's going to cost money... put that money towards something more useful, like gas! :)
 
  • Like
Reactions: A&J Outdoors

Halfhitch

GreatGrady Captain
Joined
Nov 11, 2017
Messages
1,429
Reaction score
459
Points
83
Location
Venice, Florida
There is a small black box that that lever Beyond a Wake was talking about is coupled with. It has two screws that are in slots, allowing a person to calibrate your gauge reading. That lever operates a small potentiometer inside the body that changes the ohm/resistance presented to the gauge. Follow the wire up into the cowling and you will find plug-in connectors around the fuel filter area. You can unplug them and check the ohm reading as you move the little black lever. I forget the exact ohm numbers for high and low but you can search that. If there is a good wide, smooth change in ohms as you change the angle of the lever, it is probably fine. It may have just slipped out of adjustment. Take care removing the mounting screws, as they can often be corroded and hard to move. They are small, fine thread machine screws and can easily be cross threaded on reinstallation. Been there, ain't fun.

This is how I calibrate my trim gauge. First I level the keel of the boat using a carpenters' level. Then I set the safety lock in place. Then I set the tilt/trim actuator lever in about the center of its' adjustment slots. Then get the motor off the safety lock. Turn the ignition switch to the on position and trim the motor down till the carpenters' level reads level when placed on the anti-vent plate. At that point the prop shaft is parallel to the keel. In that condition I like to have my gauge read at the center of the range on my gauge. That is subjective and you can pick your liking. If the gauge isn't reading where you want it to, raise the motor back up adjust the actuator a bit and lower back down to a level anti-vent plate and check it again. Keep doing this till you like what you see on your gauge. Good luck.
 

wspitler

GreatGrady Captain
Joined
May 16, 2011
Messages
1,372
Reaction score
320
Points
83
Location
Inglis, FL
Model
Express 330
I believe those gauges can be calibrated as well. I know my square gauges have a programming mode that allows you to calibrate the trim sensors. I simply trimmed my motors all the way in and set zero and they’ve been working fine ever since. You might check that if the gauge is not broken. That was a good point that if it is stuck it will not read full up.
 
  • Like
Reactions: A&J Outdoors

A&J Outdoors

Well-Known Member
Joined
Jul 14, 2022
Messages
193
Reaction score
36
Points
28
Age
60
Location
San Antonio, TX./Au Gres MI.
Website
www.outdoorslivecrew.com
Model
Sailfish
Or... don't worry about it. A trim gauge actually isn't very important. For one, you can physically see the engine. Two, conditions can vary so much that it's hard to rely on a specific setting. Three, a particular "bar" is only a rough estimate - meaning bar 3 on the port engine could be 31% and bar 3 on the stbd engine could be 38% (just using rough numbers there). Engines don't always tilt at EXACTLY the same rate.

In the end... it's a "pretty" gauge - but not overly useful. Mine hasn't worked in 6 or 7 years and I haven't missed it once.

My advice... if you can fix it by messing around with it yourself, great. If it's going to cost money... put that money towards something more useful, like gas! :)
This is exactly my thoughts, if I can fix it easily, then I want to because...well everything should work right. :) But if not, no worries as I can look back at it as I did with my previous boat that had no indicator. :D
 

A&J Outdoors

Well-Known Member
Joined
Jul 14, 2022
Messages
193
Reaction score
36
Points
28
Age
60
Location
San Antonio, TX./Au Gres MI.
Website
www.outdoorslivecrew.com
Model
Sailfish
Ok I lifted both motors and I see the lever you all are referring too. On the working side it goes up and down with the motor, must have a spring in it. On the bad side it just moves freely by hand, appears the spring is likely broken.
I'll likely fix it, but it is move down the list of things to do. :) Thanks everyone for the input.
 

seasick

Well-Known Member
Joined
Aug 19, 2008
Messages
9,585
Reaction score
1,447
Points
113
Location
NYC
On my SX motor (2001) the trim sensor lever is spring loaded and is moved by a cam on the motor bracket. It can get gummed up and stick The cam assembly can also break. The original version of the cam assembly clip was plastic andwas prone to crack over time. Replacement cams are metal. Adjustment requires the cam to be rotated to the correct position and tightened down. It is kind of a hit or miss adjustment and not super easy to get to. There are no adjustments at the gauge that I am aware of.
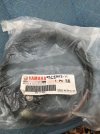
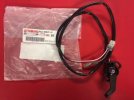
Here is the part I used
 

wspitler

GreatGrady Captain
Joined
May 16, 2011
Messages
1,372
Reaction score
320
Points
83
Location
Inglis, FL
Model
Express 330
Ok I lifted both motors and I see the lever you all are referring too. On the working side it goes up and down with the motor, must have a spring in it. On the bad side it just moves freely by hand, appears the spring is likely broken.
I'll likely fix it, but it is move down the list of things to do. :) Thanks everyone for the input.
When adjusting mine (stbd) I used a very long phillips screwdriver to loosen and tighten the adjustment screw. Check out Page 12 of the manual for the round command link gauge for calibrating the trim indication via the gauge:

02 (setting trim angle) You can set the trim angle to zero. Fully trim the outboard motor down. 1. Turn the engine off and the engine start switch to ON. 2. (4 seconds): To activate the custom mode. 3. (1 second): To switch between the setting function numbers and to switch to the zero adjustment display. 4. + (1 second): To adjust the trim angle to zero using the current trim position as the standard value and return to the normal display. NOTE: • When one segment is displayed, the trim angle of the outboard motor is adjusted to zero (full trim in). • Press the button for 1 second from step 3 to cancel the adjustment of the trim angle to zero and return to the normal display.
 

A&J Outdoors

Well-Known Member
Joined
Jul 14, 2022
Messages
193
Reaction score
36
Points
28
Age
60
Location
San Antonio, TX./Au Gres MI.
Website
www.outdoorslivecrew.com
Model
Sailfish
On my SX motor (2001) the trim sensor lever is spring loaded and is moved by a cam on the motor bracket. It can get gummed up and stick The cam assembly can also break. The original version of the cam assembly clip was plastic andwas prone to crack over time. Replacement cams are metal. Adjustment requires the cam to be rotated to the correct position and tightened down. It is kind of a hit or miss adjustment and not super easy to get to. There are no adjustments at the gauge that I am aware of.
Here is the part I used
Hmm that looks nothing like the lever on mine.
 

Halfhitch

GreatGrady Captain
Joined
Nov 11, 2017
Messages
1,429
Reaction score
459
Points
83
Location
Venice, Florida
I had a 2004 F150 and that's the type it had. A plastic clamp on the tube. Like seasick my original plastic one broke and the replacement was metal, like pictured.
 

wspitler

GreatGrady Captain
Joined
May 16, 2011
Messages
1,372
Reaction score
320
Points
83
Location
Inglis, FL
Model
Express 330
I have one like this in a drawer for back up. I must’ve ordered it for my old 2007 F250s. I now have new F300s. .
 

Attachments

  • 0159D2D4-F603-4E13-860F-C940BD9F12EB.jpeg
    0159D2D4-F603-4E13-860F-C940BD9F12EB.jpeg
    1.5 MB · Views: 3

wspitler

GreatGrady Captain
Joined
May 16, 2011
Messages
1,372
Reaction score
320
Points
83
Location
Inglis, FL
Model
Express 330
Same as the one I have. Mine is a – 11 and the current version is – 12 I believe. If you need one I can ship this one to you for $75 plus shipping. It does have some value as a back up for me. My F 300s are new but, you never know! You will see what I mean about the long Phillips screwdriver when you take a look if it is your starboard engine I seem to remember running the screwdriver through a hole in the port side engine mount to reach the screw.
 
  • Like
Reactions: A&J Outdoors

seasick

Well-Known Member
Joined
Aug 19, 2008
Messages
9,585
Reaction score
1,447
Points
113
Location
NYC
When adjusting mine (stbd) I used a very long phillips screwdriver to loosen and tighten the adjustment screw. Check out Page 12 of the manual for the round command link gauge for calibrating the trim indication via the gauge:

02 (setting trim angle) You can set the trim angle to zero. Fully trim the outboard motor down. 1. Turn the engine off and the engine start switch to ON. 2. (4 seconds): To activate the custom mode. 3. (1 second): To switch between the setting function numbers and to switch to the zero adjustment display. 4. + (1 second): To adjust the trim angle to zero using the current trim position as the standard value and return to the normal display. NOTE: • When one segment is displayed, the trim angle of the outboard motor is adjusted to zero (full trim in). • Press the button for 1 second from step 3 to cancel the adjustment of the trim angle to zero and return to the normal display.
Interesting, I'll have to try that procedure.
 

A&J Outdoors

Well-Known Member
Joined
Jul 14, 2022
Messages
193
Reaction score
36
Points
28
Age
60
Location
San Antonio, TX./Au Gres MI.
Website
www.outdoorslivecrew.com
Model
Sailfish
Same as the one I have. Mine is a – 11 and the current version is – 12 I believe. If you need one I can ship this one to you for $75 plus shipping. It does have some value as a back up for me. My F 300s are new but, you never know! You will see what I mean about the long Phillips screwdriver when you take a look if it is your starboard engine I seem to remember running the screwdriver through a hole in the port side engine mount to reach the screw.
For that price I will take it. I'll message you my address to figure shipping. Thank you.
 

wspitler

GreatGrady Captain
Joined
May 16, 2011
Messages
1,372
Reaction score
320
Points
83
Location
Inglis, FL
Model
Express 330
For that price I will take it. I'll message you my address to figure shipping. Thank you.
I'd check the part # to insure it is the correct part. I use Simyamaha often for Yamaha parts and find Andy very helpful. Let me know for sure. I did get your message.
Bill
 
  • Like
Reactions: A&J Outdoors