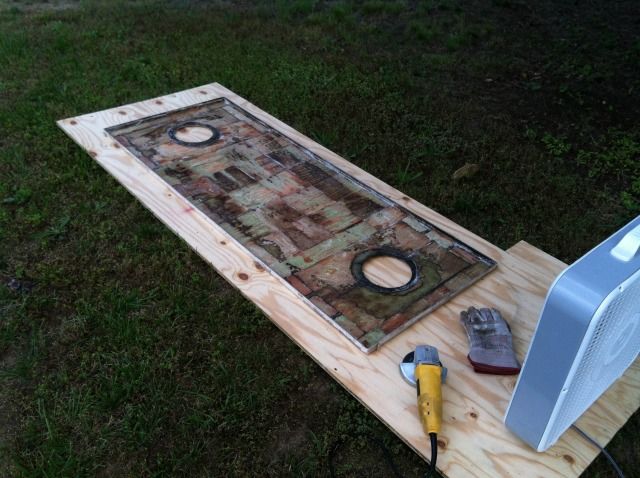
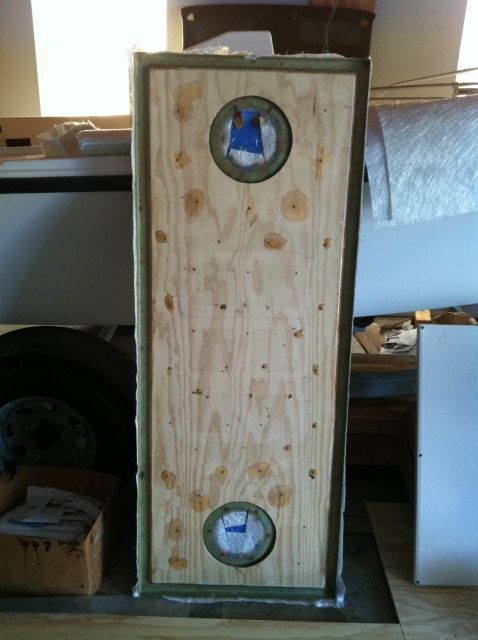
1986 Seafarer 227: 5/6/14 Update - Stringer extension prep

BobP

GreatGrady Captain
Joined
Apr 27, 2005
Messages
4,744
Reaction score
6
Points
38
Location
Long Island, NY
Model
Sailfish
Re: 1986 Seafarer 227 Repairs, Updates and Upgrades

By the way, Grady didn't seal bulkheads from stringers, it's all intimate.
They layed all the wood then glassed it in (I bet).

Get the middle section in photo it's the major of the bulkhead structure, seal off the continuation for next year.
The Admiral is waiting !

The bulkheads do not have to be continuous. I bet Grady kept the lower half of stringer continuous and cut the bulkhead notch in lower half.
However since model is used on outboards too, this bulkhead may have been placed specific by model on production line.
 

gw204

Well-Known Member
Joined
Jan 31, 2005
Messages
2,479
Reaction score
22
Points
38
Location
St. Leonard, MD
Re: 1986 Seafarer 227 Repairs, Updates and Upgrades

Well I went ahead and skinned the bulkhead from the tank side last night and peeled most of the core out. It was completely soaked. Behind the port main stringer it had the consisency of mulch. Looks like I'll be cutting out the other skin this weekend so I can remove a bit more of what used to be a bulkhead and then that is as far as I'm going to take the demo this time around. Will dry out what I can and move on with life. The kids want to go tubing and I want to fish and drink a cold beer after putting a big one in the box! :) I'll make a template for the new bulkead out of cardboard or something, transfer that to some ply and cut the new core. It will most likely get glassed outside of the boat, fitted and then tabbed in.

Got most of the core for the tank hatch cut to size as well. I am most likely going to use some 3/4" marine ply that I have...it was leftover from when I did the transom in my Mako.

Kicked the motor over just to make sure it wasn't locked up. Going to try and fire the beast this weekend once I charge the battery and check a few things.

Then I got to knocking around and making a plan in my head for when I decide to REALLY dig into it. I now have an idea of where I'll be cutting the floor/liner for the eventual stringer work....unless I hit the lottery, buy a place on the water and get myself a battlewagon. :lol:
 

BobP

GreatGrady Captain
Joined
Apr 27, 2005
Messages
4,744
Reaction score
6
Points
38
Location
Long Island, NY
Model
Sailfish
Re: 1986 Seafarer 227 Repairs, Updates and Upgrades

Correction - Grady used one layer of 1.5 oz mat and one of roven woven. mat againt hull. My supplier has it comes as a combo together. Brian can see if it is, then same as my model & year.

You in it now Brian, been there, done that.
'
 

gw204

Well-Known Member
Joined
Jan 31, 2005
Messages
2,479
Reaction score
22
Points
38
Location
St. Leonard, MD
Re: 1986 Seafarer 227 Repairs, Updates and Upgrades

So, here's the latest on my rotten bulkhead issue... :?

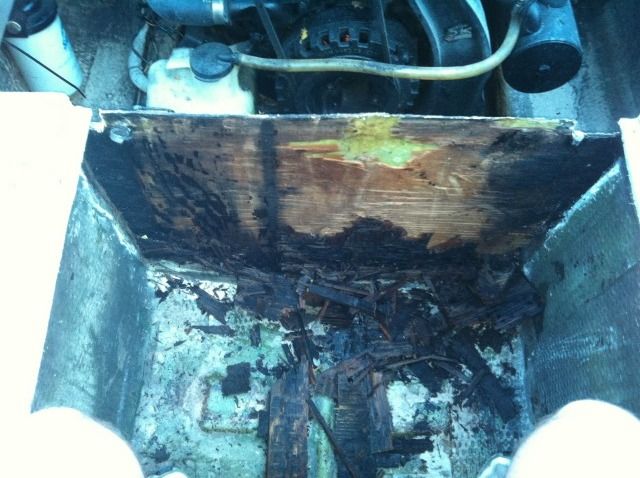
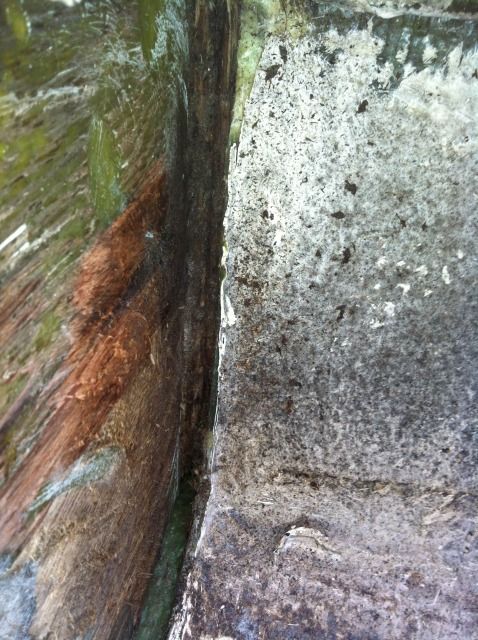
The bulkhead was skinned from the tank side a few days ago. Sopping wet and in REALLY bad shape behind the port stringer and moving farther outward. My guess is a poor seal between the deck, the tank cover and the strips of teak lining the engine well was allowing a lot of water to get to this area.

Sorry about the quality of some of these pics. I have been taking them w/ my phone.
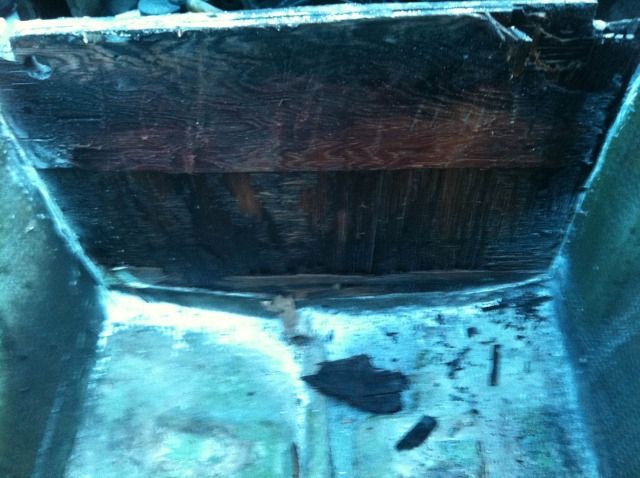
photo24.jpg


photo26.jpg


photo27.jpg


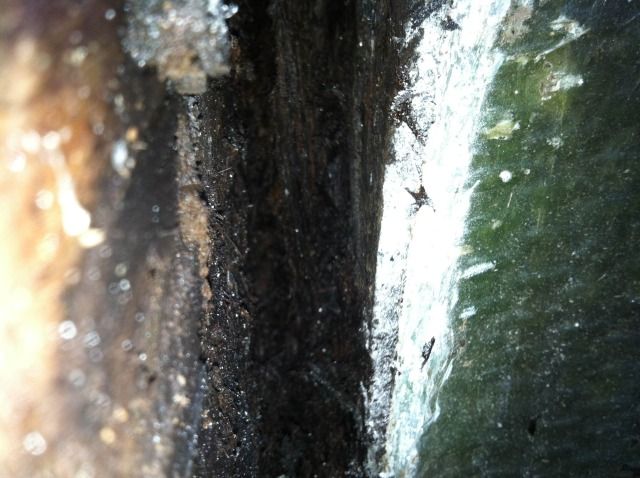
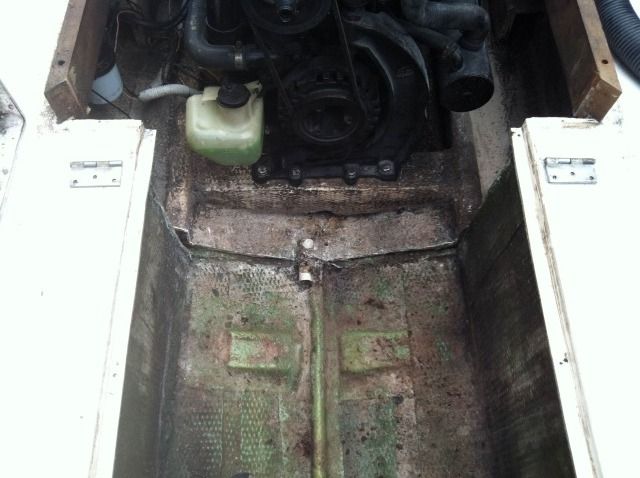
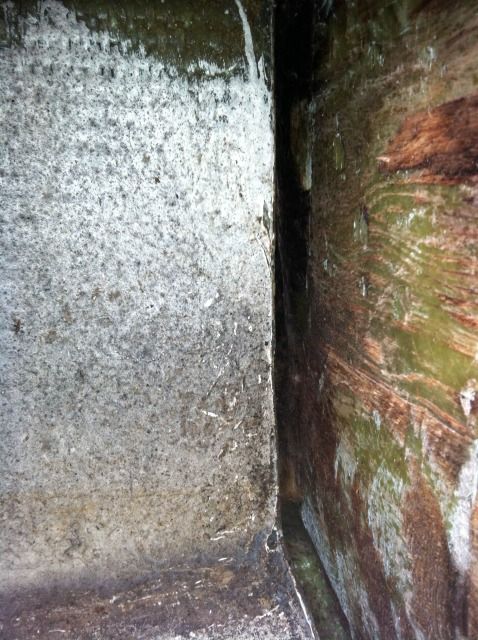
A few days later I cut the glass on the opposite of the bulkead, peeled it off and removed all of the rotten core between the two stringers lining the engine box. For the core section between the main stringers I simply kicked the hell out of it and broke it to pieces. :lol: I had to be a little more cautious on the pieces that extended out farther. Got most of it out by cutting into it around the perimeter w/ my Multimater and then prying it out with a pry bar. I tried chiseling out some pieces taht were left down by the shorty stringers in the engine box and had limited success. So, I got out my trust Stihl chainsaw and chewed those out in a matter of seconds. I then used it to clean most of the remaining core from the sides. I chewed to a point about a 1/2" beyond where the next set of stringers ended and stopped there. While I really did want to go farther, I wasn't sure how I would have been able to replace the core section w/out pulling floor...and that isn't in the scope of this "non-project" right now. Later...yes.

The stuff left was pretty wet, but after running some fans for a few hours, things were drying out nicely. I am just trying to dry the exposed edges enough so they will take some resin and glass to isolate them from the new bulkhead. Next step is to grind the areas and prep for a new bulkhead.

photo30.jpg


photo31.jpg


photo32.jpg


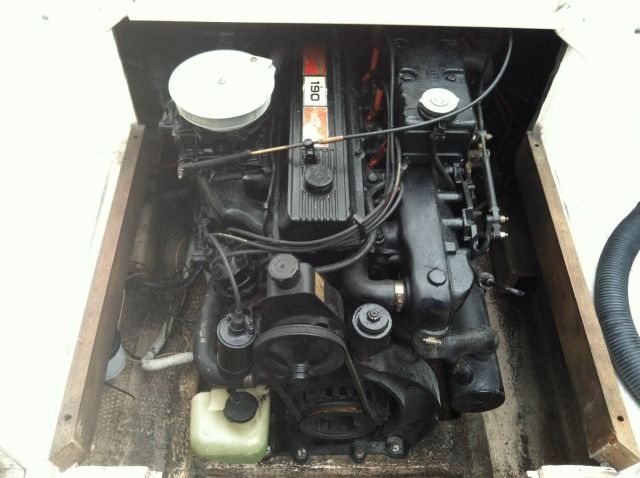
Then I moved on to prepping the engine for a start-up attempt. I was told by the previous owner and his mechanic that it was running at the end of last season, had been winterized and should start right up. We'll see.

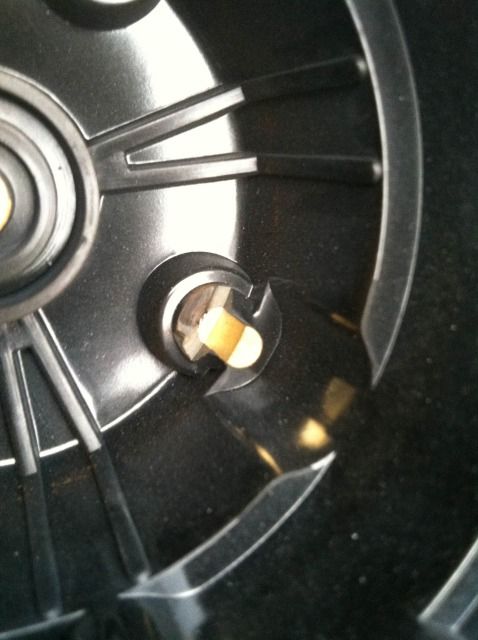
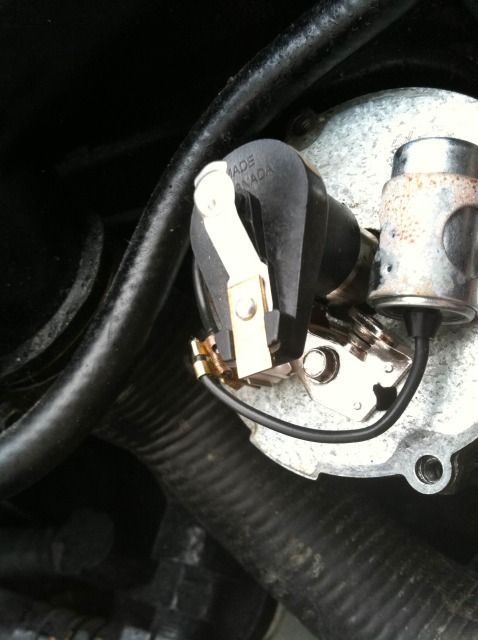
I pulled each plug, reset the gap and reinstalled them. They looked OK, but I'll probably replace once I get the kinks worked out and have her up and running for real. Pulled and cleaned the flame arrestor. Cleaned the FWC fill cap (just so it looked pretty). Installed a new 25-micron few fuel filter (it was a left over from the Forumula project and will be replaced with a 10-micron eventually). Replaced a section of fuel line from the filter to the fuel pump. Pulled the distributor cap to clean/check the contacts and rotor and got a bit of a surprise. The rotor is hitting the contacts in the cap slightly. It looks to have been this way for a while, so I decided to press on a try to start. Seems to be a good bit of end play in the distributor. Further investigation is necessary. Cleaned the build up of bottom paint from around the water intakes in the outdrive (they were probably 50% blocked). Hooked up an external tank w/ fresh fuel and pumped the primer bulb until hard. Blowers on, battery in, throttle advancefingers crossed.

Crank...crank...crank...nothing.

Crank...crank...crank...nothing.

Crank...crank...crank...nothing.

Gave up because I was out of time.

Pulled the battery because I could see fuel dripping from the fuel pump. It was pretty, but it wasn't running. :cry:

photo29.jpg


photo33.jpg


photo34.jpg


Went after the motor again last night. Wanted to run a compression check before doing anything else. Hooked the hose back up to the drive so as not to burn up the water pump. Got 150 on no 1, around 148 on no. 2 and very erratic readings on nos 3 and 4. The gauge would jump up and immediately fall back down. I put the gauge back on no. 1 and it did the same thing. So, I think my gauge took a dump. I laid a folded up paper towel over the open no 1 hole and cranked the motor to see how fast the paper towel shot up. Then I did the same on no 4. They looked pretty equal to me, so I think everything is OK. I need to get another gauge to verify though. Real technical test 'eh??? :lol:

I had remembered reading somewhere that I should get 8 volts across the terminal on the coil, so I checked that and had nothing. The contacts were covered w/ paint so I cleaned and reinstalled them. Still nothing and I was figuring I had no spark. So, I pulled the no. 1 plug, reattached the plug wire and layed it against a bolt on the engine mount to ground it. Cranked the motor and had spark. :) Reinstalled the plug and cranked again. This time I got signs of life.

My wife came out for a minute to graciously help verify fuel at the carb. She advance the throttle while I peered into the throats. Got a nice stream of fuel into each throat so I think everything was good there. Heck, let's give it another try.

Crank...crank...crank...VROOOM!!!! She runs! :praise

Oil pressure looked good. Idle seems low, but I didn't let it warm up much. I heard what I wanted to hear. Shut it down for the night.
 

Megabyte

Well-Known Member
Joined
Mar 3, 2005
Messages
55
Reaction score
0
Points
0
Location
Annapolis, Md
Re: 1986 Seafarer 227 Repairs, Updates and Upgrades

Doesn't it feel good when a project fires for the first time? :)
Gotta love that.
 

Grog

GreatGrady Captain
Joined
Sep 27, 2006
Messages
2,008
Reaction score
1
Points
38
Re: 1986 Seafarer 227 Repairs, Updates and Upgrades

It's good to hear the motor run for the first time. Before you get too far, drop the I/O unit and check the seals. I'm helping a friend with a 470 in a Welcraft and he just about never dropped the unit. The seals for the shift lever were totally shot and ruined his shift cable (along with causing a stalling problem when shifting from FWD to REV).

When I dug into my Sailfish, all the bulkheads and stringers were laid down then glassed, most of them also interlocked to each other too. Bad part is when water gets in it's going to wreck havoc.
 

gw204

Well-Known Member
Joined
Jan 31, 2005
Messages
2,479
Reaction score
22
Points
38
Location
St. Leonard, MD
Re: 1986 Seafarer 227 Repairs, Updates and Upgrades

New tanks is more or less ordered. Went with Sunrise Marine Tanks in Venice, FL. Just need to send in a check. I was told they don't take credit cards as they deal primarily with manufacturers so there has never been a need.
 

gw204

Well-Known Member
Joined
Jan 31, 2005
Messages
2,479
Reaction score
22
Points
38
Location
St. Leonard, MD
Re: 1986 Seafarer 227 Repairs, Updates and Upgrades

Took the painted-on name off the boat this weekend. Shot some EZ-off over cleaner over it, let it sit for a few minutes and went at it with a paint scraper. Took me about 5 minutes to get the majority of the name off. Then hit it with a scotch brite pad and some car soap. Total time to completely remove the name was about 10 minutes. No special name-removal rituals were performed.

I also got my hands on a trailer. It's a 2005 tandem axle Sea Lion. 5877 lb GVWR, 4800 lb. capacity. Not quite a heavy as I wanted, but it will do. The boat and engine are just under 3,700, so I have 1,100 to spare for fuel and miscellaneous sh*t. Galvanized frame, 32 roller, LED lights, Kodiak discs, diamond plate fenders and 4 new radial tires. It needs new safety chains, general PM and 3 of the roller brackets are slightly bent, but other than that, it's in real good shape.

photo39.jpg
 

Curmudgeon

Well-Known Member
Joined
Nov 30, 2005
Messages
875
Reaction score
1
Points
0
Location
NC/GA
Re: 1986 Seafarer 227 Repairs, Updates and Upgrades

Be sure of your weights. My 225G with batteries, no fuel, minimum gear comes in about 5K on the hoof. You trailer might be very marginal ... :wink:
 

Parthery

GreatGrady Captain
Joined
Jan 31, 2005
Messages
2,589
Reaction score
220
Points
63
Location
Atlanta, GA
Re: 1986 Seafarer 227 Repairs, Updates and Upgrades

I'm with Curmudgeon....I think your weight may be light. My 226 weighed almost 6k with half tank of fuel and an HPDI.....

My 225 weighs north of 5000 lbs...
 

gw204

Well-Known Member
Joined
Jan 31, 2005
Messages
2,479
Reaction score
22
Points
38
Location
St. Leonard, MD
Re: 1986 Seafarer 227 Repairs, Updates and Upgrades

I may try to take everything to the local landfill to get a weight on everything before I block the boat. Then I'll go back with an empty trailer and get another weight so I can calc the difference.

My Sailfish spent 10+ years on a 6,400 lb. sled and my Formula was sold new with a 4,100 lb trailer and neither of those ever had a failure. I don't plan on doing a lot of pulling. If that ever changes and I'm over capacity, I'll worry about it then.
 

gw204

Well-Known Member
Joined
Jan 31, 2005
Messages
2,479
Reaction score
22
Points
38
Location
St. Leonard, MD
Re: 1986 Seafarer 227 Repairs, Updates and Upgrades

The '76 catalog I downloaded listed the dry weight at 4,100...an exact match for the trailer that was under it. I think setting them up like that was common practice back in the day.

That trailer still had the original tires on it when I sold the boat a few months ago. :wow
 

Grog

GreatGrady Captain
Joined
Sep 27, 2006
Messages
2,008
Reaction score
1
Points
38
Re: 1986 Seafarer 227 Repairs, Updates and Upgrades

I'm not sure where they got the old weights from, my Sailfish is listed at 5300.
 

Megabyte

Well-Known Member
Joined
Mar 3, 2005
Messages
55
Reaction score
0
Points
0
Location
Annapolis, Md
Re: 1986 Seafarer 227 Repairs, Updates and Upgrades

Grog said:
I'm not sure where they got the old weights from, my Sailfish is listed at 5300.

Probably the same place where they got their overall lengths. :)
 

gw204

Well-Known Member
Joined
Jan 31, 2005
Messages
2,479
Reaction score
22
Points
38
Location
St. Leonard, MD
Re: 1986 Seafarer 227 Repairs, Updates and Upgrades

Nothing real exciting to report from this past weekend. I started adjusting my new trailer and got the boat up on blocks so I could take Dad's trailer back to him. Still procrastinating breaking out the grinder to prep for new hatch and bulkhead cores...
 

gw204

Well-Known Member
Joined
Jan 31, 2005
Messages
2,479
Reaction score
22
Points
38
Location
St. Leonard, MD
Re: 1986 Seafarer 227 Repairs, Updates and Upgrades

Still not a lot to report. Hoping my gas tank will arrive this week or early next and I should have an order arriving from Boatfix today w/ some SS thru-hulls, battery trays and neoprene strips for the bottom of the tank.

I did get off my lazy butt and prepped the tank hatch for new core. Took a little over an hour to rid the hatch of all remaining core. No pics of the finished product.

photo48.jpg


From the looks of this hatch, it is layed up with nothing but mat. No cloth..and it's very thin. :roll: The glass was cracked up pretty bad around 4 of the screw holes surrounding one of the deck plates so I had to bevel those areas so I could build them back up.

Also go the new core cut and bedded. Nothing fancy (or expensive) here. Regular AC plywood cut 1-1/4" shy of the hatch edges, beveled at 45 degrees and peppered w/ 1/4 weep holes for air/excess resin to escape through. I put down a some scraps of glass in the damaged screw hole area, ran a small fillet around the perimter and then dropped a layer of 1-1/2 oz. mat over the entire thing. I coated the surface of the ply with resin (vinylester) twice before applying a coat of resin thickened w/ a combination of wood flour a cabosil w/ a notched trowel. I set it in place and weighted it down with some cinder blocks, two batteries and a small generator.

Weights were removed yesterday. I was hoping things would have cured up so I could finish up Monday night, but no dice. My resin is old and despite catalyzing at 1.5%, it still needed an extra day in the hot sun to solidify. I'll come back one weeked in the future, rough up the new glass around the edges, sand down the squeeze out and glass over everything.

photo49.jpg