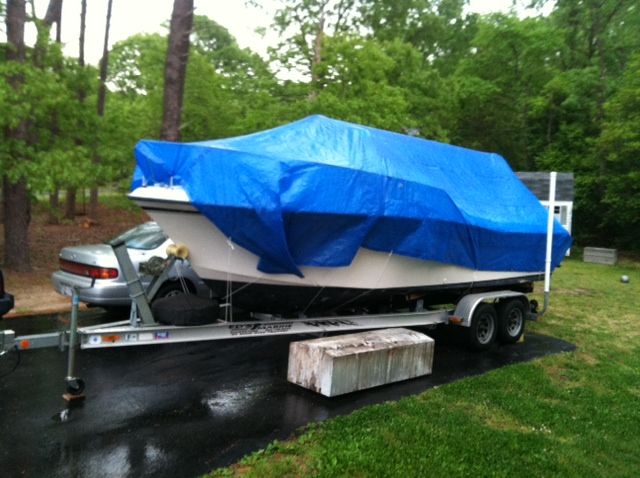
I didn't title this thread 1986 Seafarer 227 Project simply because I told my wife I wouldn't buy another "project"... :lol: Anyway, I started digging into my newly acquired rig yesterday.
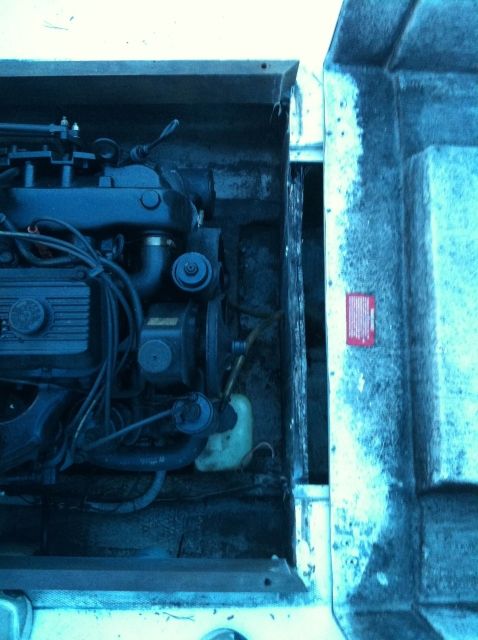
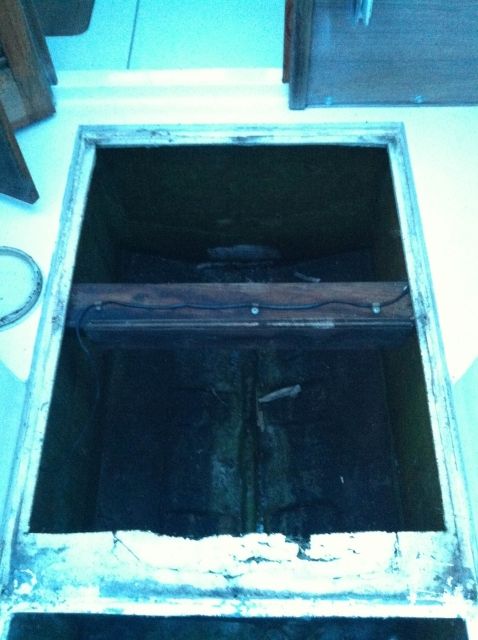
All I really wanted to accomplish on the first day of work was to get the tank out. So, the cover came off first. It wasn't pretty under there... :shock:


It was easy to see why the cover would flex when any weight was put on it.

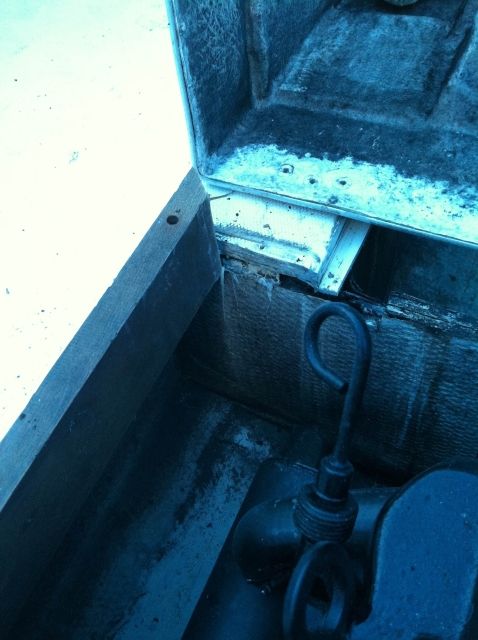
There wasn't enough clearance for me to back out all the screws on the 2x4s and shims holding the tank in place, so I got what I could and then simply chopped up the rest with my Multimaster. Then I had to trim a little more than an 1/8" from each side of the lip that the hatch sits on to make room to pull the tank up. Thankfully, the shop that had been maintaining the boat emptied the tank when the fuel leak was discovered last fall. So, I was able to put a rope around the fill and the 90 degree elbow coming off the supply port and pull the tank straight up. Over the side it went.
After I spent a few minutes brushing off the top, I had this staring back at me. I think I counted 29 holes...all in the top.

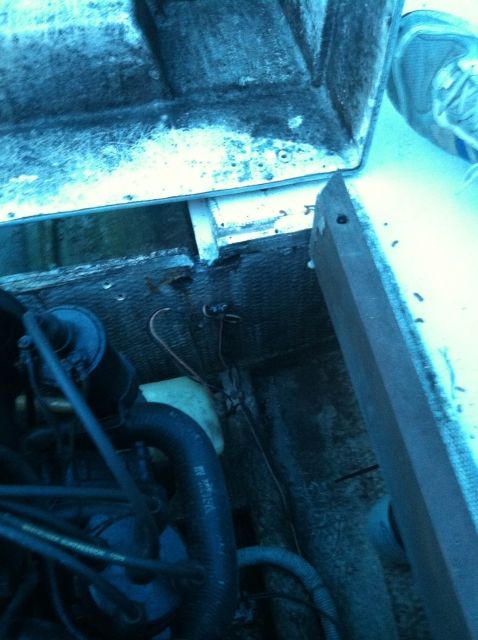
Then I moved on to cleaning the tank compartment and giving a general inspection to the stringers and bulkheads. Since the hatch was unscrewed and the caulking cut prior to my purchase, I was able to sound the top sections of the stringers before I dragged it home and they sounded good, but now I could get to everything.

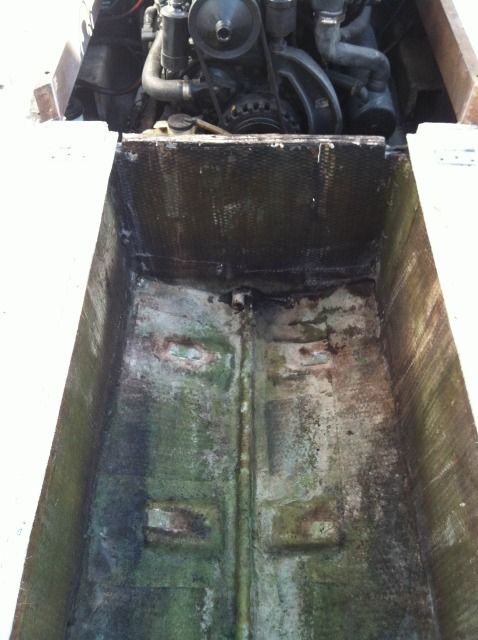
Stringers seem to be in real good shape. Looks like there could be a little delamination in the forward bulkhead and the rear bulkhead is completely rotten. It actually started seeping water after I cleaned the junk out of the compartment. I will probably end up replacing both along with tyring to clean up the glass work down in there. It's the sloppiest I have ever seen. :?
Moving on. I had a little time before I had to start on the honey-do list, so I went after the tank hatch. I cut the bottom skin around the perimeter and then made several cuts through the center trying to match the edges of the plywood squares making up the core. Once that was done, I pulled out the piece that had already broken through the bottom skin a that gave me acces to pry/chisel out the rest. I think it took me all of 15 minutes to gut the entire thing.
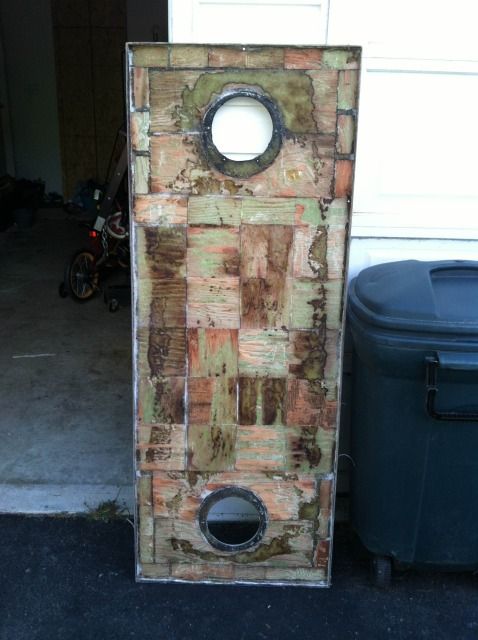
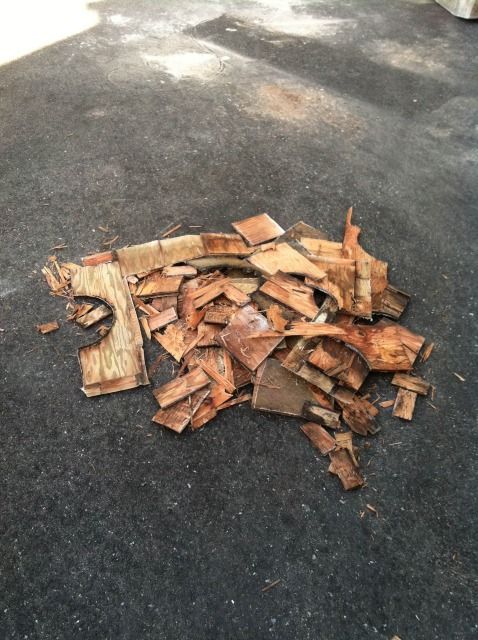
The wood cores were very wet, but didn't seem all that rotten. I think the primary reason for the failure was them simply delaminating from the top skin.
Stay tuned...
All I really wanted to accomplish on the first day of work was to get the tank out. So, the cover came off first. It wasn't pretty under there... :shock:


It was easy to see why the cover would flex when any weight was put on it.

There wasn't enough clearance for me to back out all the screws on the 2x4s and shims holding the tank in place, so I got what I could and then simply chopped up the rest with my Multimaster. Then I had to trim a little more than an 1/8" from each side of the lip that the hatch sits on to make room to pull the tank up. Thankfully, the shop that had been maintaining the boat emptied the tank when the fuel leak was discovered last fall. So, I was able to put a rope around the fill and the 90 degree elbow coming off the supply port and pull the tank straight up. Over the side it went.
After I spent a few minutes brushing off the top, I had this staring back at me. I think I counted 29 holes...all in the top.

Then I moved on to cleaning the tank compartment and giving a general inspection to the stringers and bulkheads. Since the hatch was unscrewed and the caulking cut prior to my purchase, I was able to sound the top sections of the stringers before I dragged it home and they sounded good, but now I could get to everything.


Stringers seem to be in real good shape. Looks like there could be a little delamination in the forward bulkhead and the rear bulkhead is completely rotten. It actually started seeping water after I cleaned the junk out of the compartment. I will probably end up replacing both along with tyring to clean up the glass work down in there. It's the sloppiest I have ever seen. :?
Moving on. I had a little time before I had to start on the honey-do list, so I went after the tank hatch. I cut the bottom skin around the perimeter and then made several cuts through the center trying to match the edges of the plywood squares making up the core. Once that was done, I pulled out the piece that had already broken through the bottom skin a that gave me acces to pry/chisel out the rest. I think it took me all of 15 minutes to gut the entire thing.


The wood cores were very wet, but didn't seem all that rotten. I think the primary reason for the failure was them simply delaminating from the top skin.
Stay tuned...


