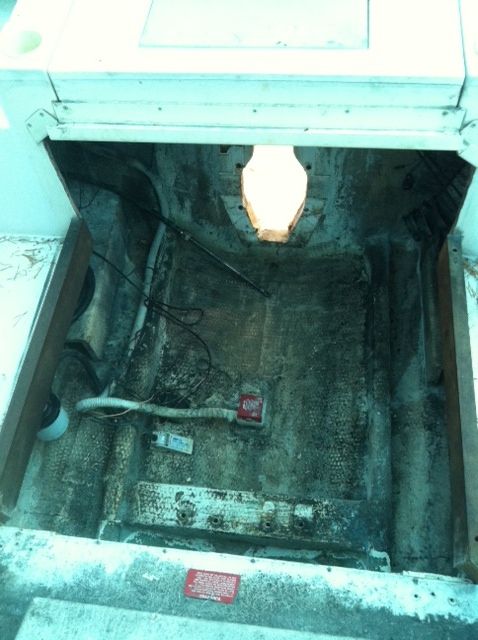
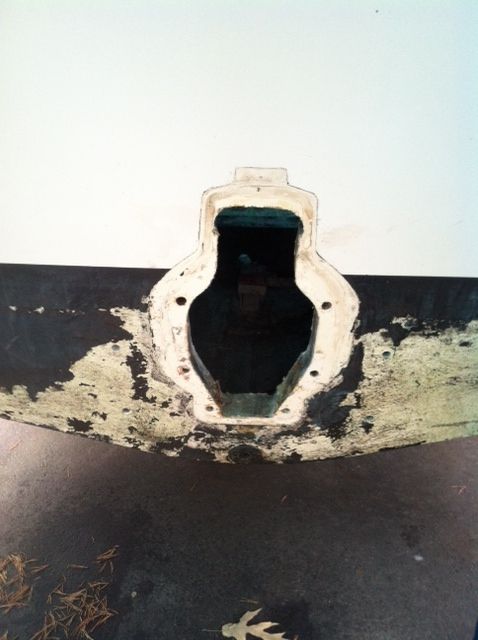
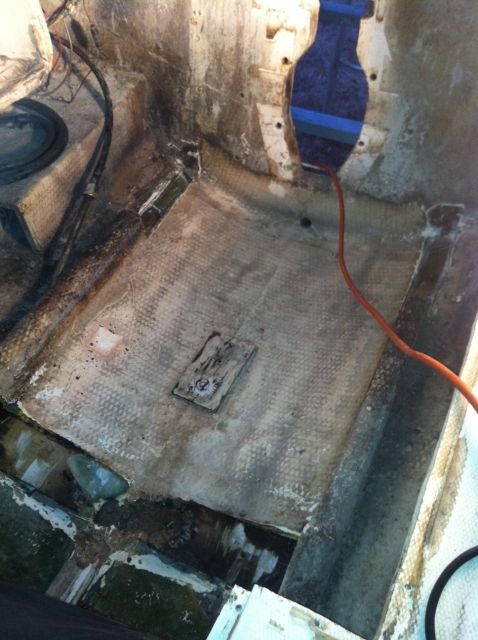
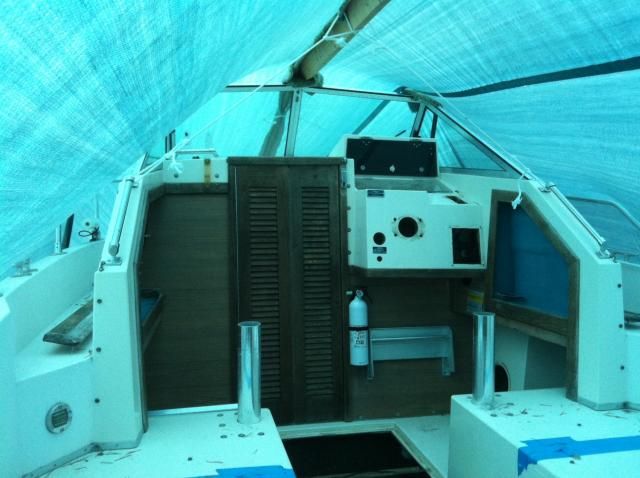
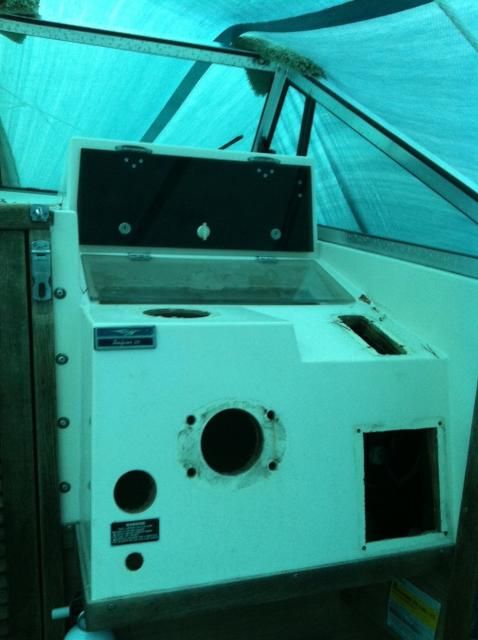
1986 Seafarer 227: 5/6/14 Update - Stringer extension prep

Curmudgeon

Well-Known Member
Joined
Nov 30, 2005
Messages
875
Reaction score
1
Points
0
Location
NC/GA
Re: 1986 Seafarer 227 Repairs, Updates and Upgrades

an exact match for the trailer that was under it.

Would you ride on an elevator that was constructed exactly at design weight loading limits (and some years ago, at that)? If the trailer was rated for a 4100# load, and your boat weighs 4100#, you are at the design weight load limit (when constructed). If your trailer is rated at 4100# GVWR, you're already overloaded because the weight of the trailer is added in ... :doh
 

ROBERTH

GreatGrady Captain
Joined
Jun 10, 2006
Messages
1,311
Reaction score
125
Points
63
Location
Raleigh, NC
Model
Sailfish
Re: 1986 Seafarer 227 Repairs, Updates and Upgrades

GW, check this out for installation procedure of tank: http://www.yachtsurvey.com/fueltank.htm.

I used PVC trim and 5200 for bonding it to the aluminum. After I recoated tank with Coal Tar Epoxy.
 

gw204

Well-Known Member
Joined
Jan 31, 2005
Messages
2,479
Reaction score
22
Points
38
Location
St. Leonard, MD
Re: 1986 Seafarer 227 Repairs, Updates and Upgrades

Thanks Robert. I've seen that article before and although Pascoe is a highly respected surveyor, he makes a few points that I completely disagree with.

My tank will be...

1. Chemically etched
2. Thoroughly coated w/ coal tar epoxy or Interprotect 2000E
3. Have 1/4" thick Neoprene strips bonded to the bottom with 5200 (after the tank is coated)
4. Lagged/screwed to the stringers using mounting tabs I am having welded to the top of the tank. No more of those stupid shims.
 

NOTHING ELSE MATTERS

GreatGrady Captain
Joined
Jun 26, 2006
Messages
1,993
Reaction score
5
Points
38
Age
60
Location
LONG ISLAND NEW YORK
Re: 1986 Seafarer 227 Repairs, Updates and Upgrades

gw204 said:
Thanks Robert. I've seen that article before and although Pascoe is a highly respected surveyor, he makes a few points that I completely disagree with.

My tank will be...

1. Chemically etched
2. Thoroughly coated w/ coal tar epoxy or Interprotect 2000E
3. Have 1/4" thick Neoprene strips bonded to the bottom with 5200 (after the tank is coated)
4. Lagged/screwed to the stringers using mounting tabs I am having welded to the top of the tank. No more of those stupid shims.

Did the same thing on the Formula, but i did not use chemical etching process, i just sand it and applied coal tar epoxy before the twenty minute time limit.
The trick with the neoprene strips and 5200 is to cover the WHOLE edge of the strip and make sure when pushed in place you get a little 5200 squeezed out of the whole perimeter to seal it so no water can be trapped between the tank and the strip. An extra thing i did was that i glassed the tank on the top edges so i don't have a gap between the tank and the stringers/bulkheads. When/if you do that you have to have a vent hole in front and rear bulkhead so fresh air runs through. I also installed a drain plug on the rear bulkhead at the bottom of the tank compartment.

IMG_0453.jpg

IMG_0459.jpg

IMG_0493.jpg


IMG_0495.jpg
 

ROBERTH

GreatGrady Captain
Joined
Jun 10, 2006
Messages
1,311
Reaction score
125
Points
63
Location
Raleigh, NC
Model
Sailfish
Re: 1986 Seafarer 227 Repairs, Updates and Upgrades

Yeah, I take Pascoe with a grain also on some point. Was just trying to show about the intentions and not to put a plain alum. tank in there and more rubber strips. :)

I did follow his detail on the PVC strips and extended them beyond the edge and also made sure the 5200 pushed out so no air pockets.

Any of what we do over the old way is better!
 

gw204

Well-Known Member
Joined
Jan 31, 2005
Messages
2,479
Reaction score
22
Points
38
Location
St. Leonard, MD
Re: 1986 Seafarer 227 Repairs, Updates and Upgrades

Got a little more done over the weekend.

We had some pretty heavy rain on Friday night and knowing the tarp I have over the boat isn't water tight, I figured I better check on the broken drain in the bottom of my port fishbox. Sure enough, water had gotten in and went right down the hole. I guess I had about a 1/2 gallon puddled on top of the foam underneath the floor. I tried to soak it up by forcing a shammy in through the hole for the thru-hull, but that was taking way too long. So, I decided to go ahead and cut my access hole in the stringer so I could get in there to remove the water. Marked a spot 4" x 4" and cut the bottom corners with a hole saw. Then I came back, made the straight cuts with my Multimaster and popped the plug out. After enlarging the width to about 7", I was able to get my arm in there and soak up the water. I set up a small fan so it could blow air at the area and within about a hour the top of the foam was bone dry.

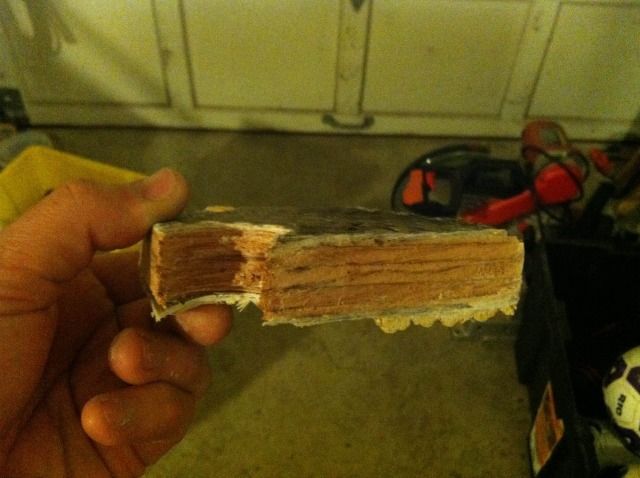
I realize this is the top of the stringer and right about amidships, but the core is PERFECT.

photo50.jpg


The next day, I went about setting my new bilge pump and port fishbox thru hulls in place. I bed them in 4200 and ran the nuts down as far as I could using just my finger. I'll come back later this week, remove the nuts, caulk the back side and tighten them all the way.

Last to go in were a pair of new Attwood battery trays. Ooooh....exciting. :roll:

Tank should come in later this week.
 

gw204

Well-Known Member
Joined
Jan 31, 2005
Messages
2,479
Reaction score
22
Points
38
Location
St. Leonard, MD
Re: 1986 Seafarer 227 Repairs, Updates and Upgrades

Not much has been happening w/ the boat lately. Mostly just taking delivery of various parts...fuel tank, fish box drains, battery switch, etc. I did do a bit of grinding in preparation for the new aft bulkead for the fuel tank compartment, but that's about it in terms of actual progress. Taking a shower in fiberglass dust when it's 90+ outside isn't exactly my idea of sumer fun... :?

Had to re-tarp the boat earlier this week. The one I had over the boat was letting too much water in. During heavy rains, I think was was running down the walkaround and getting under the deck through the holes cut for the 4" inspection plates. Multiple times I had to get in there and soak up some puddles.

44fc774b.jpg


I did manage to start making preparations to slide the trailer under the boat though. All the rollers need to be adjusted so the boat doesn't rest on any of the strakes, so loosening a bunch of rusty u-bolts was in order. Of the four that hold the forward brackets to the crossmember, two snapped. After that, I decided to just replace them all so I didn't mess with the ones on the rear brackets. I'll tackle those after I get the new u-bolts. I figured the same would probably happen when loosening the u-bolts that held the roller assemblies, but I was wrong. All 16 came of relatively easily. Going to clean the treads up with a wire wheel and then reinstall w/ liberal amounts of antisieze. I have to try and straighten out a bend in 3 of the roller arms first though.

22682c8c.jpg


Still fighting the urge to pull the Mercruiser and mount the new Armstrong bracket that I have left over from the Formula project...
 

RAINMAKER

Well-Known Member
Joined
Mar 3, 2005
Messages
286
Reaction score
3
Points
0
Re: 1986 Seafarer 227 Repairs, Updates and Upgrades

Brian, yousure do love working on boats!!!! You do very good work also! :goodjob
 

gw204

Well-Known Member
Joined
Jan 31, 2005
Messages
2,479
Reaction score
22
Points
38
Location
St. Leonard, MD
Re: 1986 Seafarer 227 Repairs, Updates and Upgrades

Thanks man. :)

Not really loving working on this one though. Thought I would have it in the water a month ago and I'm no where near that. I definitely should have just hollowed out that bulkhead with my chainsaw and then poured it full of foam or something like Nida Pour. :-|
 

RAINMAKER

Well-Known Member
Joined
Mar 3, 2005
Messages
286
Reaction score
3
Points
0
Re: 1986 Seafarer 227 Repairs, Updates and Upgrades

You'll get it done before ya know it. Til' then you're welcome on mine anytime........... :D
 

gw204

Well-Known Member
Joined
Jan 31, 2005
Messages
2,479
Reaction score
22
Points
38
Location
St. Leonard, MD
Re: 1986 Seafarer 227 Repairs, Updates and Upgrades

Thanks Rainmaker! :D

Ordered 8 new 1/2" galv. u-bolts to secure the roller brackets to the crossmembers yesterday. $62 and change shipped from Champion Trailers. :shock: Those should get delievered on Friday so I'm hoping to put the trailer back together and get the boat on it this weekend.
 

gw204

Well-Known Member
Joined
Jan 31, 2005
Messages
2,479
Reaction score
22
Points
38
Location
St. Leonard, MD
Re: 1986 Seafarer 227 Repairs, Updates and Upgrades

Nothing real exciting to report. :cry:

Spent last week prepping to slide the trailer under the boat. Took all four wheels off, removed all of the caked on bearing grease, gave them a good scrub and had them balanced. Anyone that tells you there is no need to balance trailer tires is dead wrong. If I remember correctly, one of the wheels took over 4 oz. on one side to get it to run smooth. Installed new u-bolts and spacers between the brackets holding the main roller supports, freed up each pivoting arm and did an approximate set on the width of the roller assemblies. Every bolt that went on got a dab of anti-sieze for ease of future removal (if necessary).

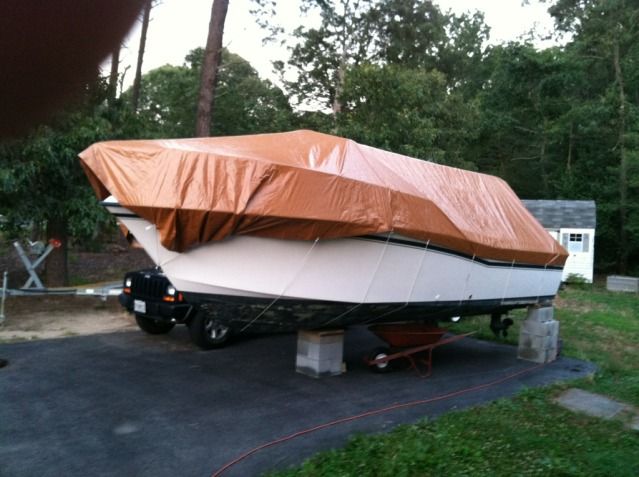
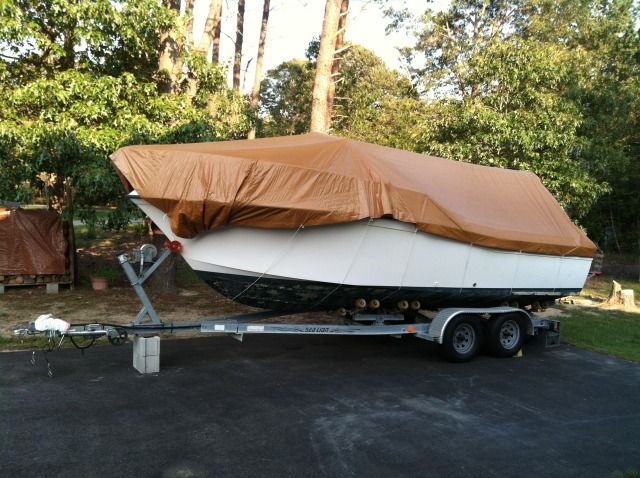
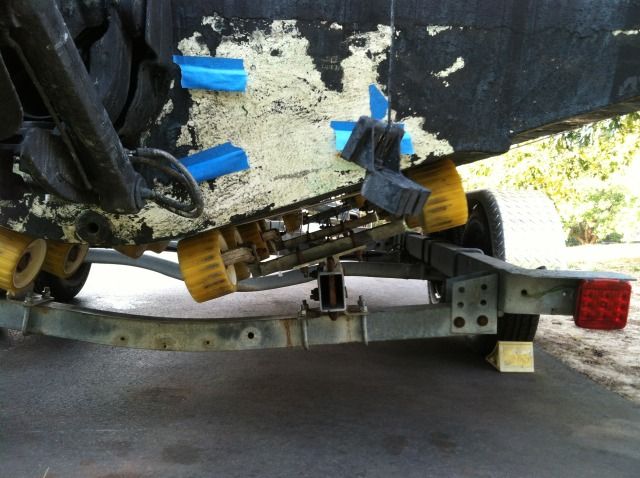
Slid it under the boat on Saturday and positioned the rollers so they sit just inside of the chines. I thought about spreading things a bit more, but I was afraid this would leave too much space down the center and could possibly allow the keel to hit the forward crossmember. Well see how this works out.

photo57_zps24be943a.jpg


photo58_zps93ce0e5c.jpg


There's still a bunch of work left to do before I'm happy with the trailer. Needs to be rewired, have a fender repaired/replaced and the brakes need attention. But at least the boat is off blocks now.


The blue tape is covering some test holes I drilled around the drive. Aside from a few spots around the old swim platform, the transom looks to be in good shape. Good enough to have the outdrive hole filled and a bracket mounted... :hmm
 

gw204

Well-Known Member
Joined
Jan 31, 2005
Messages
2,479
Reaction score
22
Points
38
Location
St. Leonard, MD
Re: 1986 Seafarer 227 Repairs, Updates and Upgrades

And the bracket conversion begins... I'm a glutton for punishment.

With a pending sale on the engine and drive, I started derigging the motor and preparing to pull everything out. Started at 6:30 PM last Sunday by running the gas out of the motor, draining the raw water side of the heat exchanger, doing some minor wiring and control cable derigging and pulling the outdrive.

photo59.jpg


I have a new appreciation for a properly maintained outdrive on a wet slipped boat. The CV joint on that thing looked almost brand new! I couldn't say the same for the water passage though. It was about half blocked with crud. :-/

photo61.jpg


Stay tuned for more. Buyer is supposed to come get the motor on Sunday so I need to get hopping on the removal.
 

gw204

Well-Known Member
Joined
Jan 31, 2005
Messages
2,479
Reaction score
22
Points
38
Location
St. Leonard, MD
Re: 1986 Seafarer 227 Repairs, Updates and Upgrades - 2/24/1

Bye bye Mercruiser...

photo62.jpg


photo63.jpg


Next step will be figuring out how to tackle filling in the hole. I have some ideas but I need to run them by some guys that know way more than I do to make sure I'm on the right track.
 

gw204

Well-Known Member
Joined
Jan 31, 2005
Messages
2,479
Reaction score
22
Points
38
Location
St. Leonard, MD
Re: 1986 Seafarer 227 Repairs, Updates and Upgrades

Power...check. :D

Grabbed this 1995 Merc 225 EFI over the weekend and got it set up on one of my engine stands for going through. Hours are unknown, but the compression is good. 1 year old SEI lower unit which means there are 2 years left on the no-fault warranty. It's not the prettiest, so I plan to give the upper and lower cowlings and midsection a paint job. Came with a full set of gauges, wiring harnesses, oil tank, throttle, throttle/shift cables, SS Mirage prop, aluminum prop and SeaStar hydraulic cylinder.

I'm not sure yet if I will grab a hydraulic helm, or just use mechanical steering. I guess if I can't get the hydraulic cylinder off (which I couldn't yesterday...damn corrosion), that will be an easy decision.

photo5.jpg
 

gw204

Well-Known Member
Joined
Jan 31, 2005
Messages
2,479
Reaction score
22
Points
38
Location
St. Leonard, MD
Re: 1986 Seafarer 227 Repairs, Updates and Upgrades

Took advantage of some nice weather yesterday to skip the honey-do list and get a bit of work done on the boat.

I started off by removing the water separator, bilge pump, float switch, bilge hose, excess wiring,etc. Then I removed all the ties securing the boat and old engine harnesses to the transon and set the harnesses aside. Next came scrubbing down the bottom of the bilge to get rid of the oily, dirty mess that was coating everything. I wanted to get that clean so I wasn't tracking it all througout the boat, to reduce the chance of slipping if I stepped in there and so when I start grinding, I'm not contaminating freshly exposed glass with oil, hyraulic fluid, etc.

Once that was all done, I got to cutting on her a little. First to go was the forward engine mount. I was a solid 4x4 block that had to come out in pieces. My reciprocating saw could chew threw the glass and wood, but not through the 1" thick solid putty it was bedded in. So, I would cut down from the top, then do my best to cut the glass against the hull bottom, and hit the section with a sledge hammer to break it free from the putty. As the center pieces came out I saw that there were areas of that mount that had not been sealed and were exposed to bilge water. Surprisingly enough, the mount was not rotten so whatever type of wood was used is natually rot resitant. After the major pieces were out, I chiseled out the remaining scraps and trimmed the glass back a little more. That reaveled there was no barrier between the core of the mount, and the short stringers it ran between.

I wanted to cut out the short stringers entirely, but I chose to leave most of them in for the time being so the hull was still well supported while it's on the trailer. Ended up chopping out the last 9" or so at the transom. These weren't bedded in putty, so they came out easier. Very wet, but not rotten. The good thing is there was glass between the stringer cores and the transom.

photo64_zps86e99a57.jpg


Next step is more clean up. Then I can start trimming back the glass and transom core to prep for filling the outdrive hole.
 

gw204

Well-Known Member
Joined
Jan 31, 2005
Messages
2,479
Reaction score
22
Points
38
Location
St. Leonard, MD
Re: 1986 Seafarer 227 Not-A-Project: 2/24/13 Update

Got a little more done over the past few weekends. Nothing real exciting though. Spent a few hours pulling out the rigging for the old Mercruiser. Gauge panel, engine wiring harness, throttle, throttle cables, helm and steering cable. I even pulled the boat harness back up through to rigging tubes in order to empty them out. The switch panel was taken out simply to give me better access to do other things.

Anyway, the boat is now a blank slate for me to re-rig...and re-rig neatly/orderly. :)

The "new" gauges are going back in the original panel. Perhaps I will eventually do an upgrade to modernize, but for now I am going to see if I can restore the simulated wood grain w/ some Pentrol.

The 225 Merc I picked up came with a Sea Star hydraulic cylinder, but I'm not sure if I am going to use it. It would be nice to have, but I am also trying to keep the cost down. At the very least, I will put in a new NFB cable steering.


Capt Bill

GreatGrady Captain
Joined
Mar 23, 2005
Messages
805
Reaction score
45
Points
28
Location
First State
Model
Sailfish
Re: 1986 Seafarer 227 Not-A-Project: 4/29/13 Update

Fantastic work, as usual Brian. Keep posting; we all love to see the progress. Are you going to have her ready to splash this season?