family affair
Well-Known Member
Looks amazing.
What did you use to color your port and starboard fuel lines?
What did you use to color your port and starboard fuel lines?
Scotch electrical tape. Coded all the way back thru manifold, filters, primer bulbs and engines.Looks amazing.
What did you use to color your port and starboard fuel lines?

White Nitrile strips 2" x 1/4” using 3M 4000. Need a good permanent seal. Self adhesive is no good.Great looking job! I am lifting my floorboards in the next few days to check out my tanks. Apparently the previous (2 owners ago) disabled the aft tank. Not exactly sure what that means, so I'll be opening her up to have a look.
Question regarding the neoprene strips you used. On my last boat build, I glued strips of Coosa to the underside of the tank using 3500 to preclude any moisture accumulation between the tank and Coosa. Thoughts?

You will have to pull the deck hatch. That doesn't' make sense to me. Look at where the fuel fills connect. I suppose they re-designed it.great write up. My tanks on the 270 are opposite yours, 150 gal in the rear, 50 up front. Im finding a bit of red stain around top of my tank (dyed fuel) so im thinking of replacing my tanks too. do you think the removing the smaller 50 gal forward tank on the 270 will still need the step to be cut out ?
I am in the process of replacing my second tank on my second Grady. I purchased the first tank in 2019, and the manufacturer told me to barrier coat the tank, then attach the mounting strips. This time around, they told me NOT to barrier coat or anything. The reason is that if there were a scratch or defect in the coating, water will get in and be held in and will cause corrosion.The tank will be epoxy coated.
When hatch was lifted there was no gas smell. Top of tanks were clean Very little water in the compartment. Had a friend stop by this morning. He thought the tanks were in very good shape based on his experience. I may scale this back and only do the Aux tank and new hoses all around. I'm going to pull the Aux tank which should be the worst of the two and inspect it. Depending on what I find will determine how far I'll go.
so, he blew himself up changing a bilge pump under the shrink wrap? Obviously he had some serious issues with his fuel tank leaking! That is the only way of an explosion happening. He didn't smell anything at all? He didn't disconnect the batteries? I put more faith in the internet jackass wannabe who DIDN'T blow himself up. Sorry this happened, but there had to be signs.Why? When you start the process of cleaning the nearly empty tank that still contains some fuel and plenty of oxygen you are at the most dangerous point.
I'm not going to stake my life on some internet jackass wannabe (not you - the thread you are referring to). Water and gas don't mix and really a leaf blower?! People work with open tanks all the time and live to tell about. A friend of mine blew himself up earlier this year changing a bilge pump under the shrink wrap. Fortunately he lived to tell about it after he got out of the burn center they airlifted him to.
Filling the tank with CO2 or nitrogen will displace the air in the tank. Much safer to work on then.
Russel is an experienced boater. Had COVID a few weeks before and claimed he didn't have his sense of smell back. There was a leak somewhere. The explosion blew a hatch out and caused thousands of dollars in damage. What can I say...fumes will explode. Let me know how the leaf blower works to dry the tanks out!so, he blew himself up changing a bilge pump under the shrink wrap? Obviously he had some serious issues with his fuel tank leaking! That is the only way of an explosion happening. He didn't smell anything at all? He didn't disconnect the batteries? I put more faith in the internet jackass wannabe who DIDN'T blow himself up. Sorry this happened, but there had to be signs.
Some tank manufacturers recommend that you DO NOT paint them with anything. Mine were epoxy painted but it was a crap job. To do it right you have to use a special epoxy primer specifically for aluminum. I used the AwlGrip primer on my aluminum tower that I sandblasted, aluminum primed, Awlgrip primed and AwlCraft 2000 finished. Two years lated it still looks perfect. If you treated you're tanks this way they may last forever. But it's expensive and time consuming or you could pay someone $125/hour to do it for you. Fact of the matter is if you don't properly prime aluminum and paint it don't bother - leave it unfinished.I am in the process of replacing my second tank on my second Grady. I purchased the first tank in 2019, and the manufacturer told me to barrier coat the tank, then attach the mounting strips. This time around, they told me NOT to barrier coat or anything. The reason is that if there were a scratch or defect in the coating, water will get in and be held in and will cause corrosion.

Good advice on the tank, thank you. Either way the tank will last as long as I need it!Some tank manufacturers recommend that you DO NOT paint them with anything. Mine were epoxy painted but it was a crap job. To do it right you have to use a special epoxy primer specifically for aluminum. I used the AwlGrip primer on my aluminum tower that I sandblasted, aluminum primed, Awlgrip primed and AwlCraft 2000 finished. Two years lated it still looks perfect. If you treated you're tanks this way they may last forever. But it's expensive and time consuming or you could pay someone $125/hour to do it for you. Fact of the matter is if you don't properly prime aluminum and paint it don't bother - leave it unfinished.
View attachment 32452
Damn! That explains why he didn't smell the gas. I'm sorry this happened to your friend. That was not me with the leaf blower, but is it OK if I use a lighter to peek inside the tank?Russel is an experienced boater. Had COVID a few weeks before and claimed he didn't have his sense of smell back. There was a leak somewhere. The explosion blew a hatch out and caused thousands of dollars in damage. What can I say...fumes will explode. Let me know how the leaf blower works to dry the tanks out!
No but he used a lighter to shrink the tubing on the bilge pump. He didn't smell gas but it happened. Not a good idea.Damn! That explains why he didn't smell the gas. I'm sorry this happened to your friend. That was not me with the leaf blower, but is it OK if I use a lighter to peek inside the tank?
I know I'm late to this conversation but...I'll give you the logic behind my advice. These aluminum fuel tanks most likely failure mode appears to be corrosion caused by moisture on the top surface or moisture trapped in the contact points. If you have a tank with no holes and only minor pitting that still has it's sealing integrity, you can clean it and prevent future corrosion by encasing the tank in a layer of fiberglass with a two part epoxy. The fiberglass cloth gives the epoxy resin a matrix to bind to and helps resist cracking of the coating or abrasion at the contact points.
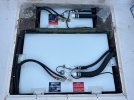
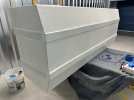
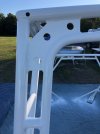
Hey Hookup,Project done! 1997 Islander 268. 134 gallon and 72 gallon tanks. About $3,800 in tanks and hoses and $700 in miscellaneous. Probably 100 hours DIY labor. Not that difficult to do but does require some fiberglass work and painting. One bulkhead had to be cut out, removed and replaced. Step had to be cut to lift tank out. Gunnel had to be cut to allow access to fuel fill hoses. All documented above.
View attachment 31803
Hey Hookup,
I guess I missed this whole thread. Nice job. I think if you go offshore you'll be glad you have the second tank. 134gls it a little tight for canyons. If I remember though, you usually have a bigger ride for that stuff.
Sucks that you had to cut. At least you are already halfway thru a paint job so painting the cockpit was going to happen anyways.
My 265 tanks were replaced a few months before I bought it. They required no cutting. I think they might be from SP also. I see you have the threaded sending units. I have them too. I think they are much better than the 5 screw design, but they are pricey.
One thing I added was to run a bonding ground from tank to tank. The 2 fills and tank should each have a green wire to the Neg terminal. Each tank has a green ground wire attached to the tank.
So clarify for me...
The tanks sit on false floors, not the hull bottom. Correct.
the fwd and aft bilges are separated by bulkheads and connected by pvc pipe straight thru to the aft bilge Aft bilge is connect to front bilge with 1/2" pvc. Mine was/is plugged in aft bilge so water does not flow between them.
the tank spaces between the bulkheads drain to each other and to the hull bottom, and to the aft bilge thru a short pvc that can be plugged if you have a fuel leak. If you plug that, the spaces under the tanks will hold water. Correct.
This is how I'm guessing mine is but I'll never get to look at it. I tried to get GW to explain the drainage before but they never got it right. I had to pull the tanks and crawl around down there to figure it out. But now I know. The one thing the concerns me is the 1/2" pvc freezing and cracking. It hasn't so far but I never winterize it. It won't sink the boat

