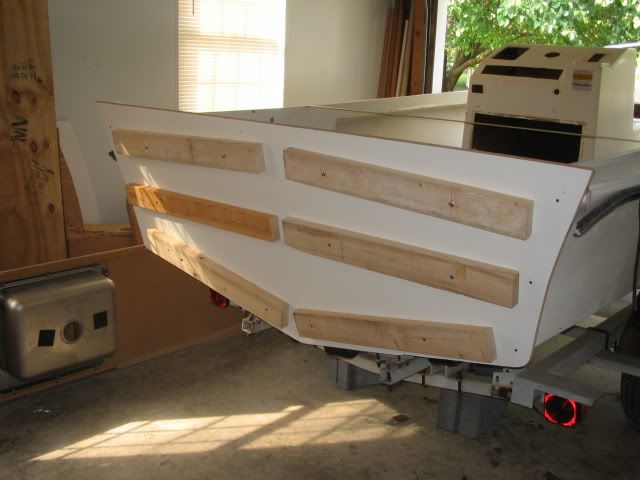
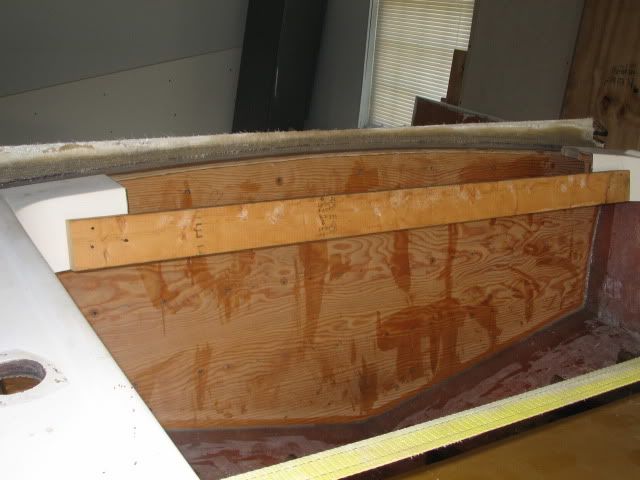
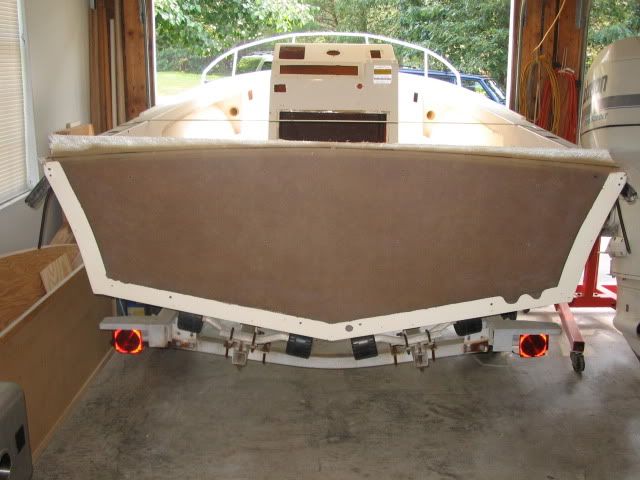
1981 Mako 17 Project - 7/15/13 update

cdwood

GreatGrady Captain
Joined
Apr 1, 2006
Messages
578
Reaction score
0
Points
18
Location
Hamilton/LBI N.J.
Thanks again for your help with the picture thing, got a project here I need to organize then get posted.
 

gw204

Well-Known Member
Joined
Jan 31, 2005
Messages
2,479
Reaction score
22
Points
38
Location
St. Leonard, MD
Re: 1981 Mako 17 Project - 3/10/09 Update

OK...time to bring you guys up to speed on this one. The next few posts are simply copies of my updates from the ClassicMako site. I've made changes along the way so if anything doesn't make sense, I can clarify.

Let's start with the following from 4/5/2010...


So here's the latest update. It's not much though...

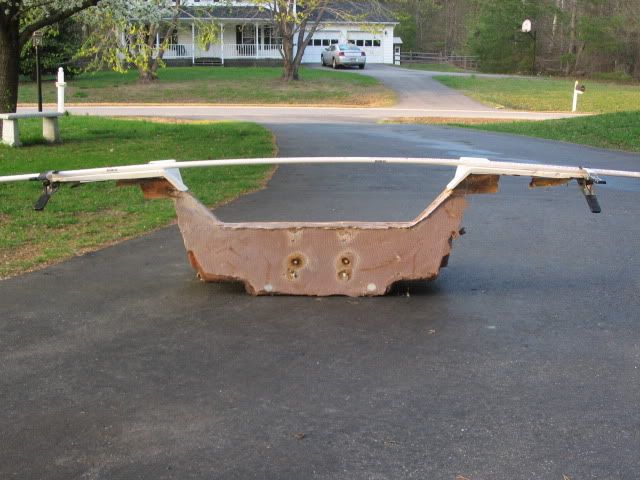
Tonight I wanted to figure out how much camber I need to put in the top of the new full transom. So, I clamped a piece of PVC across the piece of the cap that I previously removed and took a few measurements. Looks like the center is just about 1-13/16" higher than the corners. So, I'll transfer that measurement to top of the new core, put in some guide screws, bend the PVC around the screws, trace the cut line and cut.

IMG_8318.jpg


IMG_8320.jpg


I know this measurement might not be perfect because the edges of the cap are unsupported, but they seem pretty rigid. Since I will be fitting the cap back on before I glass the new inner and outer skins, I'll have time to make adjustments. If anything, I would expect to need less camber, not more.

And yes, this is a bracketed 17 experiment... :)
 

gw204

Well-Known Member
Joined
Jan 31, 2005
Messages
2,479
Reaction score
22
Points
38
Location
St. Leonard, MD
Re: 1981 Mako 17 Project - 3/10/09 Update

From 5/4/2010...

Here's where I am now...

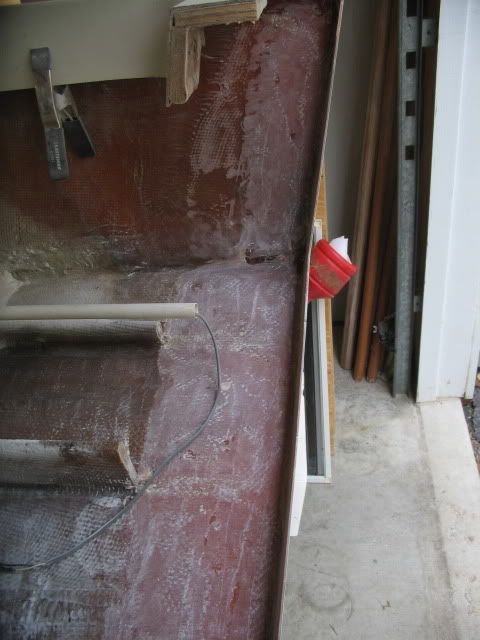
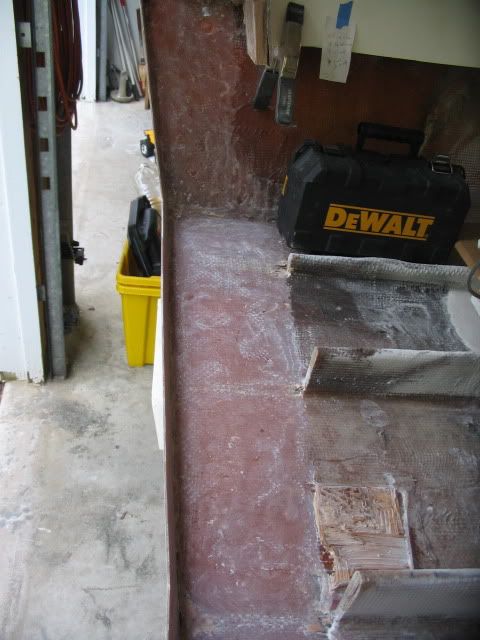
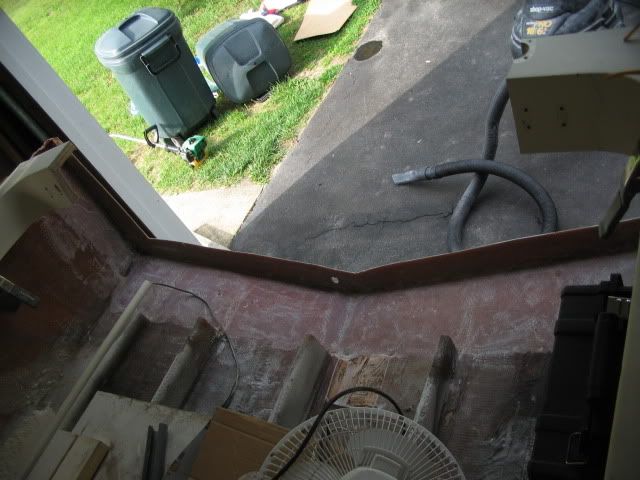
Grinding for the new transom core is just about complete. I have removed almost all remnants of the inner skin and/or stringers and tabbing from the transom to 8" forward on the hull bottom and sides. I probably did more than I needed, but I wanted a completely level surface on which to lay new glass. Besides, I kept finding voids...so I kept getting rid of them. I am going to go back one or two more times to touch up a few spots and get into the corners better.

In another post, I had mentioned that the old outer skin was comprised of two distinct layers. The outer most, was about 1/8" thick and was fully incorporated into the hull sides and bottom. The inner most layer was again about 1/8" thick, but was only as large as the core pieces themselves. So, I ground the inside of the lip remaining on the transom back to the outer 1/8" layer.

IMG_8342.jpg


IMG_8343.jpg


IMG_8344.jpg


Now here's my plan for putting the new transom in. I will be using vinylester resin and glass from U.S. Composites. Please critique/offer suggestions...

1. Clean up the ground down areas on the hull sides, hull bottom and transom lip with a 36-grit disk or flap wheel.

2. Fine tune the core template I made a few weeks ago

3. Cut the two core pieces (3/4" marine ply) based on the template.

4. Bond the core pieces together outside of the boat. Mating surfaces will get a coat or two of unthickened resin and then one layer of 3/4 oz. mat will go between them. Using thickened resin instead of the mat would be easier, but I figured the saturated mat would do a better job of isolating one layer of core from the other should I ever get water intrusion. I have read of thinning the first coat of resin to allow it to soak in a little better, but can't remember what to use to do the thinning. Allow to cure. Put a 1/2"+ roundover on the inside top edge of the core.

5. On the outside of the core, start with a coat or two of unthickened resin and follow that up with one layer of 1808 0/90 and a layer of 1708 0/45. Run the glass approx. 1" above the top of the core to create a lip for the inner skin glass to mate up with. Allow to cure.

6. Put one layer of 1808 (using some leftover epoxy) on the inside of the existing lip of the transom and run it up the hull sides and bottom approx. 2". This is just to add a little material back on to the lip (and tie it in to the hull side) prior to the final grinding. Allow to cure and then lightly grind with 36-grit.

7. Grind the portion of glass on the outside of the new core that will meet up with the existing lip on the transom.

8. Coat the lip and up about 2" on the hull sides w/ a little unthickened resin. Coat the area ground in step 7 and on the bottom and side edges of the new core w/ a little unthickened resin. Apply thicked resin with a notched trowel on the existing lip over the mat. Set core in place. Secure with temporary drywall screws through scrap wood (covered in wax paper) to be removed before full cure is achieved. Create a fillet along inner hull sides and bottom with thickened resin. Allow full cure.

9. Layup remaining outer skin. Lightly grind outside glass on new core to prepare for additional layers. Bevel the edges of the existing lip. One layer of 1808 0/90 (run all the way to the edges of the transom), one layer of 1708 0/45 (stepped back about 1"), one or two layers of 3/4 oz. mat all the way to the edges(these final two layers are primarily for sanding purposes and to prevent print through). Allow full core. Total glass on outer skin is now two layers of 1808, two layers of 1708 and one or two layers of 3/4 oz. mat. Fair and gelcoat at a later date.

10. Layup inner skin. Do any final grinding on hull sides and bottom. Sand fillet against transom core with 50 grit or less. One layer of 1808, one layer of 1708, one layer of 1808 and one layer of 1708. Wrap first layer up hull sides and bottom 8" and then step each layer back 2".


So, how does all that sound?

And heres the list of supplies I think I need (transom is 80 wide and 30 tall at the highest point):

1. 10 gallons vinylester resin (2 5 gallons kits).

2. 12 yards 50 wide 1708 0/45

3. 12 yards 50 wide 1808 0/90

4. 6 yards 3/4 oz. mat

5. 4 gallons (approx. 1.7 lbs) cabosil. Yes, I know too much, but I'll need it elsewhere.


Lastly, the questions:

1. What can you use to thin vinylester prior to applying the first coat to the wood transom core (to allow it to soak in a little better)?

2. 3/4 oz. mat in between the two layers of core, or just thickened resin?

3. In step 8 above, should I also add two layers of 3/4 oz mat in between the unthickened and thickened resin? So you have core (with the two layers of glass already applied), unthickened resin, 3/4 oz mat, thickened resin, 3/4 oz mat, unthickened resin, lip...

4. In step 10 above, I've some seen people put the smaller layers down first and then progressively step up the size next layers...and I've seen people put the largest layer down first and progressively step down the size of following layers. Is there really a right or wrong way?

My thinking was to maximize the mechanical bond area between the existing glass and the new glass by putting the largest pieces down first.

5. Is 4 layers of 1708/1808 on both the inner and outer skins too much over kill? Will that increase the weight too drastically and kill my chances of succeeding w/ a bracket right from the start?

6. Will the final two layers of 3/4 oz. mat be enough to prevent print through, or should I add a layer of 6 oz. cloth as well?


Thanks guys!
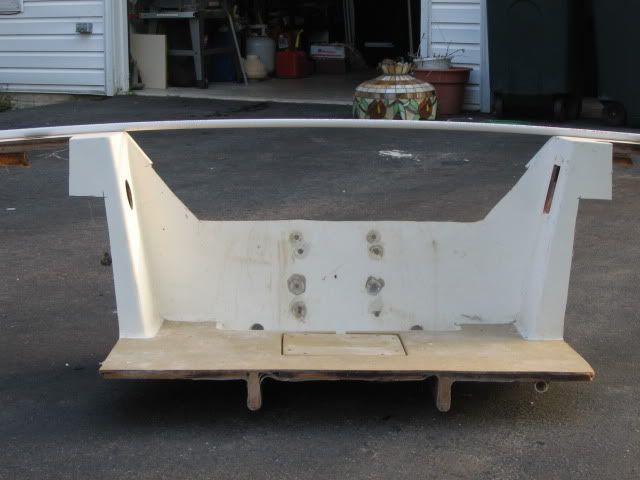
 

gw204

Well-Known Member
Joined
Jan 31, 2005
Messages
2,479
Reaction score
22
Points
38
Location
St. Leonard, MD
Re: 1981 Mako 17 Project - 3/10/09 Update

From 5/20/2010...

Just about ready to start laying the new outer skin. I have changed my original plan though. Decided to screw a melamine dam to the transom and lay the outer skin against that. So, I've been prepping everything to get the dam mounted.

I have the stringers cut back a full 12" now and have ground up the hull sides and bottom just as far. The lip on the transom has been beveled down and all the corners have been cleaned up. I think I'll probably hit everything one more time tomorrow with a 36-grit flap wheel, but other than that there isn't much left to do before I can start laying glass.

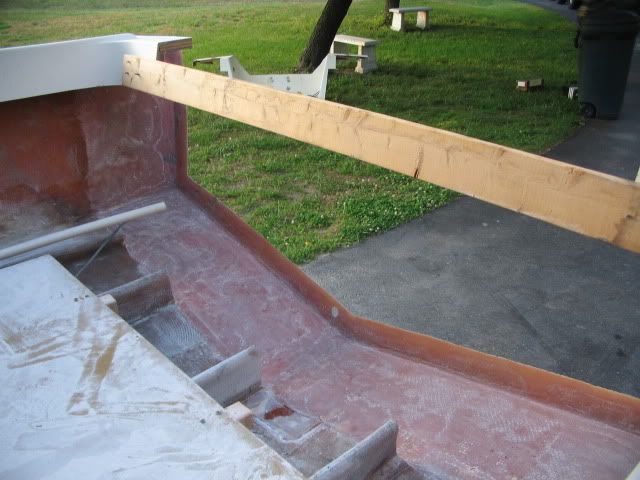
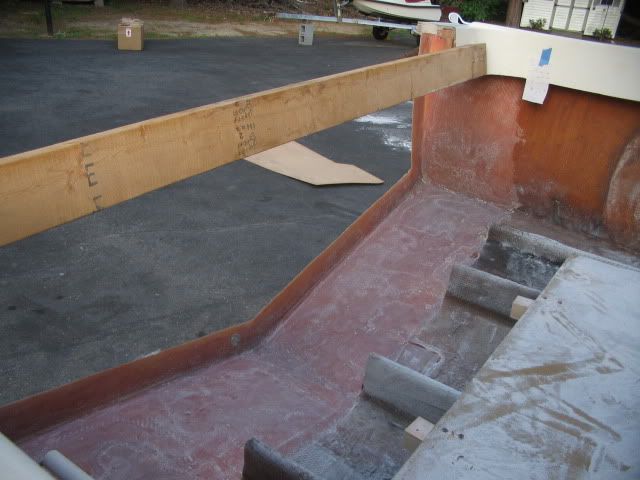
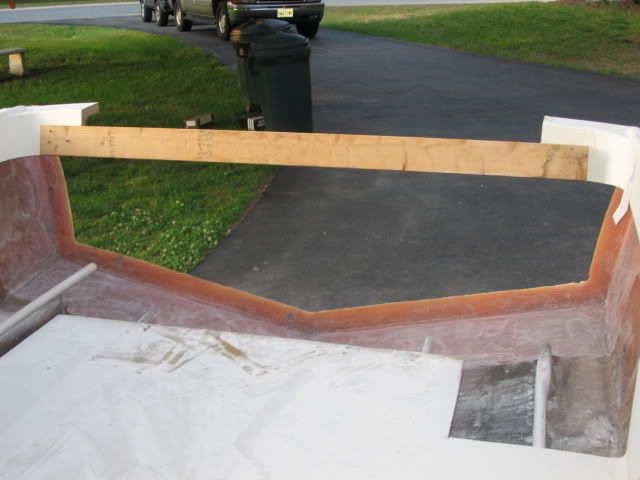
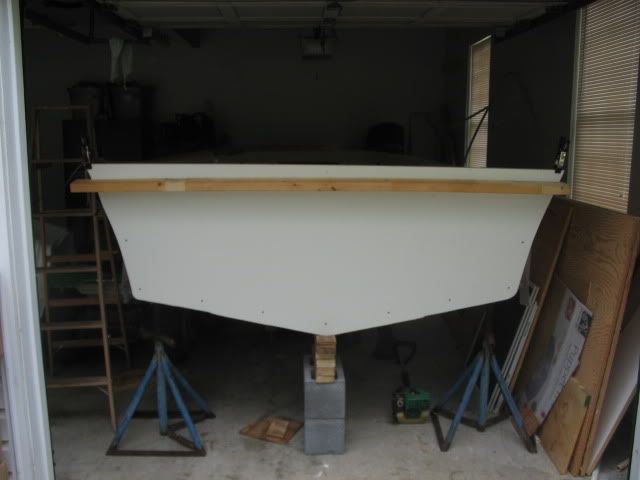
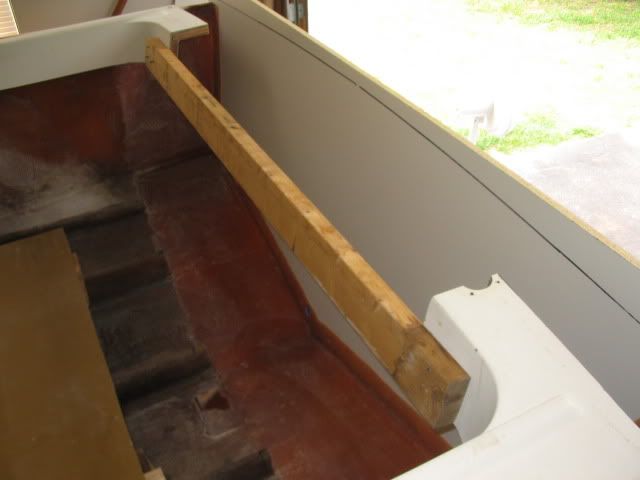
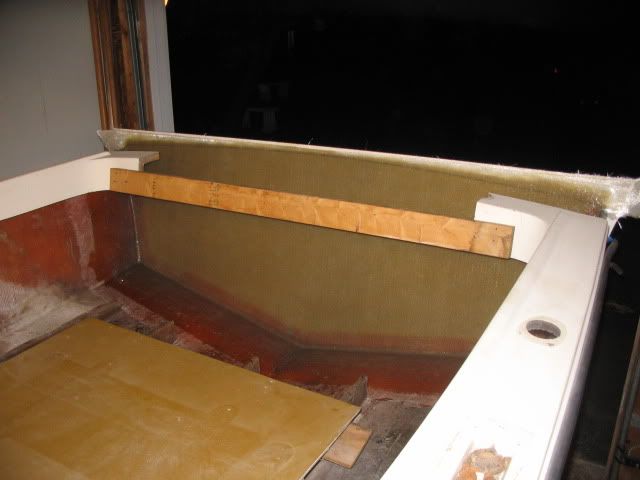
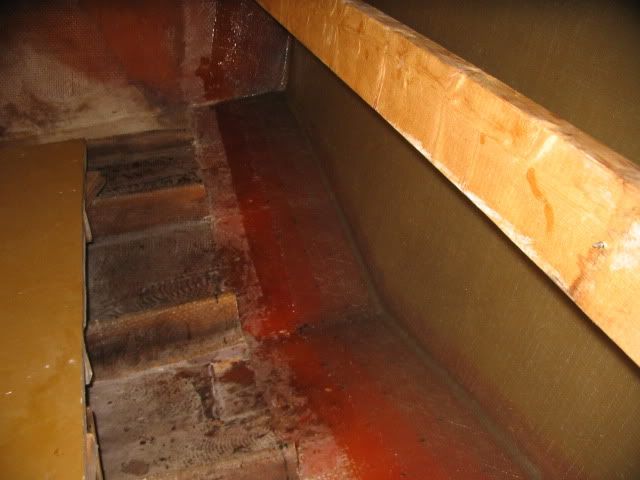
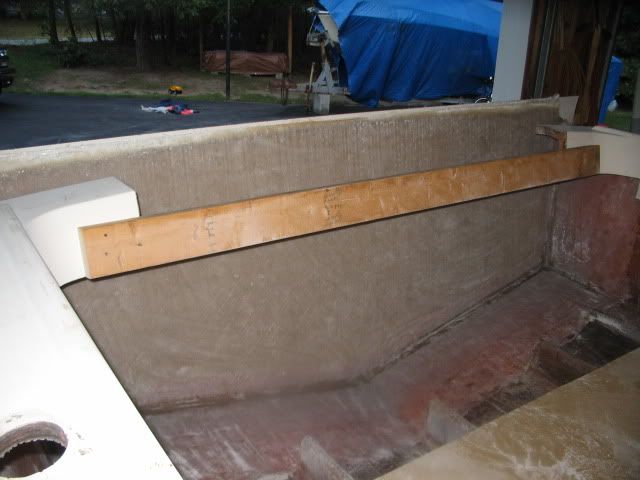
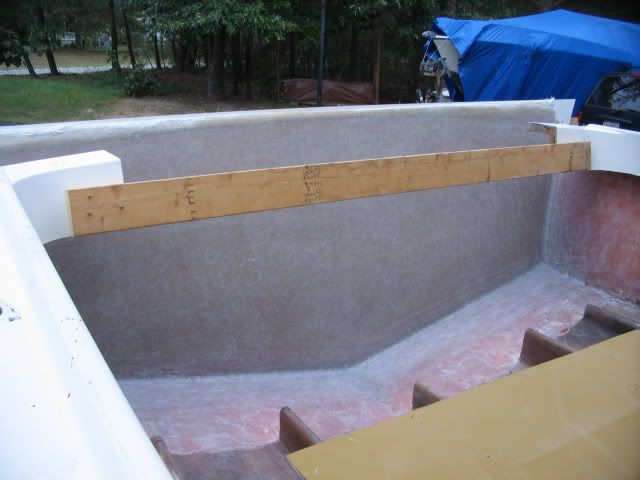
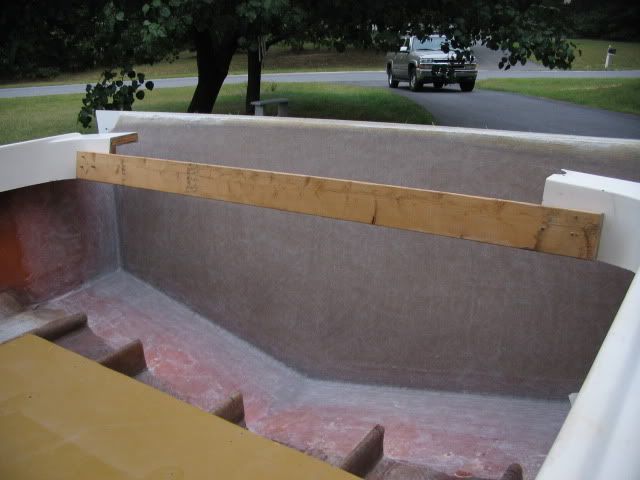
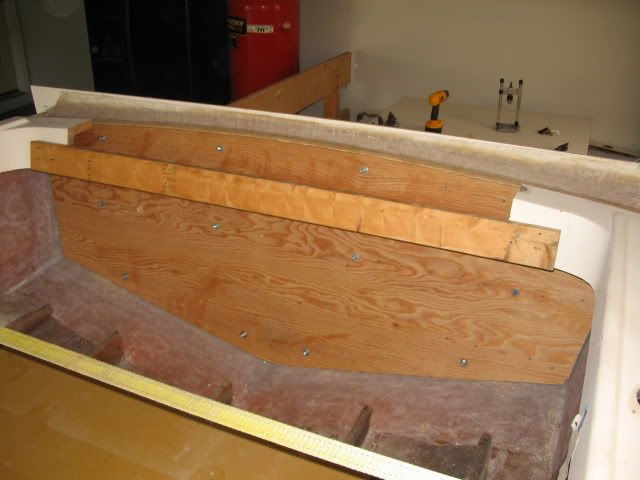
I also wanted to make sure the hull was in the right shape before I started adding material. So, I ran a ratchet strap around the entire thing and pulled it all back to a point where the aft section of the cap fit just right. Then I screwed that 2x4 in place to keep tension on things.

IMG_8346.jpg


IMG_8347.jpg


IMG_8348.jpg


Tomorrow I'm hoping to get the final grinding done and get the dam fit and waxed. If all that goes well, Saturday is a glassing day...
 

gw204

Well-Known Member
Joined
Jan 31, 2005
Messages
2,479
Reaction score
22
Points
38
Location
St. Leonard, MD
Re: 1981 Mako 17 Project - 3/10/09 Update

5/22/2010...

Waxed and mounted the transom mold this morning...

IMG_8349.jpg


IMG_8350.jpg


Then at around 3 PM I started glassing. I was a one man crew, so I didn't take pics of the process. First step was to lay a fillet in the corner at the hull sides and bottom, then a layer of 1.5 oz mat went down. That extended 1" on to the existing lip. Next was a layer of 1708 that spanned the entire width of the transom. I followed that up with a layer of 1808 than ran 2" up the hull sides and bottom. After that, another layer of 1708, 4" up and finally a second layer of 1808 6" up.

IMG_8351.jpg


IMG_8352.jpg


Hopefully, I didn't screw up the resin/catalyst ratios and got the surfacing wax ratio right on the last batch of resin. This was my first time using anything but epoxy and it was a bit of a learning experience. I only had one batch of resin kick off a little early, but it only took out the roller I was using to spread the resin, so no big deal. We'll see tomorrow if everything hardens up properly...
 

gw204

Well-Known Member
Joined
Jan 31, 2005
Messages
2,479
Reaction score
22
Points
38
Location
St. Leonard, MD
Re: 1981 Mako 17 Project - 2nd transom core and gas tank hat

6/1/2010...

Thanks for the feedback guys.

So, this weekend I got the transom core put together. Cut both sheets of ply to size and laminated them together with a layer of 1.5 oz mat in the middle. I was really happy with how things were going until I went to put down my second coat of thinned resin. I think the styrene I used to thin the vinylester started causing the roller cover to shed. It was supposed to be a roller cover suitable for use with poly/epoxy/acetone/etc... I had a bunch of little hairs show up in the resin. Not a huge deal though, so I moved on.

After the two coats of thinned resin went down, I laid down a coat of unthinned resin on one of the pieces of ply. Followed that up with the mat and then got that thoroughly wet out with a thick coat of resin. Then I put a thick coat of resin on the other sheet of ply, stuck them together and weighted everything down with 13 cinder blocks, a 5 gal pail of resin and two 4 gallon buckets of water. By my estimations, that's about 500 lbs...

Checked on it yesterday and found multiple voids near the edges. The biggest was at the top (spanned about 9", was about 1/16" wide and probably 2" deep). Right in the middle of that was a spot where I could insert my feeler gauge about 4". I mixed up some resin and did my best to fill the void, but there's no telling what is going on in other places. There was a second void spot on one of the sides, but it was only about an 1" deep.

I'm completely not happy with the outcome. I should have drilled a bunch of weep holes (like I did when I recored the gas tank hatch in my GW) in the top sheet to allow excess resin and air to escape but I didn't (moment of laziness I think). I even thought about it but then figured the resin was thin enough to squeeze out the sides... Well, I don't think it did and that's why I have voids. The excess resin most likely kept the second sheet of ply elevated from the first in spots. Very, very p*ssed at myself....


Pics will be up tonight.

So, now I have to decide if I live with it, or go spend $150 for more ply and do it over... GRRRRR.... What do you guys think?
 

gw204

Well-Known Member
Joined
Jan 31, 2005
Messages
2,479
Reaction score
22
Points
38
Location
St. Leonard, MD
Re: 1981 Mako 17 Project - 3/10/09 Update

One last brief update that hasn't been posted to CM yet...

I bough two more sheets of marine ply and made a second core. This one got a bunch of weep holes drilled in it to allow excess resin to escape and was fastened w/ drywall screws around the perimeter after the weights were added. One layer of 1-1/2 oz mat and one layer of 2415 went between the sheets of ply.

I learned another lesson when making the second core. Weights are a pain. The next time I do this, I'll have the marine ply up on sawhorses and just do all my fastening with drywall screws long enough to pentrate all the way through the bottom sheet. Screws were much more effecting in clamping than the cinder bocks.
 

gw204

Well-Known Member
Joined
Jan 31, 2005
Messages
2,479
Reaction score
22
Points
38
Location
St. Leonard, MD
Re: 1981 Mako 17 Project - 8/3/10 Update

OK...time to put down the Formula for a while. :)

A few weeks back, I went ahead and put together a second core. This time I drilled three rows of 1/4" weep holes about 9" apart and drilled a series of pilot holes for some drywall screws around the perimeter of the core. The plan was to weight the center just as before and then supplement that with the screws. I also changed the amount of glass in between the sheets. One layer of 1-1/2 oz mat and one layer of 2415.

When I got it all put together, weighted and screwed I had lots of good "squish out" of resin at the edges and from top and bottom rows of weep holes. Not so much in the center. The blocks seemed to be doing well at weighting the top layer down, but there must be a little dip in my garage floor when I had everything. So, I pulled them off and quickly ran some more screws in in between the center weep holes. That pulled things in a little better, but not as well as I would have liked. Nothing I could do about it at that point though...

So, last weekend I finally cleaned up the edges so I could see what I had. There was only one small gap between the pieces of ply about 4" long and maybe 1/8" deep. The rest was a solid 1/8" of glass. Good.

All in all, it's not perfect, but I'm much happier with this one. So, it's going in the boat. I'll get pics this weekend if I finish prepping it for install.

Lessons learned...and to be applied to the Formula transom:

1. Don't bother with the blocks/weights. Keep the core off the ground and rely solely on screws to clamp it together and just deal with the additional holes to fill.
2. Use screws long enough to go completely through both sheets. I cheaped out and used some 1-1/4" ones I had on hand. A few stripped out before pulling things as tight as I wanted.
3. Forget the plywood and use Coosa. :) Between the four sheets of ply, the resin and glass, I have invested enough cash in the transom core to have just bought a piece of 1-1/2" Coosa.


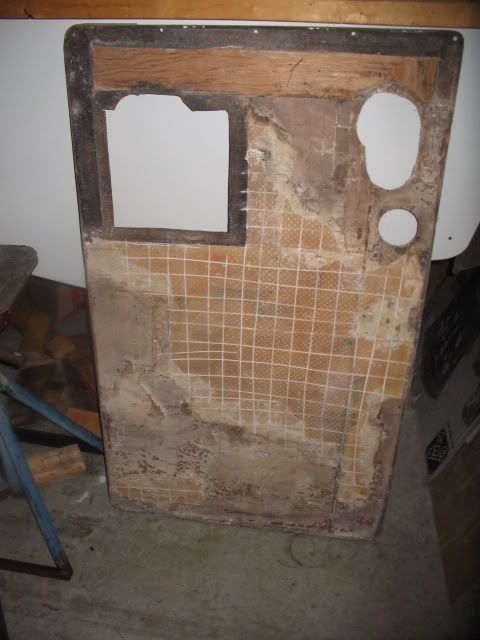
Anway, tonight I took a crack at gutting the gas tank hatch. First step was to cut the lip off of the top skin so it would lay flat.

IMG_8491.jpg


Then I flipped it over. Only about half of the balsa core in that thing was rotten and some of the bottom glass had already been removed by the previous owner. So, I cut the glass into about 9" sqauares hoping it would peel up in big pieces like the stuff on my old Sailfish hatch. No dice. It just broke into little pieces. I also tried chiseling the balsa out, but that was a waste of time too. Since it's end grain, the chisel couldn't really split it nor sever the bond with the top skin.

What I ended up doing was using the corner of the chisel, pressing into the balsa, twisting and breaking off little pieces. :cry: Did that for about 30 minutes before giving up and cutting all the lines you see below. Hopefully that will help. Of the bare areas, I can take credit for only half...

IMG_8492.jpg


Hopefully, I can get the transom core prepped for install this weekend and be ready to mount it by mid-Sep. I need to get a move on before the Vinylester I bought goes bad... :cry:
 

gw204

Well-Known Member
Joined
Jan 31, 2005
Messages
2,479
Reaction score
22
Points
38
Location
St. Leonard, MD
Re: 1981 Mako 17 Project - 9/20/10 Update

Haven't been able to keep to my schedule lately, but things are progressing. I have the new outer transom skin almost completely ground down in preparation for bedding the new core. Just need to get in there and clean up the corners. I use my Dremel with sanding drums for that.

Looks like the outer skin is right about 3/16" thick.

IMG_8507.jpg


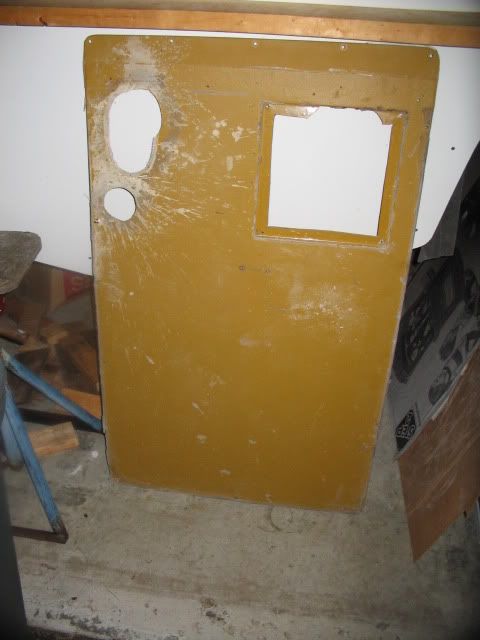
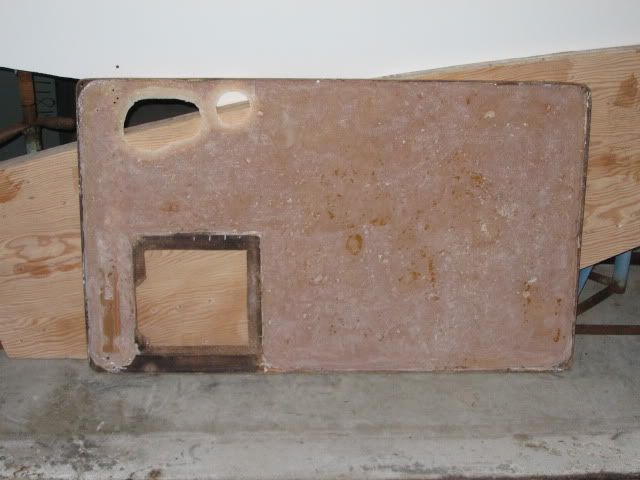
I also did most of the grinding on the tank cover to prep that for a new core as well. I am planning on filling in all of the openings for the rigging tubes and the small access panel. The rigging tube holes will be redrilled for an exact fit and the access panel is going to be moved forward a few inches so I can slide the console forward as well.

IMG_8505.jpg
 

gw204

Well-Known Member
Joined
Jan 31, 2005
Messages
2,479
Reaction score
22
Points
38
Location
St. Leonard, MD
Re: 1981 Mako 17 Project - 9/20/10 Update

Finished up grinding the outer skin of my new transom yesterday. While doing so, I came to the conclusion that I should have cut further up the gunwales when I removed the aft section of the liner. Getting up under there to grind/rough things up was a PIA...

I want to check it one more time with a straight edge to make sure I don't have any major ridges, but I think all should be good and ready for installation of the core.

IMG_8511.jpg


IMG_8510.jpg


I also fine tuned the fit of the new core. Just need to drill some holes though the outer skin for the temp mounting bolts and I'm ready to install it.

The plan is to put down one layer of 1-1/2 oz mat against the outer skin to build back some of the thickness lost from grinding, putty that up with thickened resin, set the core in place and tighten down the mounting bolts. I'm leaving the outer mold in place until this is done in order to provide even more spreading of the clamping force (I'm using some 2x4 on the outside too).

I'm hoping to put in the core this Sunday and then come back the following weekend to lay up the inner skin and call the transom phase of this project complete.
 

BobP

GreatGrady Captain
Joined
Apr 27, 2005
Messages
4,744
Reaction score
6
Points
38
Location
Long Island, NY
Model
Sailfish
Re: 1981 Mako 17 Project - ready for transom core

Brian, I missed this one -

you must have a dip in the floor, otherwise the surfaces of the wood are uneven, then only 1/4 in. or more of thickened resin would cover it, and perhaps that's not enough.

The weights in blocks or sandbags (either, two high) is plenty especially further towards middle, the holes don't matter if weighed enough since it will push out any air - only if flat surfaces. Excess will be seen squishing out all edges.

I think that's why the screws worked.

Pain in the can doing it a second time.

But I'm sure the transom can take an F350 when you are done!
 

gw204

Well-Known Member
Joined
Jan 31, 2005
Messages
2,479
Reaction score
22
Points
38
Location
St. Leonard, MD
Re: 1981 Mako 17 Project - ready for transom core

Yep, the floor isn't perfect. I picked the flattest spot I could find. Had no problems getting 1/2" ply to conform when I rebuilt the gas tank hatches in my Sailfish. 3/4" is a different animal though...as I found out. Live and learn right?!?!

I'll be curious to see what the plug I drill out for the for garboard drain looks like...

She might be able take an F350, but an old Merc is all that's on the menu for now.
 

gw204

Well-Known Member
Joined
Jan 31, 2005
Messages
2,479
Reaction score
22
Points
38
Location
St. Leonard, MD
Re: 1981 Mako 17 Project - ready for transom core

Was hoping to be able to report this morning that the new transom core was installed yesterday. Unfortunately, Mother Nature put the brakes on that with several consecutive days of heavy rain towards the end of last week. This in turn resulted in a leaking roof over my garage. Water broke through the drywall right above the boat and splashed on to the new core as it dripped on the deck. So, I cancelled my plans to install the core and am going to let it sit indoors for a long while to ensure it thoroughly dries out. I don't think it got much water, but I don't want to take any chances.

Now I need to find some other things to use up about 6 gallons of Vinylester resin on before it goes bad...
 

BobP

GreatGrady Captain
Joined
Apr 27, 2005
Messages
4,744
Reaction score
6
Points
38
Location
Long Island, NY
Model
Sailfish
Re: 1981 Mako 17 Project - can't catch a break

Brian, heat lamp it or use one of those radiant directional electric heaters.

Heat it up good, a day or two.
 

gw204

Well-Known Member
Joined
Jan 31, 2005
Messages
2,479
Reaction score
22
Points
38
Location
St. Leonard, MD
Re: 1981 Mako 17 Project - can't catch a break

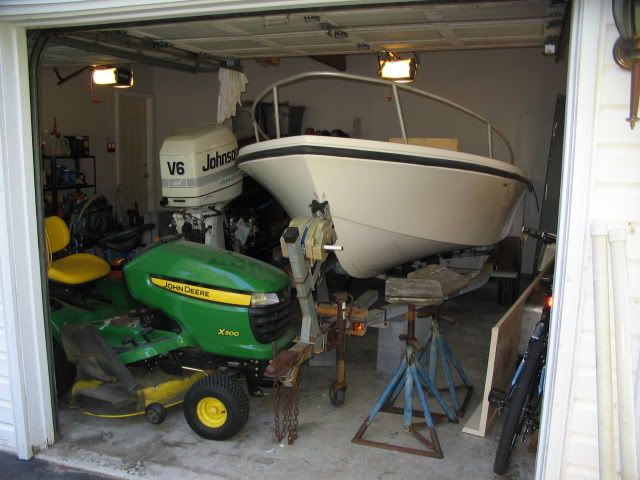
As I now have to perform surgery on the garage roof/ceiling, I needed to get the boat out of the garage so I would have room to work. My original plan was to put her back on the trailer, cover her up and go back to outdoor storage for a little while. I really wasn't keen on that, so I came up with another plan.

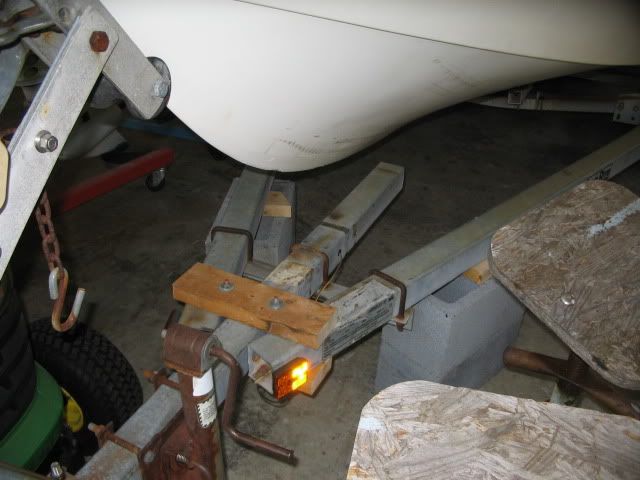
Since going into the garage for the second time, she has been sitting on a small cart I originally built for storage of a jet ski. It held the weight of the boat just fine, but I didn't like how it held it and it was difficult to push in and out of the garage. So, I started think about how to be able to continue w/ garage storage, but store on the trailer (which is too long) for better support. My solution was to shorten the tongue.

Once I got the boat back on the trailer, I rolled it into the garage and figured out how much the tongue needed to be shorted by. Then I supported the main beams of the trailer, and removed the tongue jack and winch stand. From there I undid (broke off) the nuts on the u-bolt holding the back end of the tongue and undid (broke off) the nut on the bolt holding the mid-point of the tongue to the main beams. Try as I might, I couldn't get the bolt out in one piece so I ended up just cutting it in half.

After sliding the tongue back, I secured the back end of it w/ one of the u-bolts from the winch stand, bolted a couple of 2x4s around the mid-point, reinstalled the winch stand, reinstalled the tongue jack and closed the garage door. :D The only wires I had to cut were for the side markers. Plenty of length in the main harness.

Now I can easily roll it in and out when needed...after I move a bunch of crap out of the way.

IMG_8535.jpg


IMG_8534.jpg
 

DB

Well-Known Member
Joined
Jan 22, 2008
Messages
149
Reaction score
0
Points
0
Location
Ocean City, Maryland
Re: 1981 Mako 17 Project - can't catch a break

You are one very handy individual...good luck with the project...can't wait to see her all done...keep pics coming.
 

NOTHING ELSE MATTERS

GreatGrady Captain
Joined
Jun 26, 2006
Messages
1,993
Reaction score
5
Points
38
Age
60
Location
LONG ISLAND NEW YORK
Re: 1981 Mako 17 Project - can't catch a break

DB said:
You are one very handy individual...good luck with the project...can't wait to see her all done...keep pics coming.

And that is understatement, check out a sticky on top of one of his tricks to duplicate a non skid, awesome, just awesome.
 

gw204

Well-Known Member
Joined
Jan 31, 2005
Messages
2,479
Reaction score
22
Points
38
Location
St. Leonard, MD
Re: 1981 Mako 17 Project - can't catch a break

Transom core is in and outer skin mold is off!!!!

After a dry fit on Friday, Dad came down on Saturday and helped me set the core. After making a quick pass over the outer skin w/ a 24 grit disc on my grinder, vacuuming the surface and wiping it down with a tack cloth, I put down one layer of 1708 while Dad started wetting out the core. Once that was done, we puttied up the skin and dropped the core in. Tightening down the bolts gave me good "squish out" from almost all of the weep holes. The ones that didn't gush look like they at least got partially filled up. I may have a small void at the starboard top corner, but I'm not worried about it. Nothing I can do now anyway.

Dry fit:

IMG_8619.jpg


IMG_8618.jpg


Bolts/braces out and mold removed:

IMG_8625.jpg


IMG_8624.jpg


It's not perfect, but I think it came out pretty good for my first one. :)

Next step is to lay clean up the runs and things, lay down a better fillet than what I did on Saturday and glass up the inner skin.
 

cdwood

GreatGrady Captain
Joined
Apr 1, 2006
Messages
578
Reaction score
0
Points
18
Location
Hamilton/LBI N.J.
Re: 1981 Mako 17 Project - can't catch a break

Looks damn good Brian, looks like your putting everything into it but the kitchen sink...oh wait there's the sink, when's that go in?
 

gw204

Well-Known Member
Joined
Jan 31, 2005
Messages
2,479
Reaction score
22
Points
38
Location
St. Leonard, MD
Re: 1981 Mako 17 Project - can't catch a break

cdwood said:
Looks damn good Brian, looks like your putting everything into it but the kitchen sink...oh wait there's the sink, when's that go in?

Right after the refrigerator in the first picture... :lol: