1986 Seafarer 227: 5/6/14 Update - Stringer extension prep

gw204

Well-Known Member
Joined
Jan 31, 2005
Messages
2,479
Reaction score
22
Points
38
Location
St. Leonard, MD
Re: 1986 Seafarer 227 Not-A-Project: 4/29/13 Update

Capt Bill said:
Are you going to have her ready to splash this season?

That's the idea...but it probably won't happen. I don't work fast enough... :lol:
 

gw204

Well-Known Member
Joined
Jan 31, 2005
Messages
2,479
Reaction score
22
Points
38
Location
St. Leonard, MD
Re: 1986 Seafarer 227 Not-A-Project: 4/29/13 Update

A little bit of progress to report...

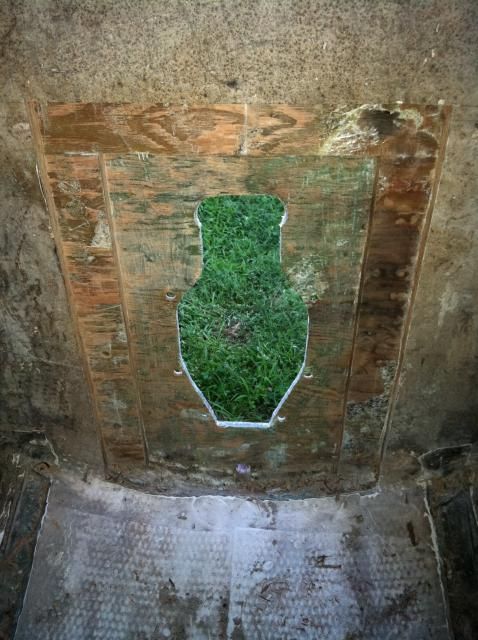
Got the outdrive hole just about ready for plugging. I still need to go back and do my grinding to clean things up.

photo73_zpsadfe9a2f.jpg


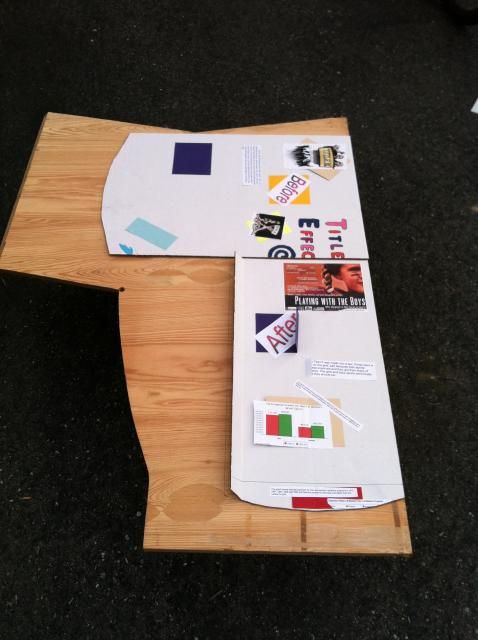
Made some templates for the outdrive hole plugs.

photo75_zps263f377b.jpg


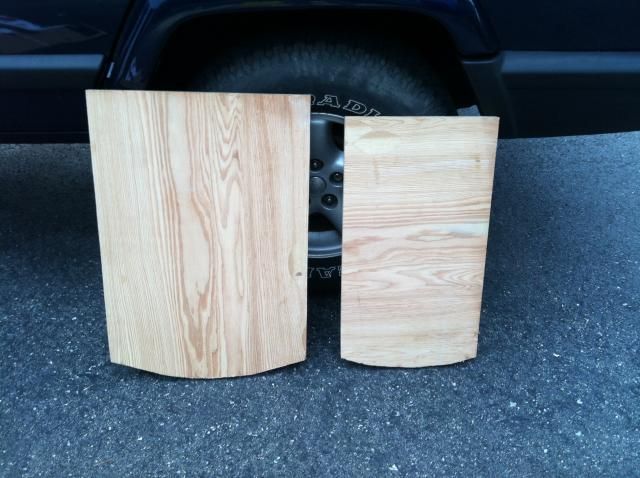
Cut the plugs out of a scrap piece of 3/4" marine ply I had lying around. In hind sight I should have cut both so that the surface grain ran across the outdrive hole horizontally, but I wasn't paying attention. I suspect it will be OK since I'm going to put a third layer over the outdrive hole and will make sure I orient the grain like the small one pictured.

photo76_zps7bf3f9cb.jpg


Looks like it's about time to order more resin. :)
 

gw204

Well-Known Member
Joined
Jan 31, 2005
Messages
2,479
Reaction score
22
Points
38
Location
St. Leonard, MD
Re: 1986 Seafarer 227 Not-A-Project: 8/6/13 Update

As you have probably noticed, I've had the boat casually for sale for the last 6 months or so. Just didn't have time for the project so I decided to unload it rather than have it just sit in the driveway. Got a bunch of lowball offers, one OK one and one great one, but none of them came together for various reasons. So, I pulled it off the market and decided to get serious about putting her back on the water.

Got the outdrive hole patched up over the Easter weekend. During the week prior I had spent some time preparing the hole to receive the plugs. Ground the inner surface of the outer skin, finished sizing the new pieces of plywood, ordered resin, taped around the outdrive hole, etc.

Saturday, I did the final grinding around the perimeter of the hole and then set about putting in the first layer of ply. I brushed several coats of unthickened resin on the exposed end grain of the core and on to the mating surface of the new plywood, and coated the inside of the exposed glass of the outer skin. Then I layed two layers of 1.5 oz. mat on the plug. I followed that up by applying some resin thickened with cabosil to the outer skin using a notched trowel. After that went on I set the core piece in place and pulled it tight with some drywall screws run through the outer skin. Lastly, I smoothed out the resin that squeezed out on the inside and outside.

One screw up on day one. I accidentally catalysed the thickened batch of resin at 3% (I'm using Vinylester from U.S. Composites), instead of the intended 1.5%. That's why the fillet on the outside of the hole looks so rough. It had started to gel at that point, and once it went, it went FAST. Dummy...but I don't think it will cause any problems.

13947430192_780990a893_z.jpg


13947456971_8ee6c72ef1_z.jpg


There was really no spill over of excess resin on the inside as I had taped around the joints, and simply scraped off the excess before pulling the tape.


Easter Sunday afforded me a few hours to get the second layer of ply in. Same drill as the day before. Several coats of unthickened resin on the core mating surfaces. A single layer of 1.5 oz. mat against the transom. Core bedded using resin thickened with cabosil and secured with drywall screws. The only real difference here was that I drilled a couple of relief holes in the plug to allow excess resin to escape. When I pulled things tight I had a good amount of resin come through each hole so it should be well bonded. I had to force some in around the edges to fill the gaps. The force of pulling the plug tight did squeeze some mat out at the bottom so I scooped that out (hopefully I didn't create a void...I'll find out when I drill for the garboard drain) and combined it with the left over thickened resin to fill the cap and create a fillet. After snapping off the protrucing parts of the drywall screws, I put down two layers of 1.5 oz mat. This didn't need to be structural as I plan to put down another layer of ply once the stringers are extended and cover that with heavy glass.

13947462491_5a007dbe1d_z.jpg


The only thing I would have done differently on day two was go a little less heavy on the unthickened resin on the new layer of ply. It didn't soak it up as much as I had hoped.
 

Megabyte

Well-Known Member
Joined
Mar 3, 2005
Messages
55
Reaction score
0
Points
0
Location
Annapolis, Md
Re: 1986 Seafarer 227 Not-A-Project: 4/21/14 Update

Good to see you getting back on this project.
Hopefully you'll get her wet this season after all.
 

gw204

Well-Known Member
Joined
Jan 31, 2005
Messages
2,479
Reaction score
22
Points
38
Location
St. Leonard, MD
Re: 1986 Seafarer 227 Not-A-Project: 4/21/14 Update

Started prepping the stringers for their extensions last night. I measured back 6" and 12" from where they met the aft fuel tank compartment bulkhead and marked two vertical lines. Along the 6" line, I cut completely through them to the glass on the other side and chiseled out the pieces. Along the 12" line, I cut down to a point about half way through and again chiseled out the pieces. I'll go back with the grinder to clean things up, but these are the start of my half lap splices to join the stringer extensions to the existing structure.

13942795439_29bd025b75_z.jpg


14106293386_90393eac19_z.jpg


13942835500_3b2584182e_z.jpg


The port stringer had a little rot at the very bottom, but it's not bad enough for me to want to cut any farther forward. Since the ends have been open for a quite a while now, things were already pretty dry, but now that the area is completely exposed, I'll let it dry throughly and then saturate with resin when I bond the extensions in. The starboard stringer is perfect.
 

DennisG01

GreatGrady Captain
Joined
Sep 1, 2013
Messages
7,188
Reaction score
1,341
Points
113
Location
Allentown, PA & Friendship, ME
Model
Offshore
Re: 1986 Seafarer 227: 5/6/14 Update - Stringer extension pr

That's looking really nice. I really like your thought on the half lap joint. You may already know this, but here's a tip I picked up a little while ago regarding saturating wood with resin... heat it up with a heat lamp or small heater for a full day before you start. The heated wood will thin the resin and pull the resin further into the wood - all without sacrificing strength like thinning the resin with acetone (or similar) would. You could also drill some longitudinal holes into the exposed plywood ends and use a syringe. Before the resin completely kicks, come back and fill with thickened resin.
 

gw204

Well-Known Member
Joined
Jan 31, 2005
Messages
2,479
Reaction score
22
Points
38
Location
St. Leonard, MD
Re: 1986 Seafarer 227: 5/6/14 Update - Stringer extension pr

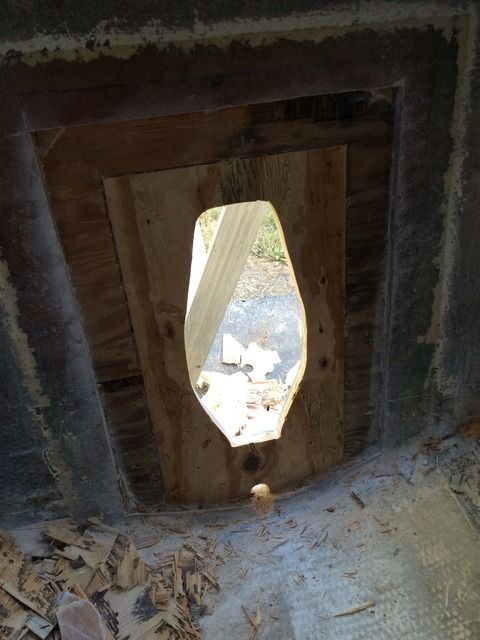
Well, I was never truly happy with how my plug turned out, so I ripped the top layer of it out yesterday and I'm planning to get the rest today.

IMG_0348_zpstmh29oty.jpg


Recoring the I/O hole first would have had me glassing over from the outside. After applying the 12:1 bevel rule on a 1/4" thick outer skin, each layer of 5 or 6 layers of 17oz (increasing in size) would have only had about 1" of contact with the existing skin. That seemed questionable to me. So I decided that after removing the plug I would dam and glass over the hole from the inside, then recore the area.

Right now the layer of original core that is up against the outer skin is only cut back about 3" from the I/O hole. I am going to increase that to 5 or 6" so give me room to grind a suitable bevel in the skin. I'm somewhat hesitant to cut away more of the existing core though. What you see above has some evidence of water damage, but it was still solid enough for me to not want to remove. If I go father, I might find more extensive damage that would point towards a full transom rebuild. Not sure I want to go there on this boat, but with college bills starting in 2 years and then lasting for 12 or so, it will be a long time before I have money for a new boat. So we'll see...